Organization settings are only available to Organization admins.
For an overview of roles and permissions in Velixo Portal, refer to the general article.
To add new Organization admins, contact your Velixo Partner or your Customer Success Manager.
Overview
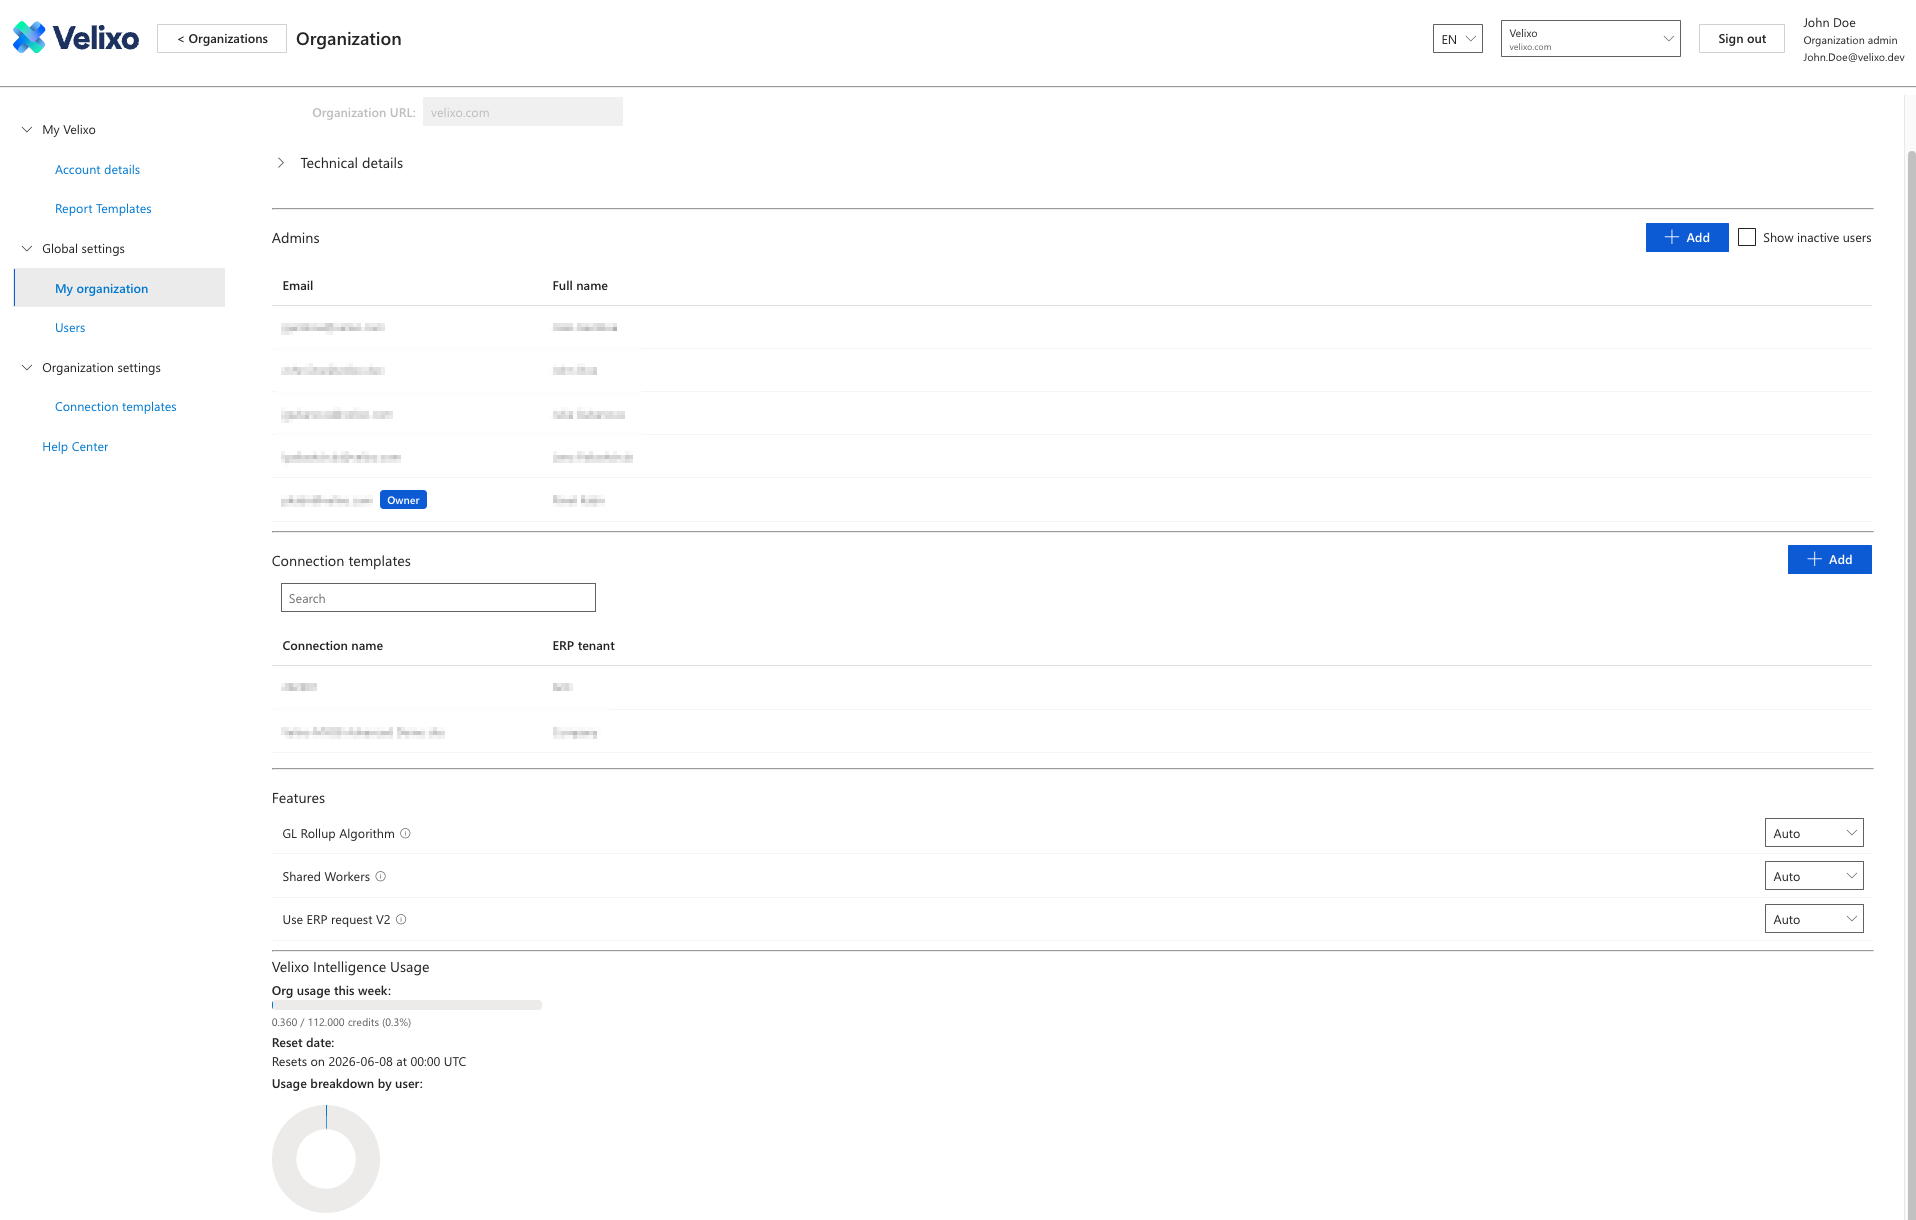
Admin and feature management within an organization is available in the Global settings -> My organization details screen in Velixo Portal.
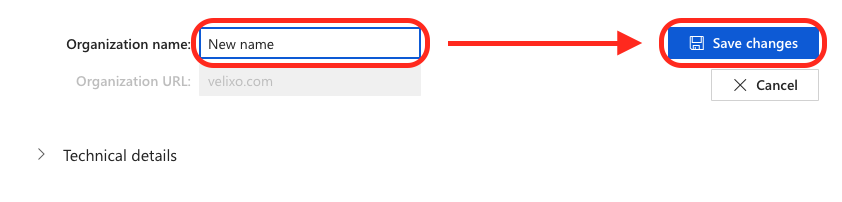
Change the organization name
-
Enter the new organization name in the Organization name field at the top of the Organization details screen.
-
Click the Save changes button.
To modify the domain URL (for instance, when your company's domain has changed), contact your Customer Success Manager or file a support request.
Manage users and admins
Add new users or admins
-
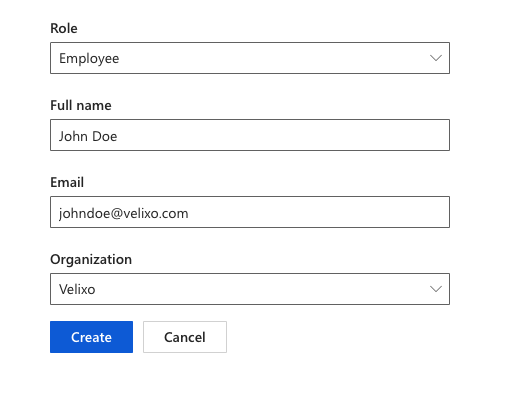
Go to the Users menu in Global Settings and click the + Add button.

-
Choose the appropriate role you want to add, fill in the Full name and Email fields, select the Organization (for admins with more than one organization), and click Create.
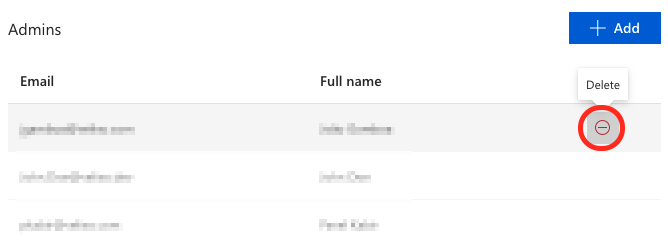
Delete users or admins from an organization
-
Click the delete button next to their name on the Admins list in the My organization view.
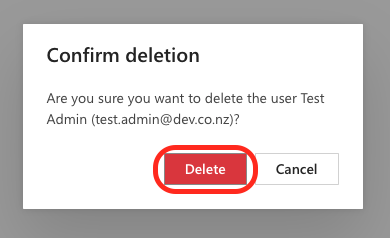
-
If you are certain you want to remove the selected admin, confirm by clicking Delete in the pop-up window.
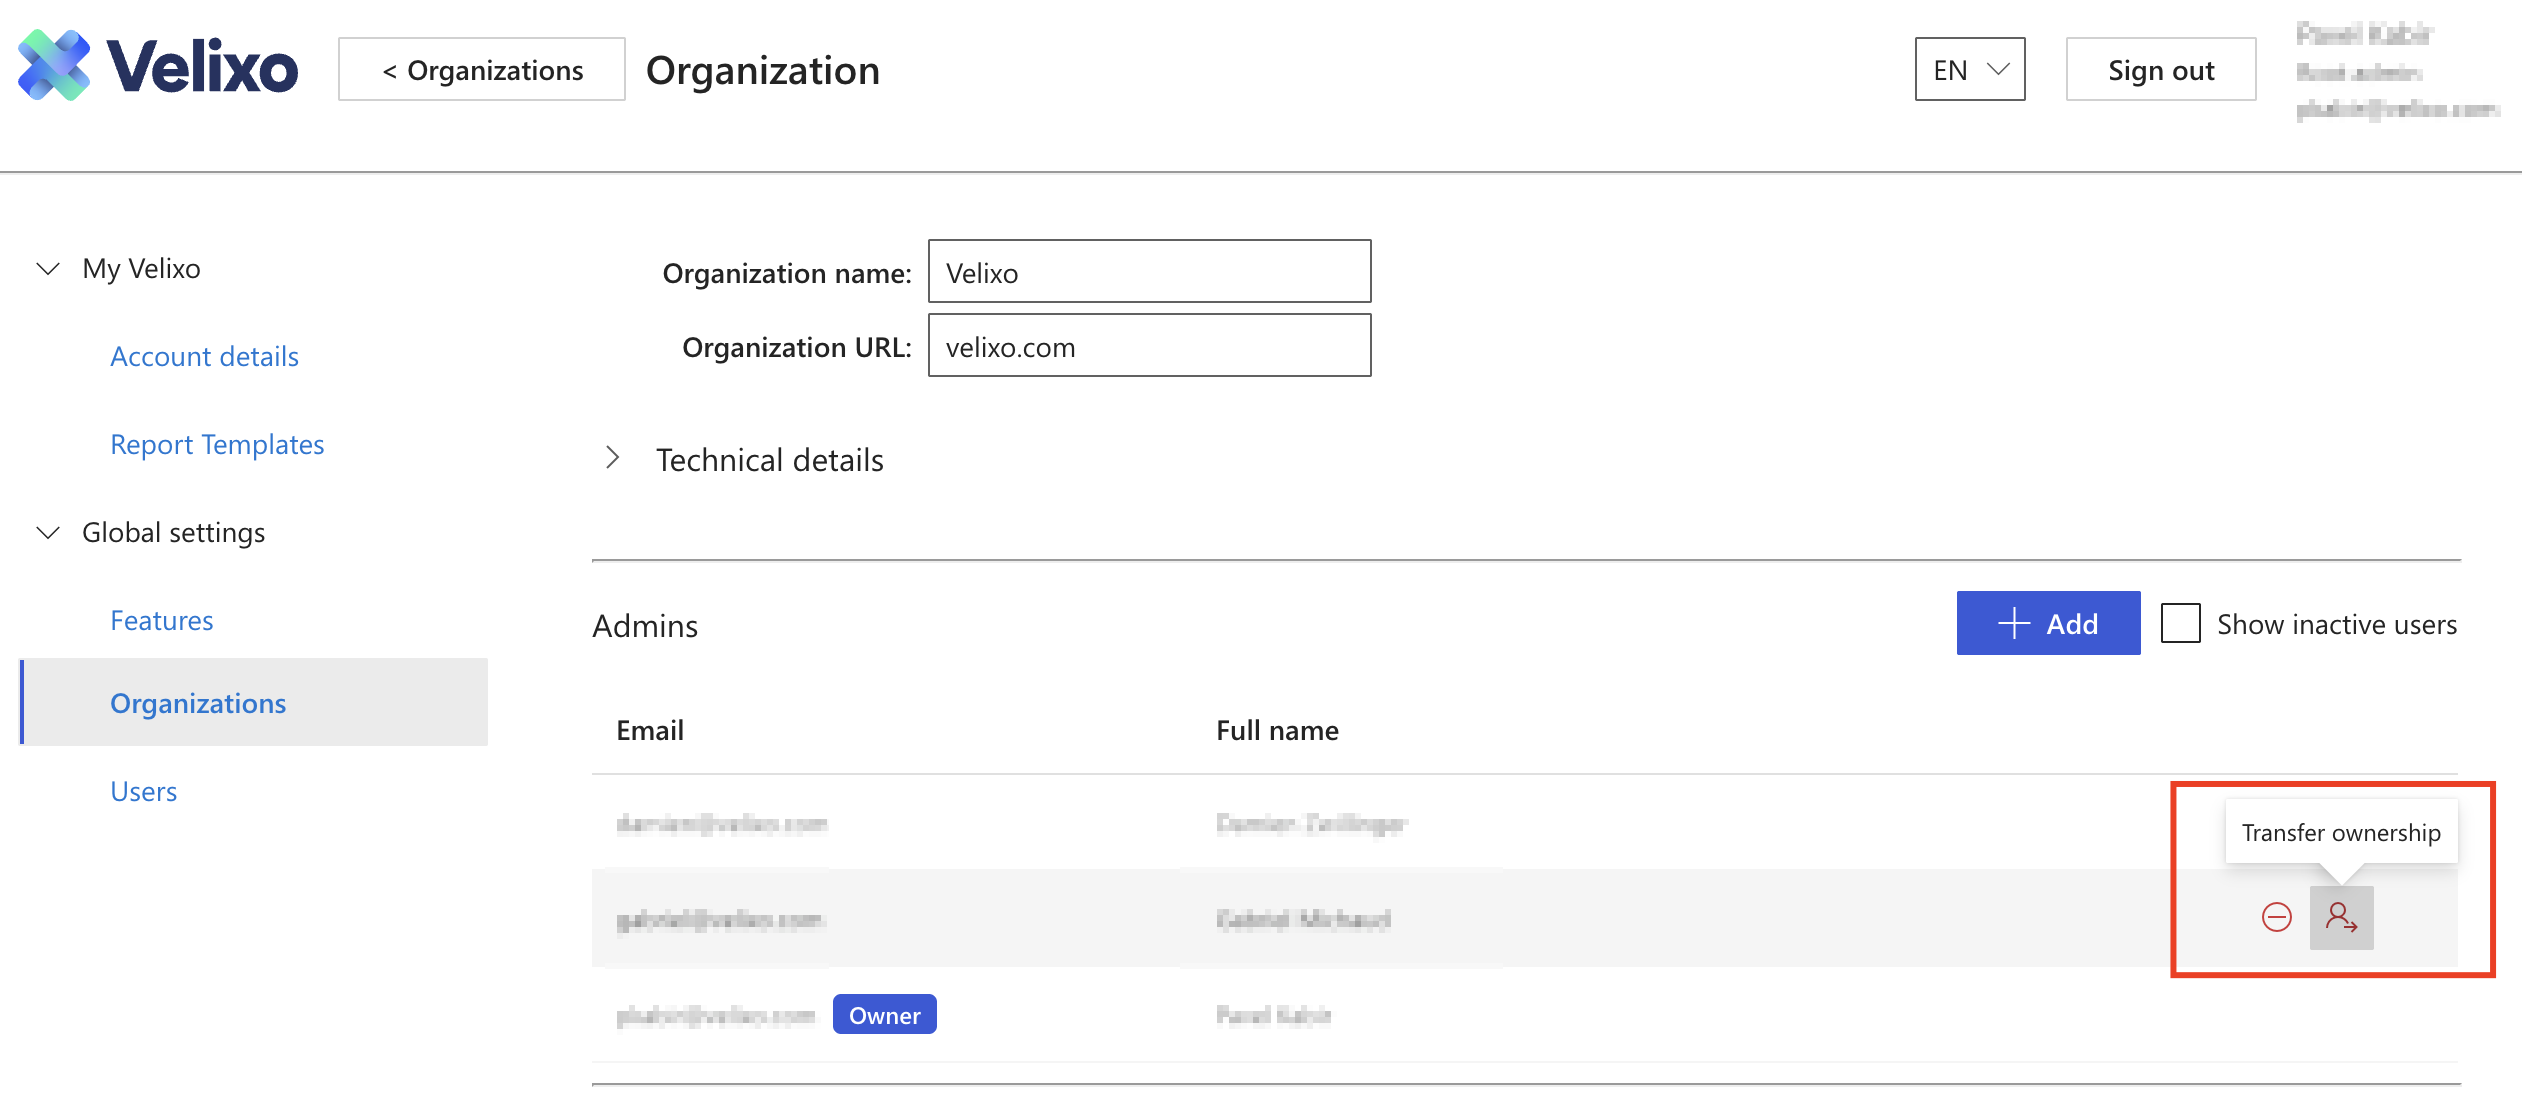
Transfer Owner status to a different admin
This process is only available to the current Owner of the organization.
-
Go to the Global settings → Organizations.
-
Click the Transfer ownership button next to the admin to whom you wish to transfer ownership.
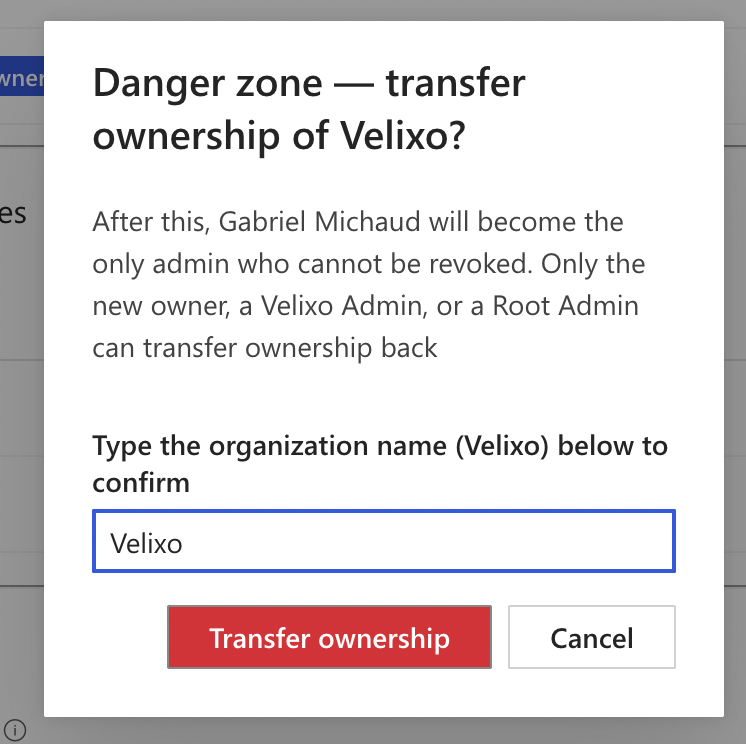
-
In the warning popup, type in the organization name and confirm by clicking Transfer ownership.
Manage features
-
Click on the drop-down menu next to the feature you wish to disable/enable in the My organization view.

-
Set the switch to the desired setting for the organization. Selecting Auto sets the feature to its default setting.
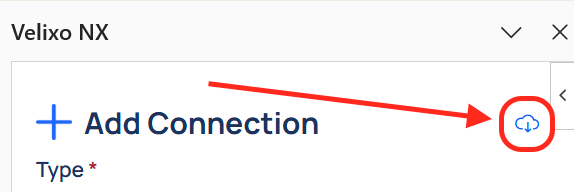
Manage connections
The Connection templates menu under Organization settings lets you manage connection templates available in the Cloud Connections selector in Connection Manager.
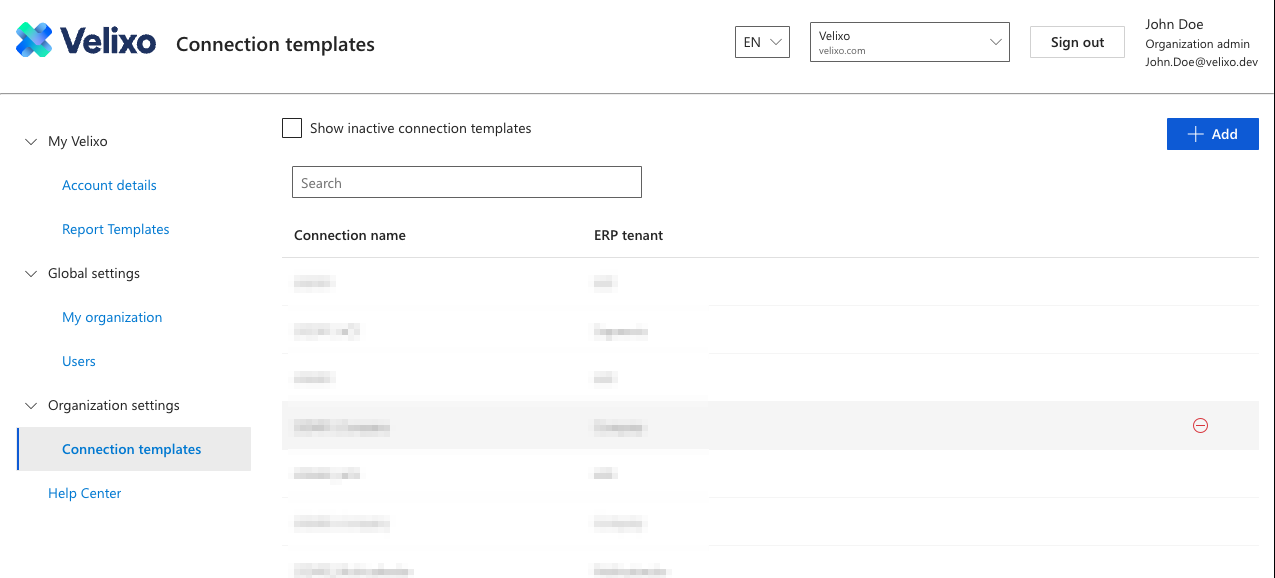
Add a connection template
-
Click the + Add button.
-
Select the Organization (for admins with more than one organization)
-
Select the desired ERP type.
-
Assign a friendly, human-readable name. This name will identify the connection in Velixo Portal
-
Enter the name of the tenant.
-
Click Create.
Your added connection should now be available for users with access to that tenant in the Cloud connections list in the Add Connection menu in the Connection Manager.