
Overview
This article explains how to create a local connection from Velixo NX to Sage Intacct.
You can add two kinds of connections to a workbook:
-
Local connections – connections you create and configure yourself in the Connection Manager. You enter the connection details, such as the Company ID, in the add-in. This article covers local connections.
-
Predefined connections – connections created in the Velixo Portal by you or your organization. You add them from the Predefined tab of the Add Connection panel and don’t enter connection details in the add-in. They are read-only in the add-in.
If your organization shares connections in the Velixo Portal, use a predefined connection. See Use a predefined connection and Managing predefined connections in the Portal. If you’re new to Velixo, or no connection is shared with you, create a local connection as described below.
Before connecting Velixo NX to Sage Intacct, a system administrator must first have configured Sage Intacct as described in Sage Intacct configuration prerequisites.
Velixo NX Installation
If you haven't installed Velixo NX yet, please follow the Getting started with Velixo NX guide.
Alternatively, you can follow the Click-by-Click demo:
Connecting to Sage Intacct
Click Connection Manager in the Velixo NX menu in the Excel ribbon:

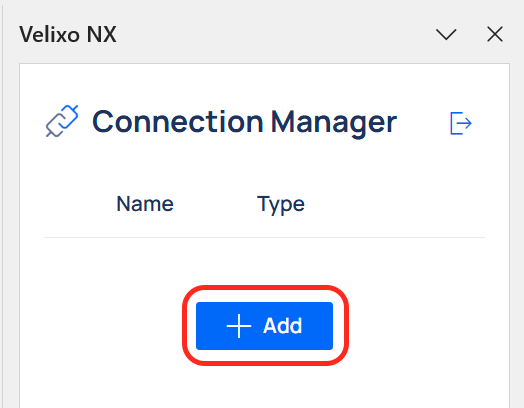
In the Connection Manager side panel that opened, click the Add button:
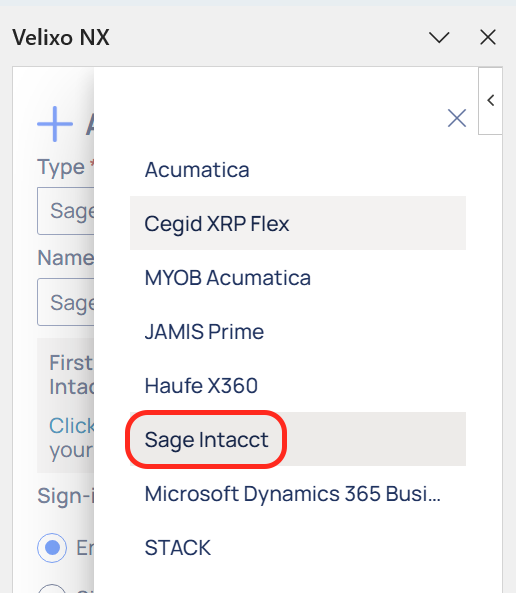
From the Type drop-down list, select Sage Intacct.
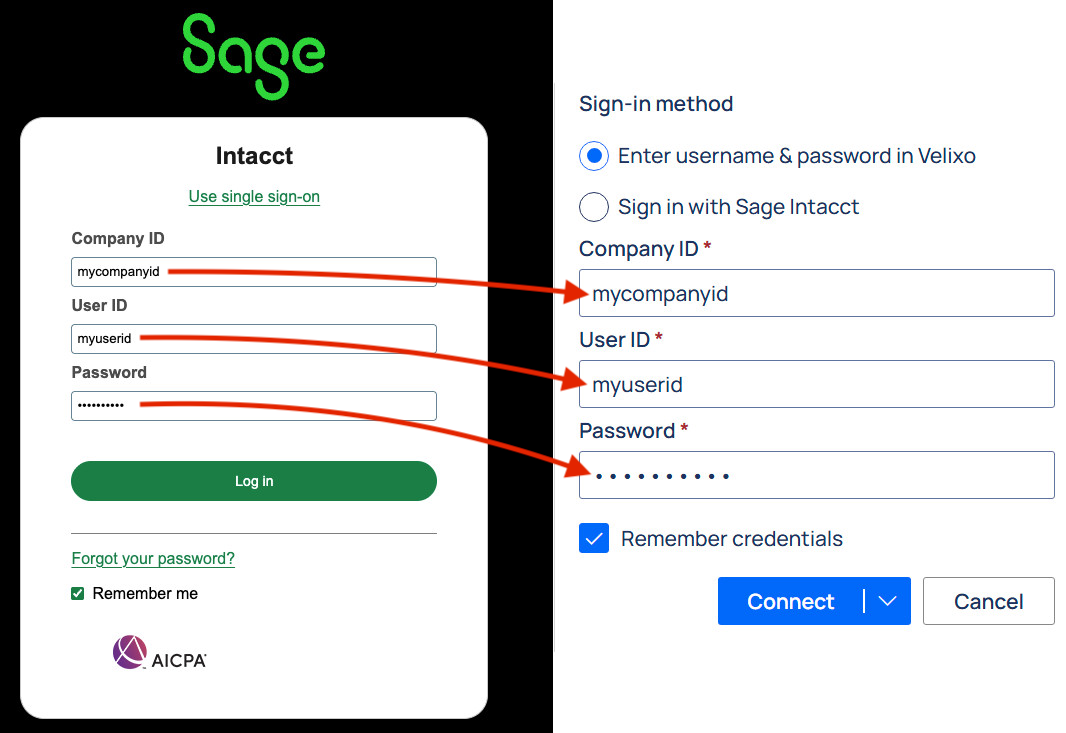
Next, depending on your administrator’s recommendations, choose one of the available sign-in options:
-
Enter username & password in Velixo – lets you provide Sage Intacct sign-in credentials directly in the Velixo interface.
-
Sign in with Sage Intacct – redirects you to the Sage Intacct sign-in screen, where you can provide your Sage Intacct credentials or sign in using Single Sign-on as usual.
To save your credentials for future use, check the Remember credentials box.
If you check this box, your credentials are not actually saved within the spreadsheet. Rather, they are saved to your Velixo user profile, which resides in your local Microsoft Office installation and is encrypted at rest.
Click Connect.
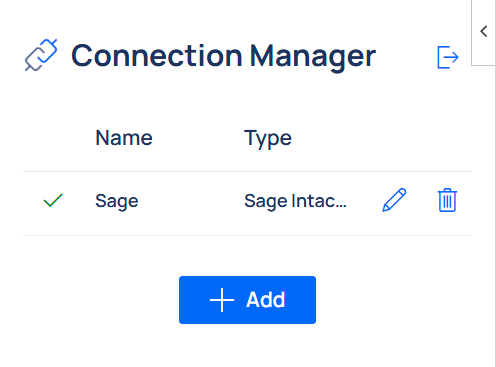
Done! Once connected, the newly created connection will appear on the list of local connections in the Connection Manager panel with a green check mark next to the connection name.
Once you have established a connection to your Sage Intacct instance, you can create your first reports by following our Create your first Velixo report guide.
To sign into a specific Entity within a Company, follow the dedicated guide.