Overview
Excel needs to be configured to recognize the Velixo Classic add-in. Since Excel stores add-in configuration on a user-by-user basis, if multiple users use the same workstation or server, this step must be done for each user.
Typically, the Velixo installer takes care of this step automatically. There may be times, however, when the Velixo ribbon does not appear in the Excel toolbar and the user must activate the Velixo add-in manually.
Here is a video walkthrough of the process:
Manually Activating the Velixo Excel Add-in
-
First, you need to know if you are using 32-bit or 64-bit Excel. See How to determine if Excel is 64-bit or 32-bit for help on this.
-
In Excel:
-
Click File
-
Click Options
-
Click Add-ins
-
Select Excel Add-ins in the Manage textbox

-
Click the Go... button
-
-
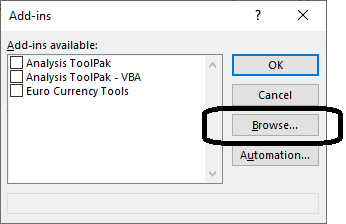
On the Add-ins screen, click Browse
-
Excel Browse dialog will be displayed with the default location for Microsoft Add-ins:
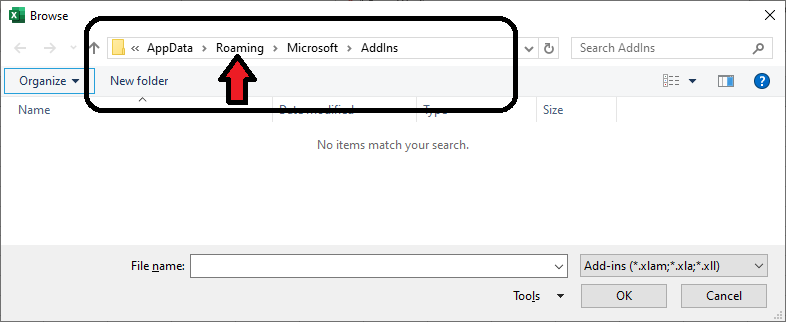
For most installations, this is in the user's APPDATA folder and you simply click on Roaming (as shown) (if you do not fall under the category of "most installations", we'll find out in just a moment and make an adjustment)
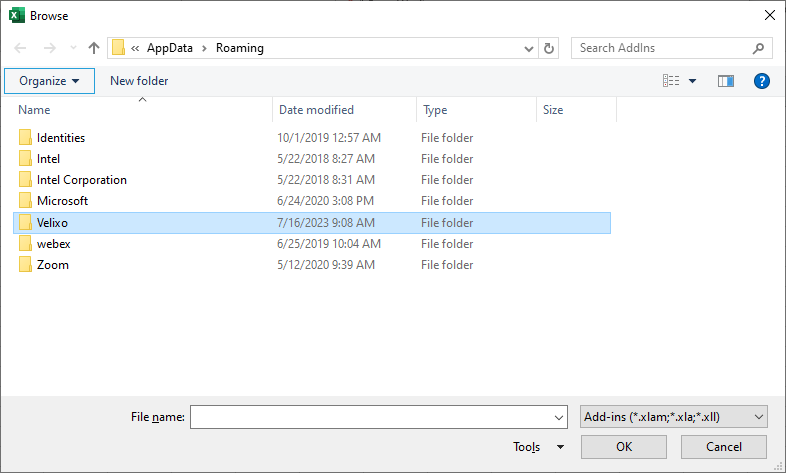
5. Double-click on Velixo:
If you do not see Velixo in that window, and the address bar (where, in this image, you see AppData → Roaming) looks something like this instead:
AppData → Local → Apps → micr..stem_0000000000000000_0007.0001_a43cd824722753ba
Replace the entire contents of the address bar with %appdata%
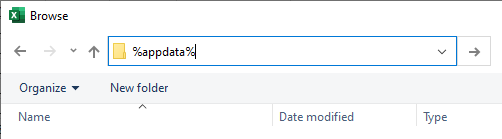
and press Enter.
You should now see Velixo in the list. Double-click that and proceed to the next step.
-
Double-click on Velixo Reports Pro:
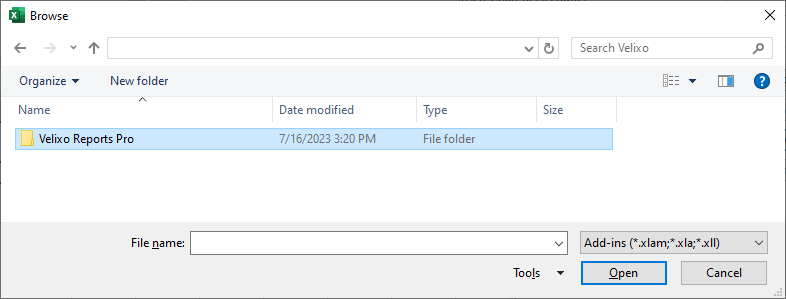
(older versions used the name Velixo Reports Pro for Excel and Acumatica)
-
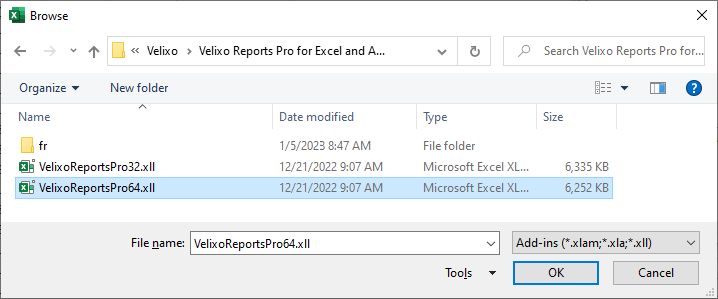
In that folder, select the bit-level of the Velixo that corresponds to the bit-level of Excel:
-
If you get a message asking if you want to replace Velixo...
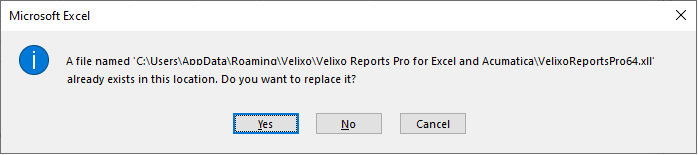
select Yes
-
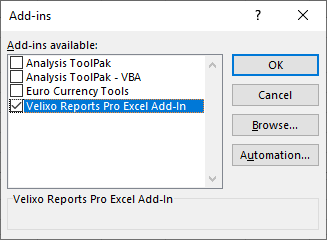
Velixo should now appear in the Add-ins list and be checked:
-
Click OK, and the Velixo ribbon should now appear on the Excel toolbar.