Overview
For those Velixo users who are also connected to Microsoft Teams there is a great opportunity to get the most of this integration. Storing reports in the cloud and sharing them across the organization can now be performed in the most straightforward way.
Using Teams when running your Scheduled Reports Distribution
A major advantage you can obtain from this integration is that your Report Distribution List can be significantly shortened by having just one link to the team's channel - and no one is missed out!
Below is a distribution list for a monthly report, which must be distributed to seven people from the organization.
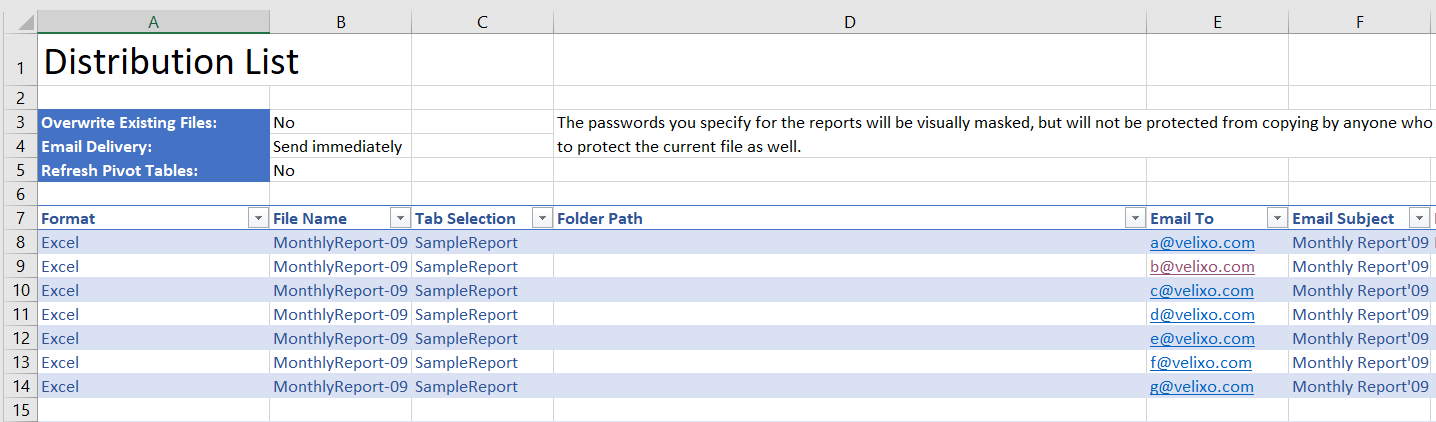
Suppose you have those seven people in your team's channel; that's how your distribution list can look:
Let's see how we can find the folder path.
Path to the SharePoint folder
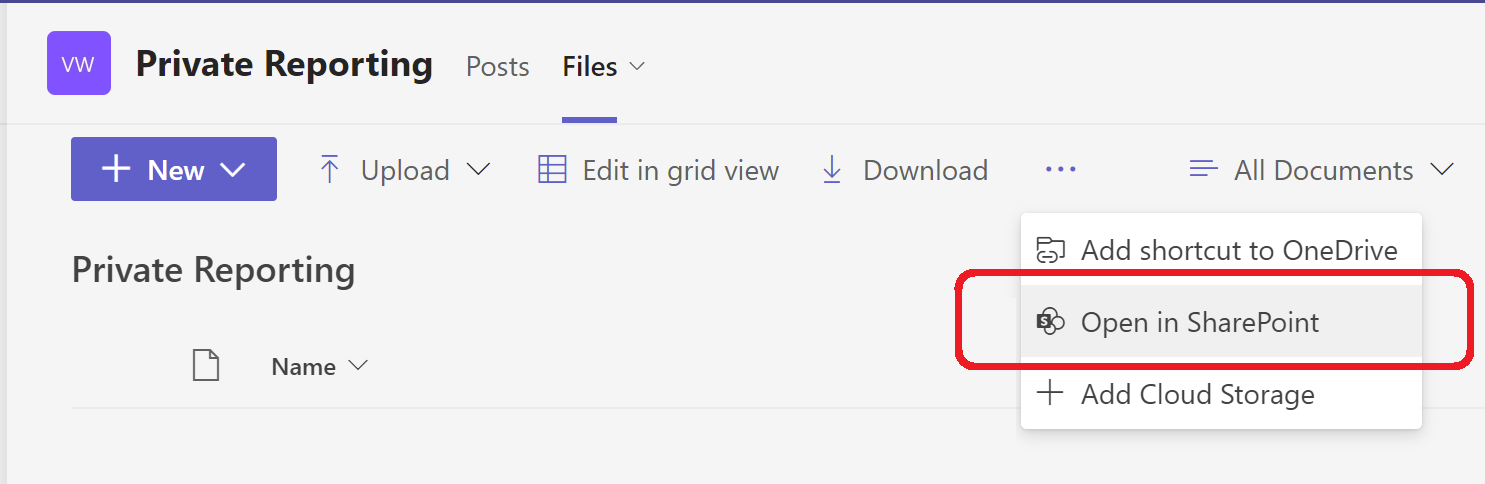
Step 1 - Open the SharePoint folder from Teams
Considering that a file available in Teams is stored in a folder on a SharePoint site, open the SharePoint folder to determine the correct path.
From within the Microsoft Teams user interface, we select the desired Team:
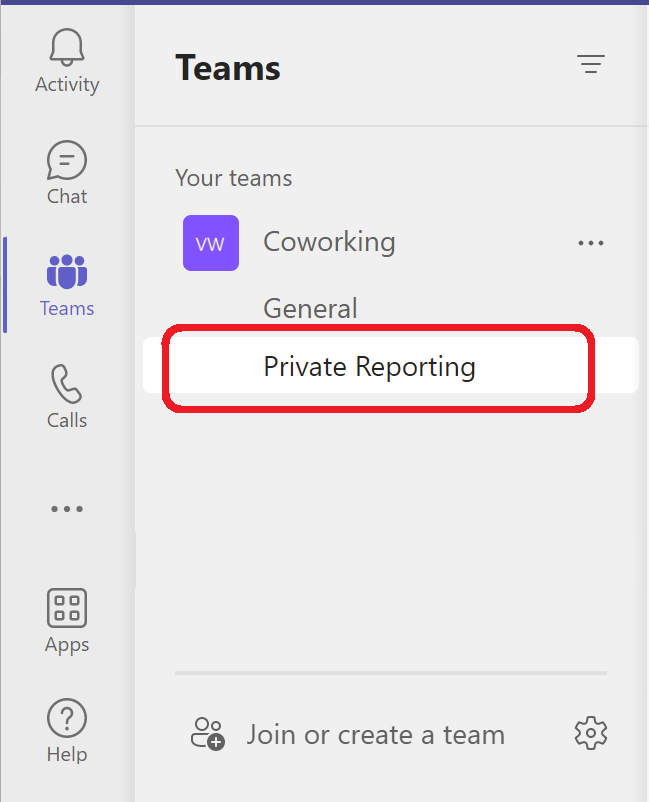
In the Files section of the Team, we click the three dots menu at the top of the display...
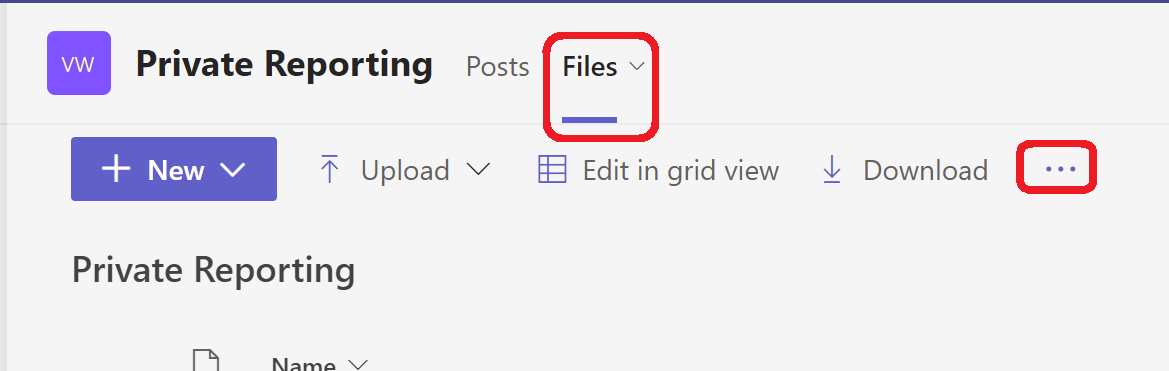
... and select: Open in SharePoint:
Step 2 - Get the root URL
Once the browser is open, we will copy the URL...
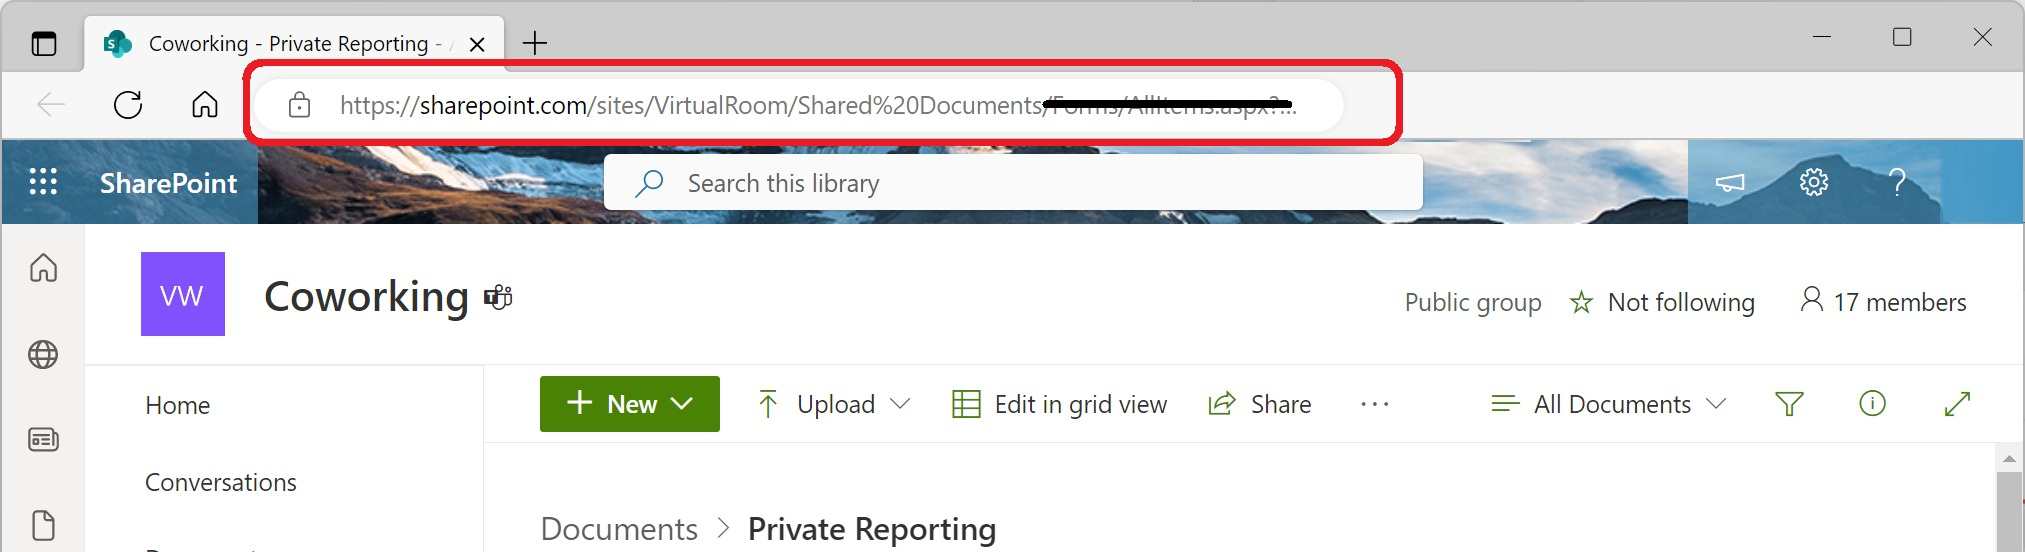
... but remove everything after /Shared%20Documents
So, in this example, the root URL is:
https: //sharepoint.com/sites/VirtualRoom/Shared%Documents
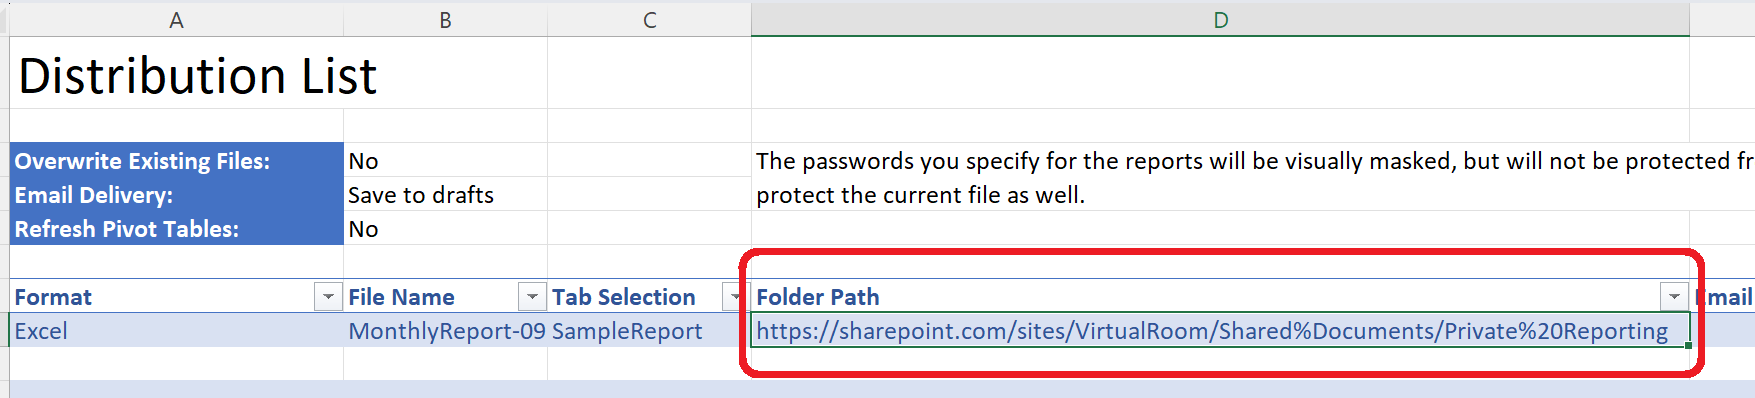
Step 3 - append any needed subfolder path
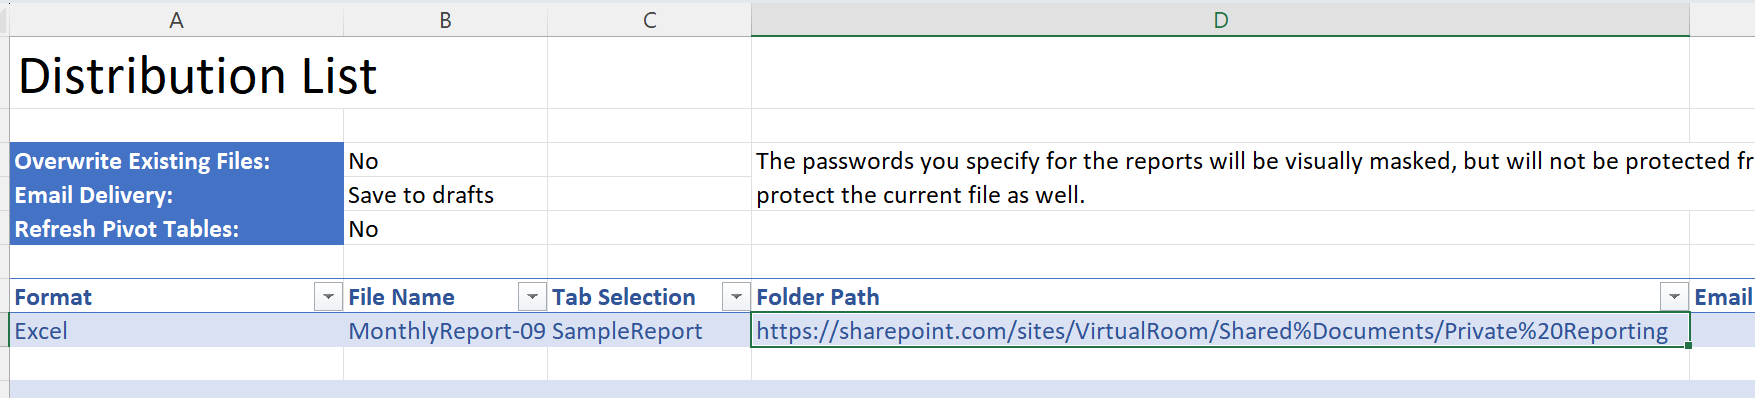
Let's assume we want our file stored under the Private Reporting team. We can add that to the URL (being sure to replace any spaces with %20)...
So:
https: //sharepoint.com/sites/VirtualRoom/Shared%Documents/Private%20Reporting
...and use it as a Folder Path in our Distribution List:
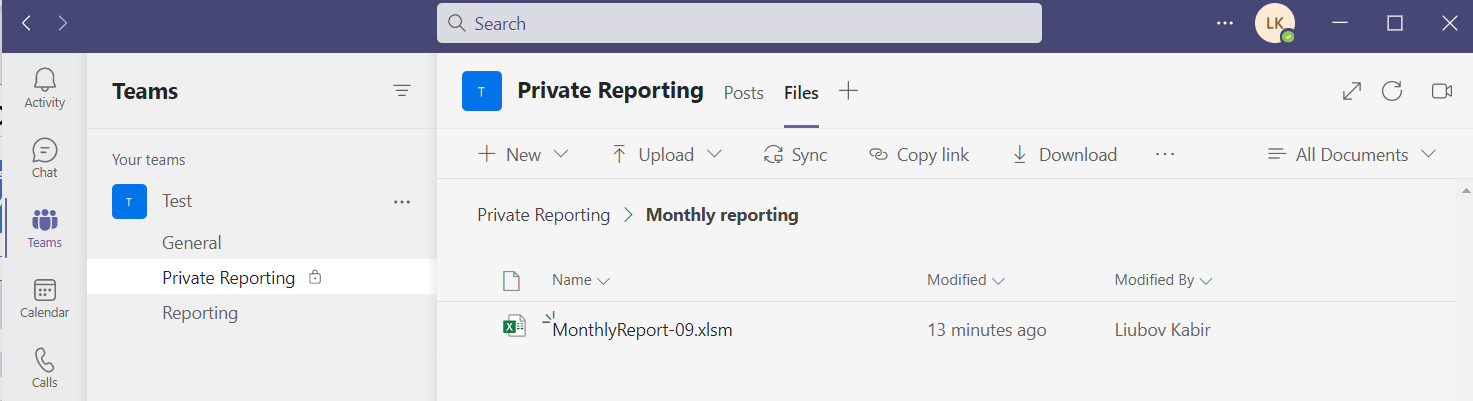
Once the report distribution is completed, the report will be available in Teams in the Files tab of our channel:
Limitations:
-
Velixo cannot detect if a file already exists in SharePoint or if it is in use. The file specified will always be overwritten during the Distribution process.
-
It is not possible to password-protect a PDF file when saving it to a cloud storage location (an error message will be displayed).
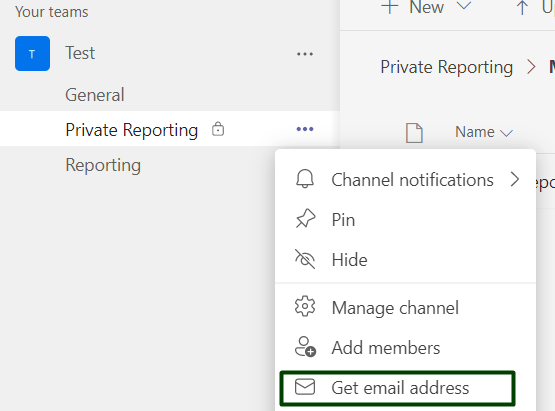
SharePoint address of a team's channel
If any comments must be provided with a distributed report, instead of using a folder path you can use the email address of your channel as an Email To argument in the Distribution List. The channel's email address is available from the context menu:
Here is an example of Distribution List with email address specified:

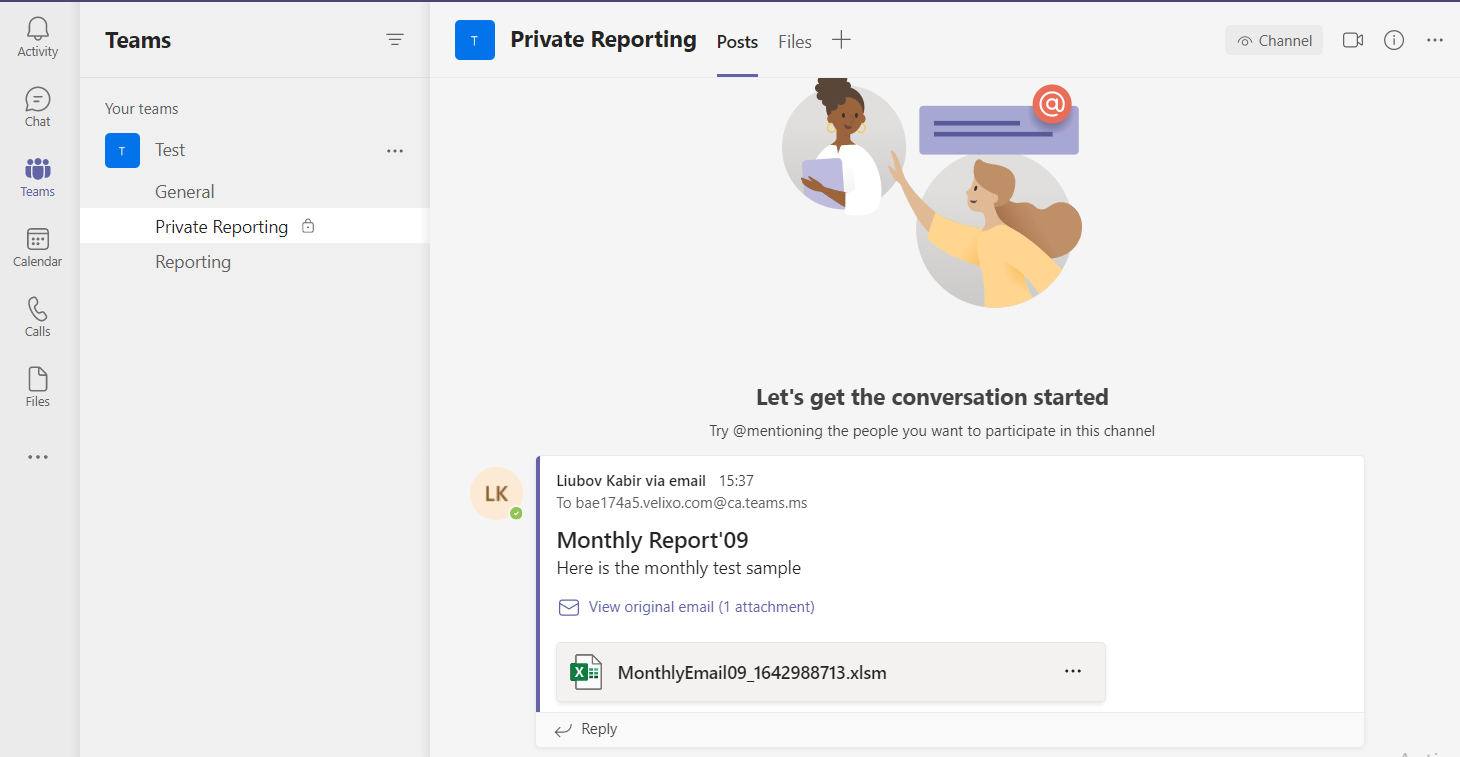
In this case a separate post will be added to the Posts tab of your channel:
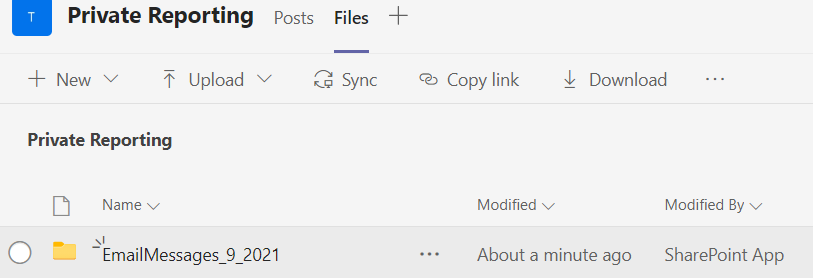
The report will be stored in the EmailMessages folder within the Files tab:
Permissions management in Teams
By default, all shared files in Teams have read-write permissions for every member of the channel. In case you want to share a report, for which any changes are undesirable, you can set up read-only permission in SharePoint.
To do that, open files in SharePoint:

On a SharePoint site click the kebab menu (three vertical dots) for the required file or folder and select Manage Access:
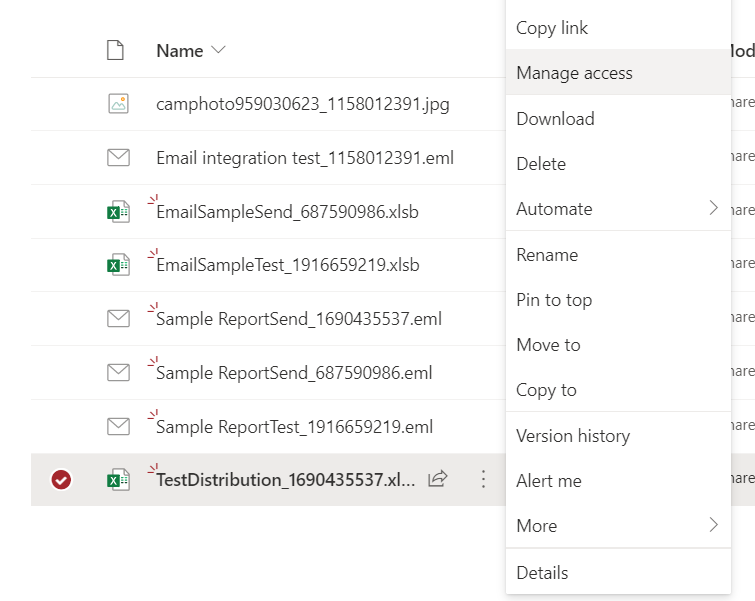
You have a variety of options to configure the preferred set of access rules:

When you add or remove users from a team, their access to the SharePoint site is also added or removed.
Changes are saved instantly. You always have the latest version of the document, whether you are in Teams or in SharePoint Online.