Overview
The Velixo Universal Writeback functionality (previously known as Generic Writeback) is a licensed feature available in Velixo for clients needing to send Excel for Windows data to pre-defined screens within their ERP.
Universal Writeback works with any active Import Scenario that is already defined within the ERP and to which the user has access rights.
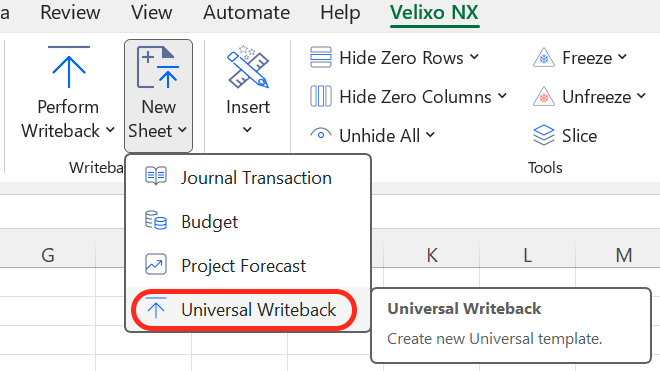
Choose New Sheet -> Universal Writeback (from the New Sheet selector) to create a new worksheet that you can use to write data to your ERP system.
Select the Connection to which data will be sent and which of your EPR's active, pre-defined Import Scenarios you want to use for writing the data. Then click the Insert button.
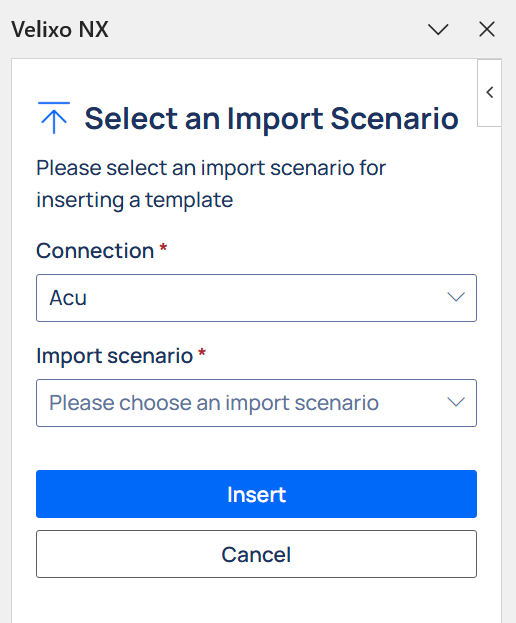
The Universal Writeback feature requires that the Import Scenario you want to use is already active in your ERP and that you have access to it.
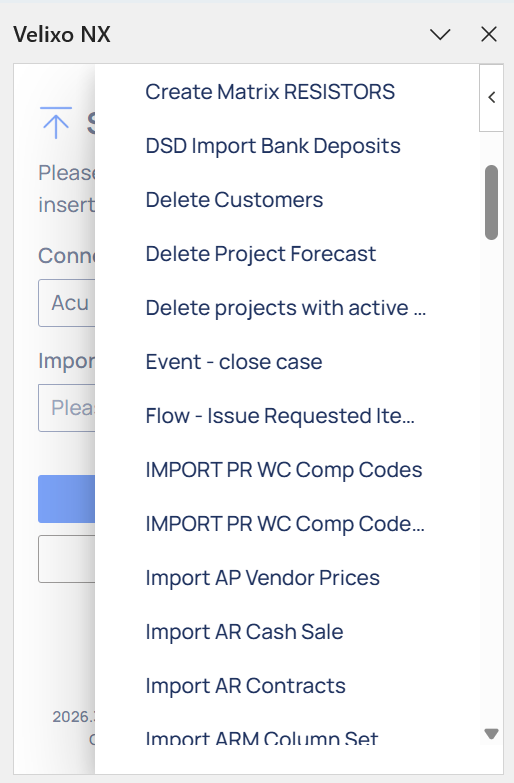
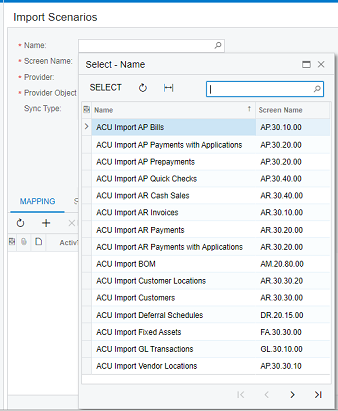
Here you can see the Import Scenarios defined in a sample Acumatica instance:
Velixo will then create a new worksheet using the writeback fields associated with the Import Scenario you selected:
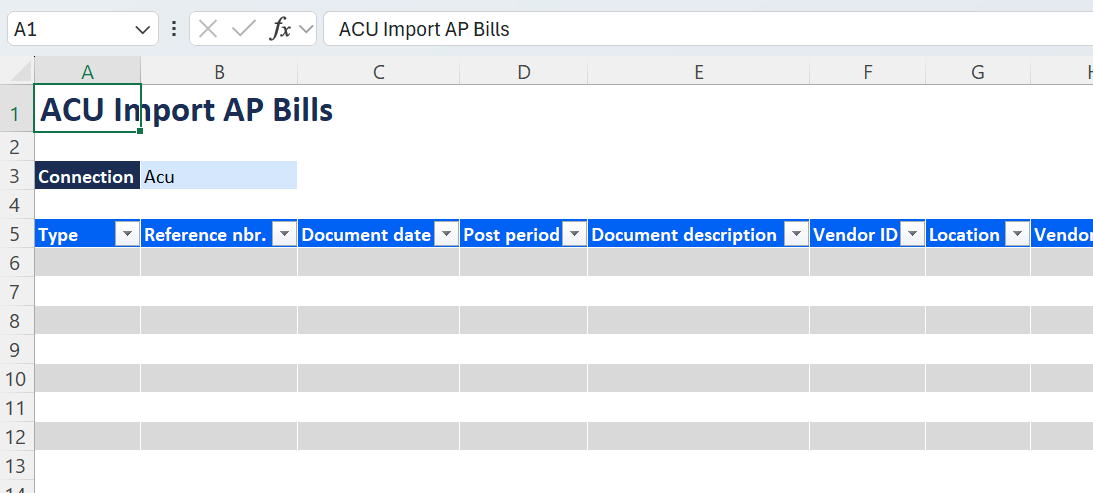
The worksheet includes the Writeback Status column which contains the WRITEBACK functions that will be used to send your data to the ERP:
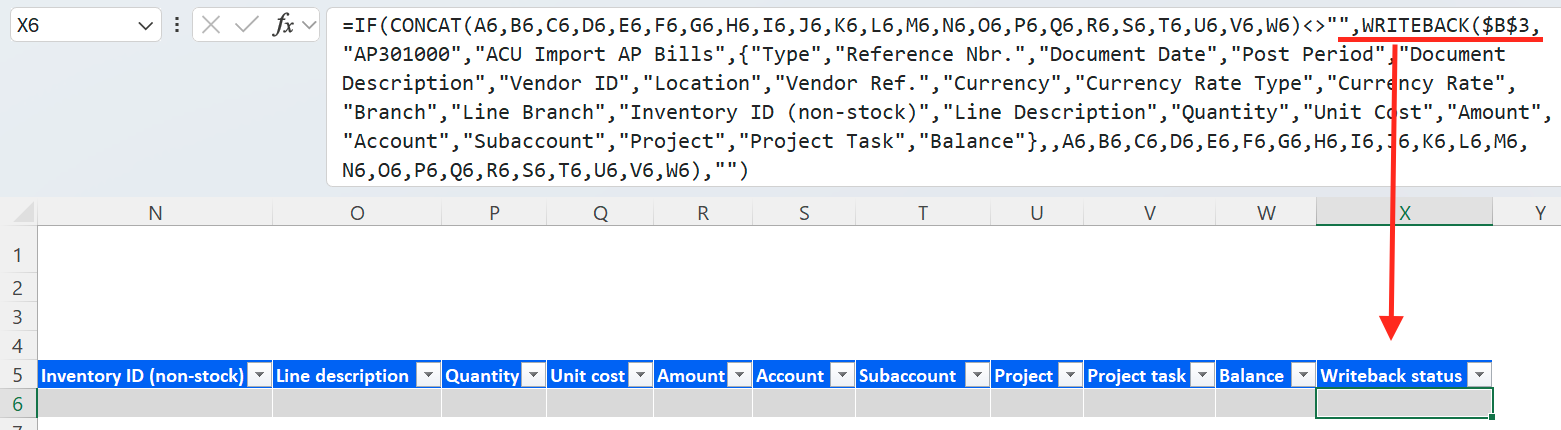
Now fill in the required data.
The ScreenID argument can be specified with or without periods.
e.g.,
or

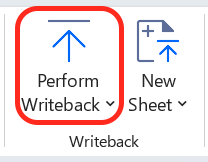
Once that is done, click Perform Writeback on the Velixo ribbon to activate the WRITEBACK functions and write all the specified data to your ERP:
If you only want to select the active worksheets, ensure that the worksheet is displayed and select Current Sheet from the dropdown on the Perform Writeback button:
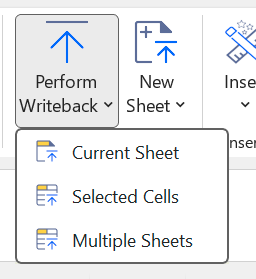
If you only want to import specific rows, first select them, then click Selected Cells or Worksheets from the Perform Writeback dropdown.
This feature can also be used to select Multiple Sheets and perform all writebacks defined on those worksheets.
Hidden/filtered-out cell behavior:
-
When writeback is triggered for Selected Cells, only visible cells (not hidden by filters or manually hidden rows/columns) will be included in the writeback. This applies to a single selected range/area as well as several discontiguous ranges
-
When writeback is triggered for the Current Worksheet, all cells (including hidden ones) will be included in the writeback.
Writing Back with Attachments
By default, the WRITEBACK functions are configured to use the provided grid. However, you are welcome to create your own form and WRITEBACK function.
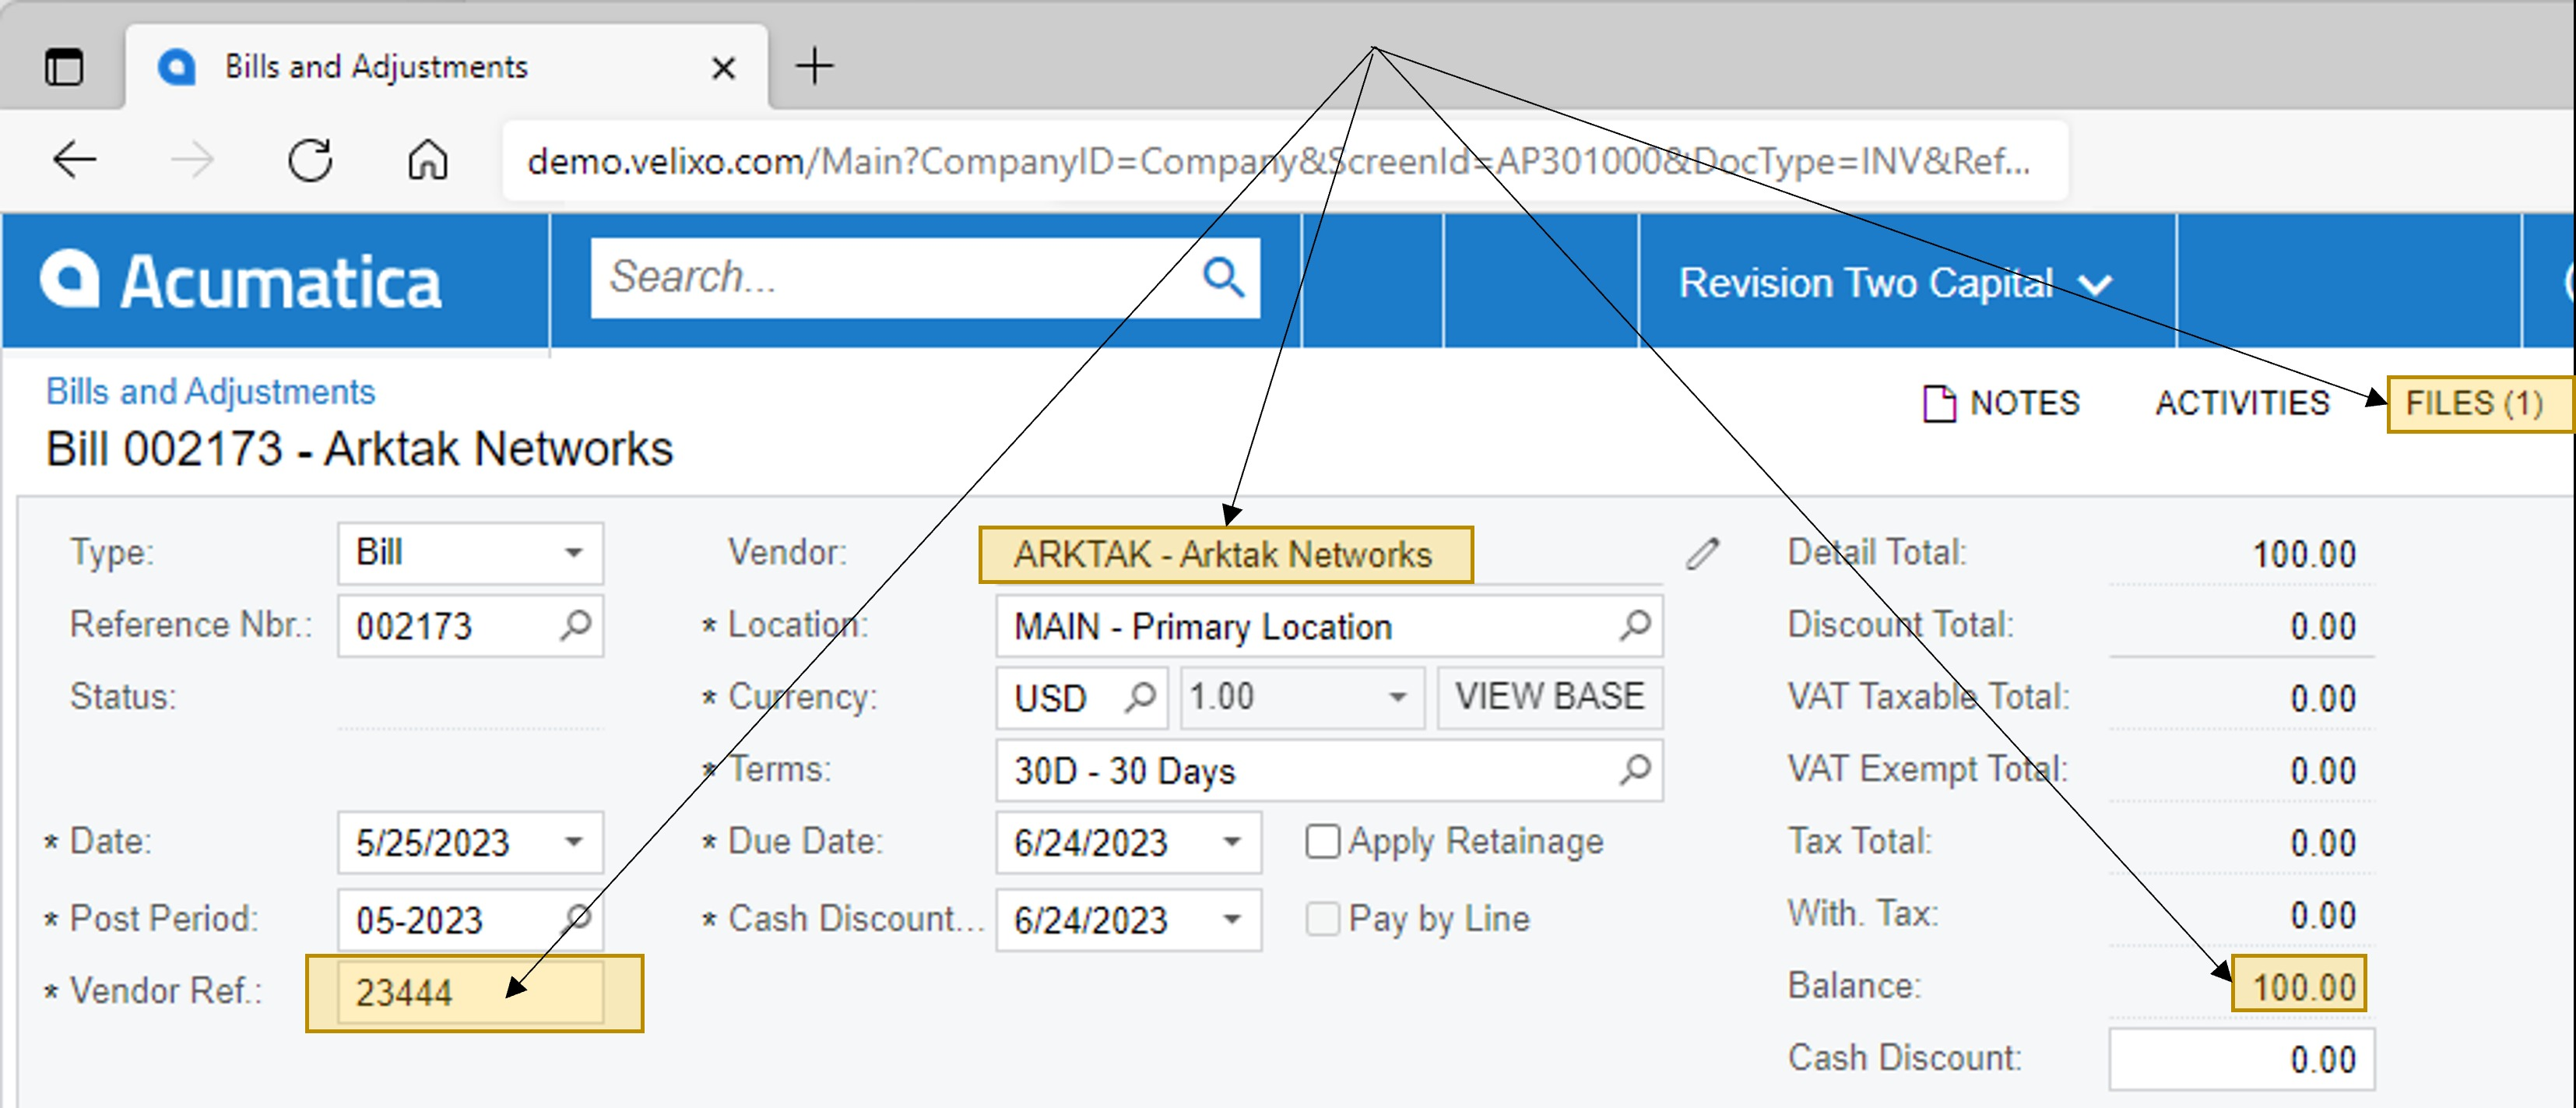
For example, let's consider that we are performing a Writeback to the Acumatica Bills and Adjustments page (screen AP301000) using an Import Scenario named Velixo Import Bill.
That Import Scenario is configured to provide the ability to attach a document:

Excel for Windows ONLY
Velixo Classic for Excel for Windows supports the ability to access the computer's file system to support this attachment functionality. Currently, Velixo NX cannot access the computer's file system.
Here is a simple Writeback worksheet with the information we want to send to Acumatica, and the WRITEBACK function to accomplish that:

We will be sending data for the Vendor, Vendor Reference, and Amount fields, and attaching a file to the record.
Once the Writeback is performed, all the data - including the attachment file - is present in the Bills and Adjustments page:
If your Velixo license does not include use of Universal Writeback, you will see this message when you select Universal from the New Sheet option:
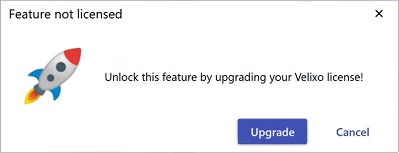
Click Upgrade to start the process of upgrading your Velixo license to include this feature.
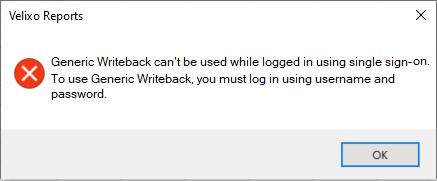
When used with Acumatica 2022R1 or higher, Universal Writeback can be used with either username/password authentication or Single Sign-on authentication.
Note that using multi-factor authentication (MFA) requires that OAuth2 (aka SSO) be enabled. This does *not* require an SSO/Advanced Authentication License with Acumatica (which is only required if you want to link Acumatica to ActiveDirectory, Okta, or another provider).
For older versions of Acumatica, multi-factor authentication (MFA) and single sign-in (SSO) are not supported.