
The Velixo Hide Zero Rows and Hide Zero Columns features make reports tidier and more readable by hiding rows or columns that contain only zero values. You can hide once manually, or set auto-hide criteria that Velixo reapplies on every calculation and refresh.
This article covers:
-
Hiding zero rows and columns one time (Basic hiding)
-
Setting auto-hide criteria that persist across refreshes (Auto-hide)
-
Revealing hidden data with Unhide All
-
Permanently clearing auto-hide criteria with Unhide All + Forget Auto-Hide Ranges
-
How hidden cells behave during writeback

See the video for a demonstration of this feature:
Basic Hiding
To hide zero rows or columns once, select a range of rows, an individual column, or multiple columns, then click Hide Zero Rows (or Hide Zero Columns). Velixo hides every row where all selected columns are zero. Rows with an empty value are ignored, so the layout of your report is not affected.
To reveal all hidden rows and columns, use Unhide All:
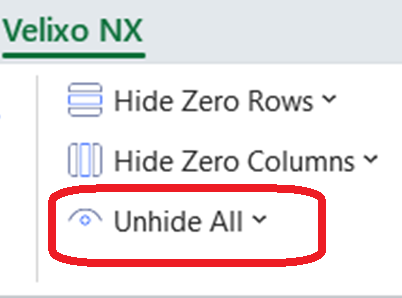
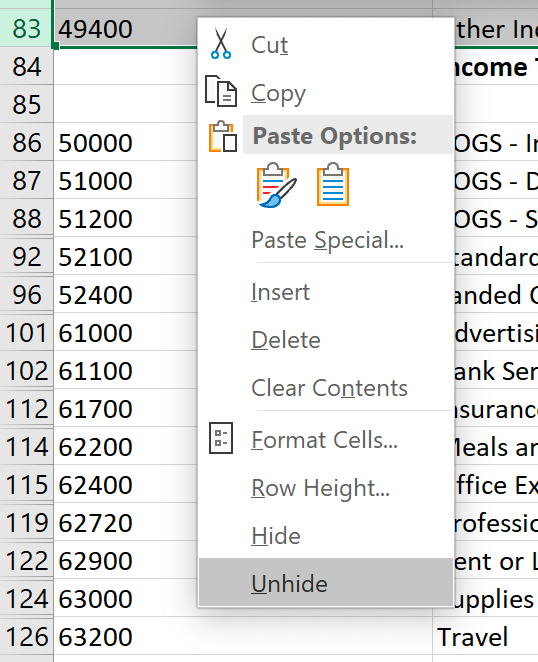
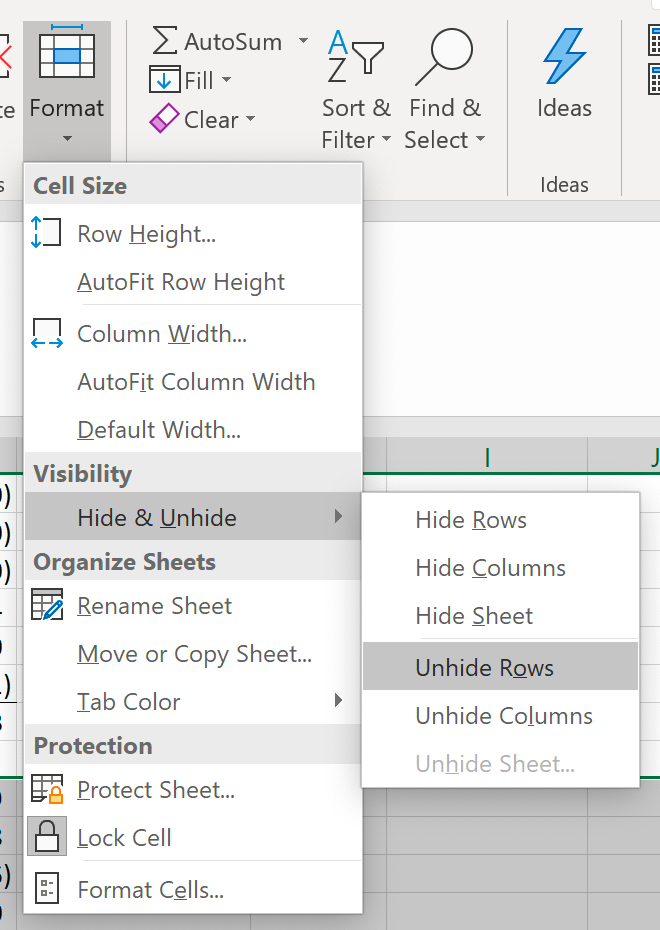
You can also press Ctrl + Shift + 9, use the Unhide command in Excel's right-click menu, or use the Format menu in the Cells group of the Home ribbon tab.
Auto Hide
With basic hiding, you have to unhide rows before refreshing a report, then re-hide the rows that now contain zero values. Auto-hide removes that manual step: you set the hiding criteria once, and Velixo hides zero rows and reveals non-zero rows automatically as your report's values change.
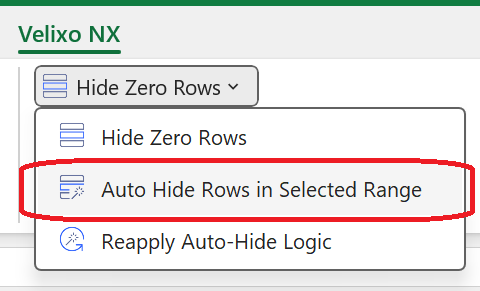
Access auto-hide from the pulldown on the Hide Zero Rows button, then select Auto Hide Rows in Selected Range (or, for columns, Auto Hide Columns in Selected Range from the Hide Zero Columns pulldown). Velixo remembers the area to which you apply the criteria, called the controlled range. On every workbook calculation and every Velixo Refresh, Velixo adjusts which rows are hidden based on the current values.
The scope of an auto-hide range is the active worksheet.
For faster results, select only the cells you want to evaluate rather than entire columns.
Example
Here is an example of the results of using the Auto Hide/Unhide Rows feature:
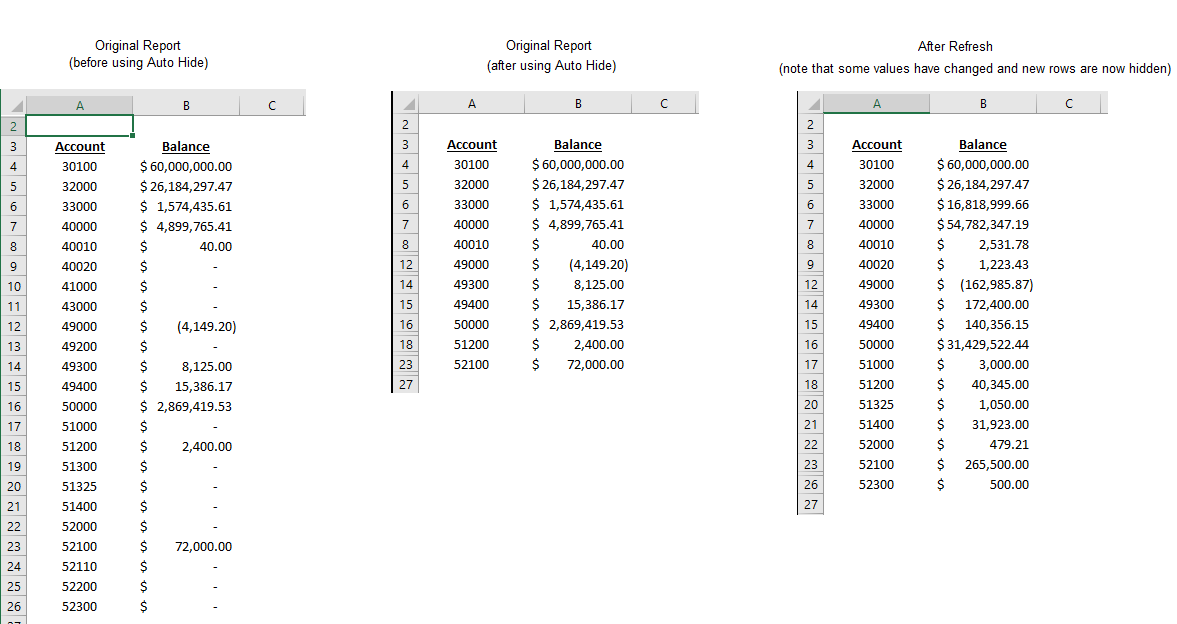
In the example, the original report shows some zero values in column B. By selecting cells B4 though the last data value in column B, and then clicking Auto Hide / Unhide Rows in Selected Range from the Velixo ribbon, those zero-value rows are hidden. (Velixo will now remember the area to which you want to apply this hiding criteria. This area is referred to as the "Controlled Range")
Next, when the report is refreshed with new data, Velixo automatically adjusts which rows are hidden, based on the new values in the report.
Unhide All
The Velixo Unhide All feature reveals all rows and columns hidden in the active worksheet.
When you have used auto-hide, Unhide All reveals the hidden rows and columns temporarily. When Excel next recalculates the workbook, the rows and columns that match the saved criteria are hidden again.
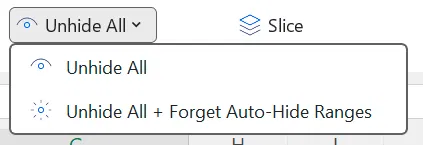
Forget auto-hide ranges
To permanently unhide auto-hidden data, select Unhide All -> Forget Auto-Hide Ranges from the Unhide All button's pulldown. This both reveals the hidden rows and columns and removes the saved auto-hide criteria, so they stay visible on later calculations and refreshes.
Unhide All -> Forget Auto-Hide Ranges applies to the active worksheet only. If you have applied auto-hide across several worksheets, switch to each one and run Unhide All -> Forget Auto-Hide Ranges separately to clear its criteria.
Hidden cells and Writeback
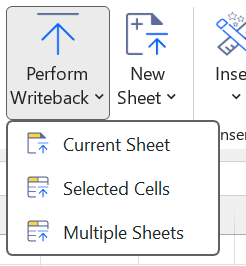
Hidden cells behave in the following way when using the Writeback functionality:
-
Current Sheet – uploads all lines in the currently active worksheet, including hidden rows.
-
Selected Cells – only uploads data from cells that are selected, hidden rows excluded.
-
Multiple Sheets - uploads all lines in the selected worksheets, including hidden rows.
FAQ
|
When does Velixo auto-hide and unhide the controlled ranges? |
On every workbook calculation (for example, when you update a formula) and on Velixo Refresh. |
|
Is it possible for unhidden cells to stay unhidden? |
If you base auto-hide on a subset of cells (not entire columns), use unhide, then change a filter without the cell data changing, the zero cells can stay displayed until you use Reapply Auto-Hide Logic. |
|
Excel hides and unhides rows automatically when I filter a table. How do I get Excel to detect the auto-hide settings? |
Select Reapply Auto-Hide Logic from the Hide Zero Rows pulldown. |
|
Is it better to select entire columns or only the rows I want to apply auto-hide to? |
Because Excel allows over a million rows per column, applying auto-hide to all rows across multiple columns can be slow. Select only the region where you expect data. |
|
What is the scope of the auto-hide range I select? |
The active worksheet. |
|
Where can I review the auto-hide range for a worksheet? |
On Excel's Formulas ribbon, select Name Manager and look for |
|
Can I change which cells the auto-hide feature considers? |
Yes. Select a new range of cells and click the auto-hide menu option to overwrite the previous range. |
|
Can I manually edit the auto-hide range for a worksheet? |
Yes. Normally you use Auto Hide Rows in Selected Range, but you can edit the range manually: on the Formulas ribbon, select Name Manager and edit the range. A manual change produces no calculation event, so it is not reapplied automatically. To reapply, select one of the controlled cells, click the pulldown arrow on Hide Zero Rows, then click Auto Hide Rows in Selected Range. The change reapplies across the entire controlled range, not only the selected cell. |
|
Can I use auto-hide on a protected worksheet? |
No. Protecting a worksheet locks Excel's hide feature, so Excel worksheet protection is not compatible with the Velixo hide features. |
|
How do I forget all controlled ranges for the active worksheet? |
From the Velixo ribbon, click the pulldown arrow for Unhide All and click Unhide All -> Forget Auto-Hide Ranges. This applies to the active worksheet only. |
|
What if I want to temporarily disable auto-hiding while I make changes, then restore the ranges? |
On the Formulas ribbon, select Name Manager and temporarily rename the |