
Sharing a connection, managing shared connections, and changing the automatic-add setting of an existing connection require the Organization admin role. Every user can create, edit, and delete their own private connections.
Overview
Predefined connections are ERP connections that you create and manage on the Connections page of the Velixo Portal. Instead of every user configuring a connection separately in their workbooks, an Organization admin can set a connection up once and share it with the organization. The connections available to you then appear in the Velixo add-in.
You can create predefined connections for Acumatica and Business Central.
The Connections page appears in the sidebar only when connection management is enabled for you. When it is not enabled, the Velixo add-in does not show predefined connections. Connections you created locally in the add-in work the same either way.
This article covers:
-
connection types and what they mean for users,
-
the Connections list,
-
creating a connection,
-
sharing a connection with your organization,
-
entering your own credentials for a shared connection,
-
editing, reconnecting, and deleting connections,
-
how predefined connections appear in Excel.
Connection types
Every predefined connection has one of three types, shown in the Type column of the Connections list. A connection always starts as private; sharing it changes its type.
|
Type |
Who can use it |
Credentials |
|---|---|---|
|
Private |
Only the user who created it |
The creator signs in with their own credentials. |
|
Shared - Individual |
All users in the organization |
Each user enters their own credentials. |
|
Shared - Common |
All users in the organization |
A single set of credentials, managed by Organization admins. Users do not sign in individually. |
The Connections list
The Connections page lists the predefined connections available to you, with these columns:
-
Name – the connection name. You can sort the list by this column.
-
Type – Private, Shared - Individual, or Shared - Common.
-
Auth type – how the connection signs in to the ERP: OAuth or Username & password, or Not configured if you have not entered credentials yet.
-
Owner – the user who created the connection.
-
Status – for example, Active, or Not configured if you have not entered credentials yet.
-
Auto-add – a check mark shows connections that are added to your workbooks automatically.
Use the filters above the list to show All, Private, or Shared connections, and connections that are Ready or need your action. Needs Action shows, for example, shared connections you have not entered credentials for yet. The search box searches connection names. To act on a connection, select ... at the end of its row.
Creating a connection
Predefined connections are currently supported for Acumatica-type ERPs and MS Dynamics Business Central. Sage Intacct support is coming soon.
-
In the Portal sidebar, select Connections.
-
Select Create connection.
-
On the Choose provider step, select your provider, then select Continue.
-
In the Login method step, choose how the connection signs in to your ERP, then select Continue:
-
OAuth – Sign in – you sign in to your ERP; no password is stored. The most secure option, but tokens may expire and require you to sign in again.
-
Username & password (Acumatica only) – Velixo stores the credentials encrypted. Useful for service accounts. Available for Acumatica only.
-
-
On the Credentials step, enter the connection details for your ERP. See Acumatica connection details or Business Central connection details below.
-
Optionally, select Automatically add to all my workbooks to add this connection to the workbooks you open from now on.
-
Select Save connection.
The new connection appears in the list with the type Private and the status Active.
Velixo stores your credentials in a digital vault with AES-256 encryption. Your plain-text credentials are never accessible to the Velixo team.
Acumatica connection details
-
Name – a name for the connection, for example
Production. -
Url - the full address of your Acumatica instance, including the protocol - for example,
https://acumatica.example.com. -
Tenant - the Acumatica tenant to connect to, for example
MyCompany_Live. Make sure the value has no leading or trailing spaces.
Then complete the Authorization section for the login method you chose:
-
OAuth – Sign in - select Connect with Acumatica and complete the sign-in in the pop-up window. The button is available after you enter a name.
-
Username & password - enter the Username and Password of an Acumatica account.
Business Central connection details
A Business Central connection always uses OAuth – Sign in.
-
Name – enter a name for the connection.
-
Tenant – enter your Microsoft Entra tenant, or leave it empty to use your default tenant.
-
Select Connect with Business Central and sign in with your Microsoft account. The Authorization section then shows Connected as and the account you signed in with.
-
Environment – select the Business Central environment to connect to.
-
Companies – select one or more companies to include in the connection.
Add a connection to workbooks automatically
When you select Automatically add to all my workbooks, the connection is added to the workbooks you open from now on. The Auto-add column shows a check mark for these connections.
After a connection is created, only an Organization admin can change this setting. For other users, the checkbox is unavailable in the Edit connection dialog.
Sharing a connection
Only Organization admins can share a connection; Share does not appear in the menu for other users. You can share a private connection in one of two ways:
-
Share with Individual Credentials – members see the connection but enter their own credentials when they use it. The connection becomes Shared - Individual.
-
Share with Common Credentials – the credentials you provide are used by every member of the organization. The connection becomes Shared - Common.
-
In Connections, select
...at the end of the connection's row. -
Select Share.
-
Select Share with Individual Credentials or Share with Common Credentials.
-
If you selected Share with Common Credentials, check the credentials that everyone will use. The dialog shows the account the connection is Connected as. For an Acumatica connection, you can choose the Authentication method (OAuth or Username & password) and enter different credentials. For OAuth, you can sign in again with Re-connect with your ERP.
-
Select Share.
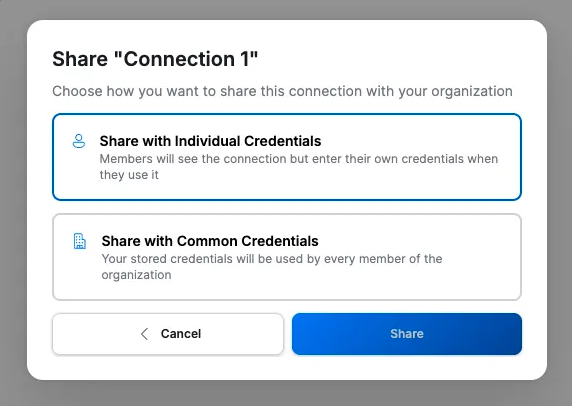
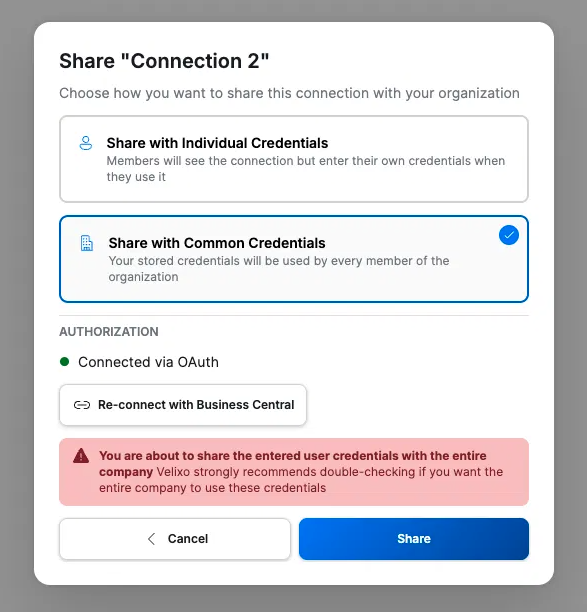
When you choose Share with Common Credentials, the dialog warns that you are about to share the entered credentials with the entire organization. Check that you want everyone to use these credentials before you select Share.
The Type column changes to the new type, and the connection becomes available to all users in your organization.
You can share only a working private connection - its status must be Active. Shared connection names must be unique within the organization; if another shared connection already uses the name, rename the connection before sharing it.
You cannot change the type of a connection after you share it.
Entering your credentials for a shared connection
When an Organization admin shares a connection with individual credentials, the connection shows the status Not configured for you until you enter your own credentials. To find these connections, select the Needs Action filter. To enter your credentials, select ... on the connection's row, then select Edit. When your credentials are accepted, the status changes to Active.
Managing connections
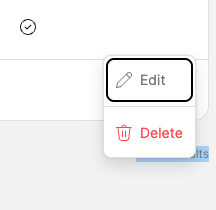
The ... menu on each connection shows the actions available to you. Organization admins see Edit, Share, and Delete; Employees see Edit and Delete. You can delete only the connections you own.
Editing a connection
-
In Connections, select
...at the end of the connection's row. -
Select Edit.
-
In the Edit connection dialog, change the details or enter new credentials. For Acumatica, you can also switch the authentication method.
-
Select Save.
You cannot change the provider of an existing connection. To connect to a different ERP, create a new connection.
Updating credentials is optional. To keep the current credentials, leave the credential fields empty.
If you change the Url or Tenant of an Acumatica connection that uses OAuth, you cannot save until you sign in again. The Portal will display an error: The provided credentials are invalid.
Reconnecting a connection
If a connection that uses OAuth stops working, sign in to your ERP again:
-
In Connections, select
...on the connection's row, then select Edit. -
Under Update credentials (optional), select Connect with [your ERP], and complete the sign-in.
-
Select Save.
Deleting a connection
You can delete only connections you own, including connections you have shared. You cannot delete a connection that someone else owns, even if it is shared with you.
-
In Connections, select
...at the end of the connection's row. -
Select Delete.
-
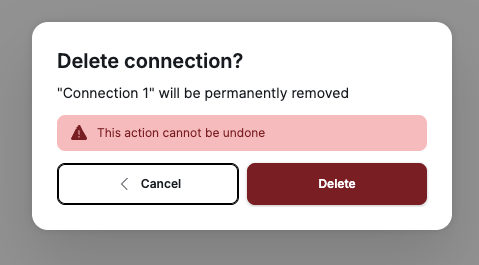
In the Delete connection? dialog, select Delete.
This removes the connection permanently. You cannot undo this action.
Connection status
The Status column shows whether a connection is ready to use:
-
Active - the credentials are valid, and the connection is ready to use.
-
Not configured - you have not entered your credentials for this shared connection yet.
With OAuth, tokens may expire. If a connection stops working, reconnect it.
Using predefined connections in Excel
To use a predefined connection in a workbook, add it in the Velixo add-in:
-
In the Connection Manager, open the Add Connection panel.
-
Select the Predefined tab.
-
In Select a predefined connection, select the connection.
-
Select Add.
Connections set to Automatically add to all my workbooks are added for you. To open the Connections page in the Portal, select Manage my predefined connections.
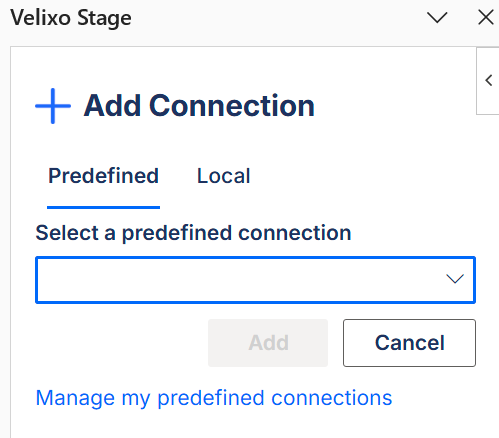
You can use predefined connections in formulas like any other connection.
Predefined connections usage notes:
-
Predefined connections are read-only in the add-in. To change or delete one, use the Portal.
-
Only connections that are working and active appear in the add-in. A connection whose credentials no longer work does not appear.
-
If a local connection has the same name as a predefined connection (case-insensitive), the predefined connection does not appear anywhere in the add-in. To use the predefined connection, rename or remove the local one.
Permissions
The following table summarizes who can perform each action, depending on the connection type.
|
Action |
Private |
Shared - Individual |
Shared - Common |
|---|---|---|---|
|
Edit configuration |
Owner only |
Organization admins |
Organization admins |
|
Edit credentials |
Owner only |
Each user, for their own credentials |
Organization admins |
|
Change Automatically add to all my workbooks after creation |
Organization admins |
Organization admins |
Organization admins |
|
Delete connection |
Owner only |
Owner only |
Owner only |
|
Share (change type) |
Organization admins |
Not available |
Not available |