Overview
The Connection Manager is a panel that lets you create, edit and remove connections from your workbooks.
To open the Connection Manager, click the Connection Manager icon in the Velixo NX ribbon:

This article provides an overview of how to add, edit, and remove connections.
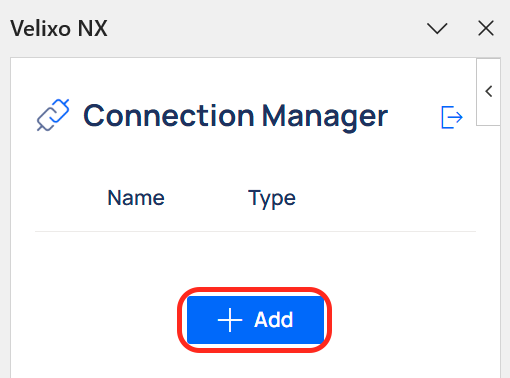
Adding a connection
Add a new connection by clicking the + Add button:
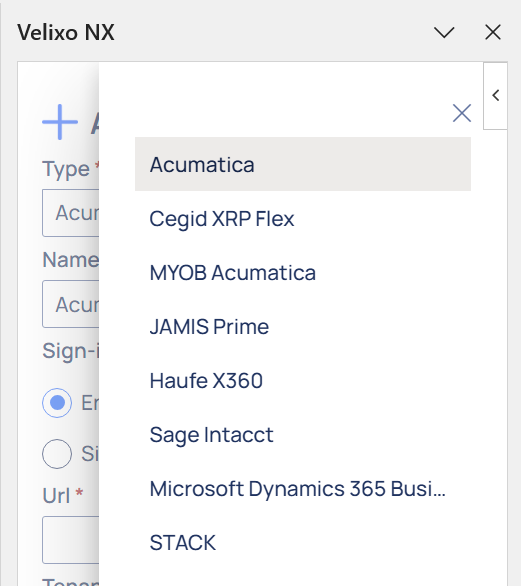
Doing so opens the Add Connection panel:

To add a connection, in the Connection dialog, you need to specify the following information:
-
Type: this is the type of platform to which you are connecting (Acumatica, Cegid XRP Flex, Haufe x360, JAMIS Prime, MYOB Acumatica, Sage Intacct, Dynamics 365 Business Central, or STACK):
-
Name: This is the friendly name for the connection, which must be unique (case does not matter). You will use this name later when building formulas that refer to it. By default, Velixo NX will provide a name that corresponds to the type of the connection. You are welcome to keep that name or change.
-
Sign-in method: You can choose between two ways to sign in:
-
Enter username & password in Velixo: Provide your Acumatica credentials directly in Velixo: URL, Tenant, Username, Password.
-
Sign in with Acumatica: You will be directed to sign in in a pop-up window with the Acumatica sign-in screen. You will only need to provide the Acumatica URL and Tenant in Velixo.
-
-
URL: The ERP website URL. This needs to be the full root URL - including the protocol (HTTPS - Velixo NX does not support non-secure HTTP connections) and subfolder (if applicable).
Example: https://mycompany.com/erp.
Only the root address needs to be entered; if you copy-paste from your web browser address bar, you do not need to include Frames/Login.aspx?ReturnUrl=%2f
-
Tenant: The tenant to which you want to connect. If the ERP is configured with only a single tenant, the name is typically Company. This field is case-sensitive - make sure the tenant name matches exactly.
-
Username and Password: The username and password for the ERP account - an account that has sufficient access rights.
-
Remember credentials: Check this box to save the password. If you decide to save your credentials for the connection, they will be saved to your Velixo Windows Registry profile on this computer and encrypted with the Windows Data Protection API (DPAPI). Saved connections are then available to use within the Connection dialogue panel.
-
Refresh upon connecting: Refreshes your workbook after the connection is established. It is checked by default when adding a first connection to the workbook or adding missing credentials to the only connection in the workbook. For your convenience, to avoid multiple redundant refreshes, it remains unchecked by default in multi-connection workbooks.
-
Connect: Click to be redirected to an SSO/login screen, and complete the process.
If the URL and Tenant (Acumatica) or Company ID and User ID (Sage Intacct) you provided match a set of remembered credentials, you will see the message below. Click Use, to use these credentials for the connection.

Using Cloud Connections
You can use the Cloud Connections to add a connection made available by your organisation administrator. Just click on the Cloud Connections button and select a connection from the list.
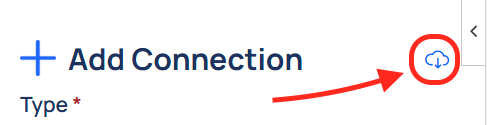
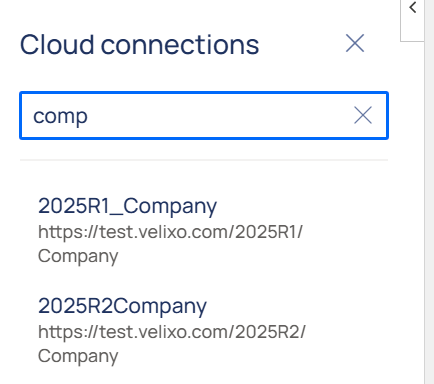
Administrators can manage the Cloud Connections available for each user via the Velixo Portal.
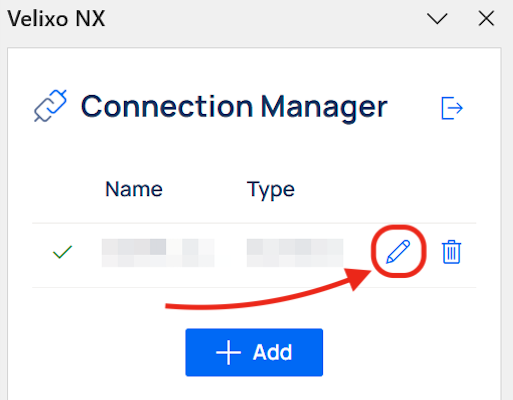
Editing a connection
Edit an existing connection by clicking the pencil icon:
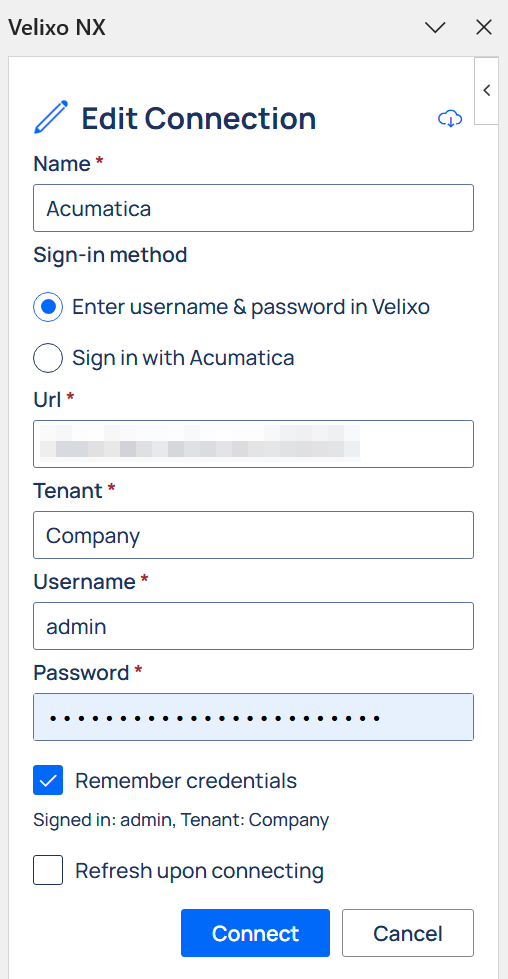
Doing so opens an Edit Connection panel, which allows you to edit information provided when creating a connection. Once edited, click Connect to connect using the updated details.
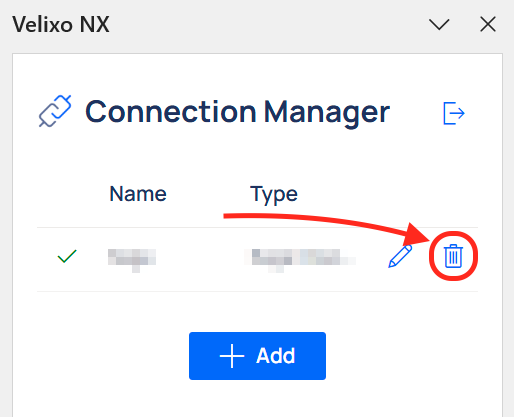
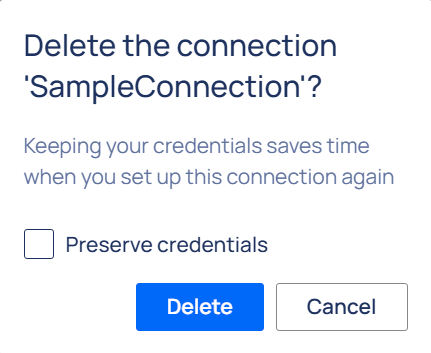
Removing connections
To remove a connection, click the Trash can icon next to its name in the Connection Manager panel.
Check the Preserve credentials box to remember the credentials for future use. Click Delete to confirm.
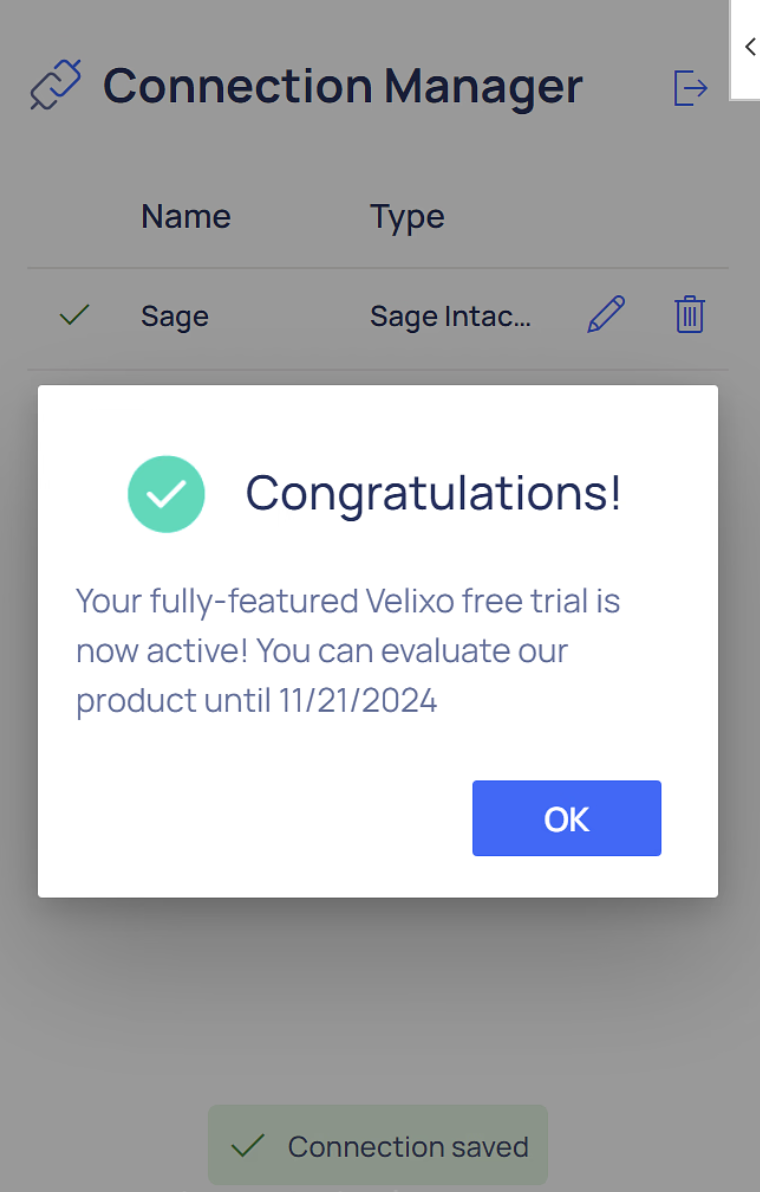
New to Velixo?
If your organization is new to Velixo NX, you can activate a 15-day free trial license automatically when you connect to your ERP instance via the Velixo NX Connection Manager.
When you attempt to connect to your ERP, you will see this message:
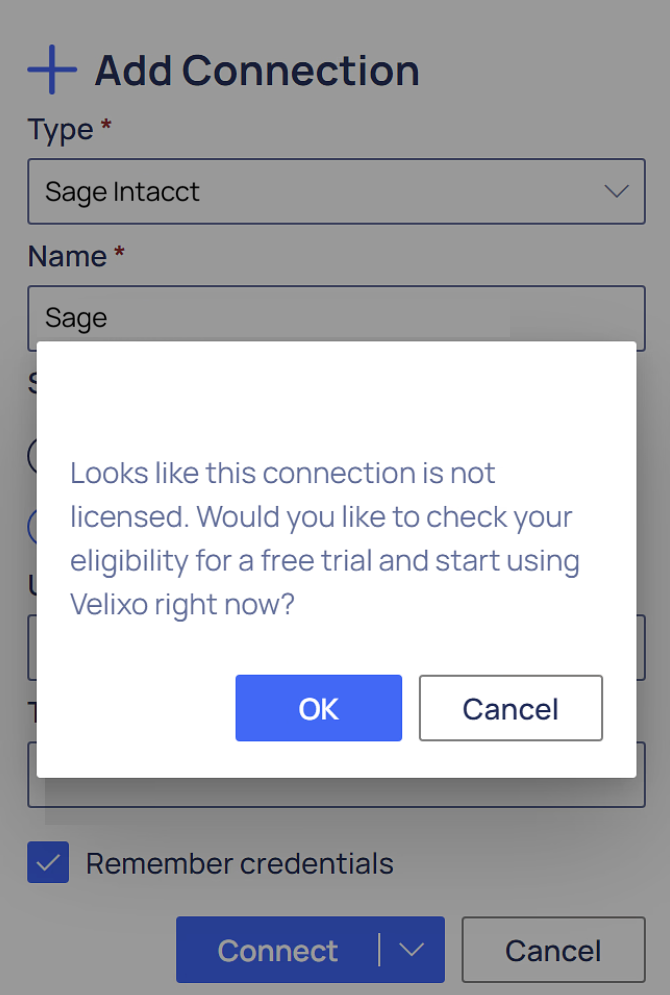
Click the OK button and then complete the registration process.
Once complete, your connection will be established, and your trial period will have begun: