Uninstallation steps
Excel Desktop for Windows
-
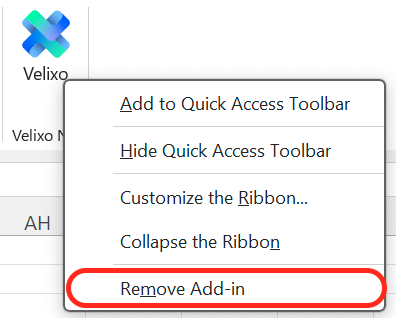
In the Home tab of the Excel ribbon, right-click the Velixo icon.

-
Click Remove Add-in.
-
Click Yes to remove the Velixo NX Add-in from your device.

Excel for Mac
-
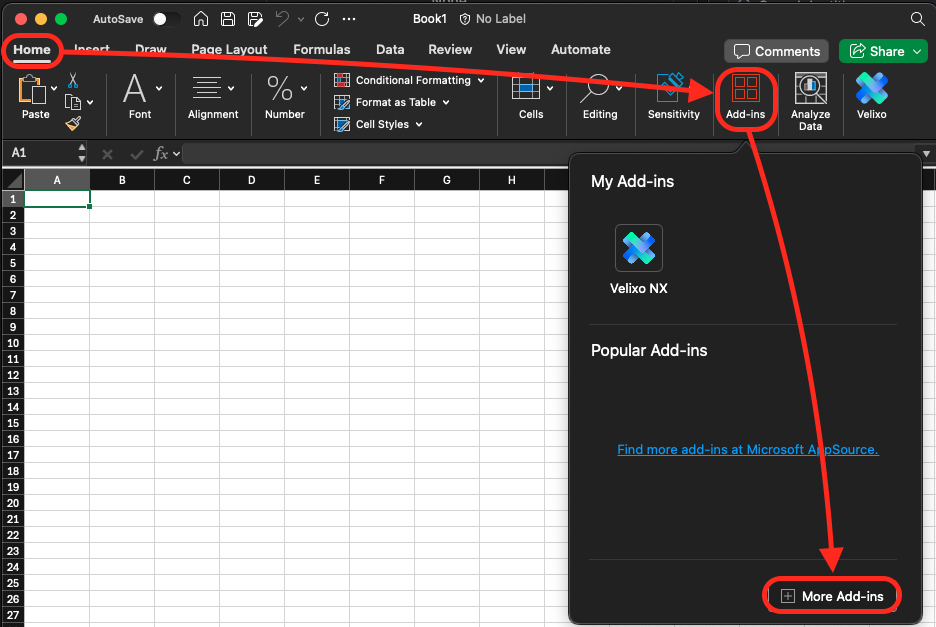
In the Home tab of the Excel ribbon, click Add-ins → More Add-ins.
-
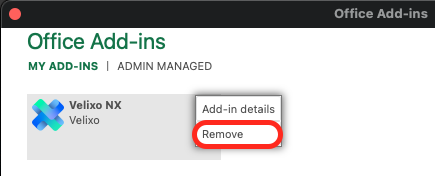
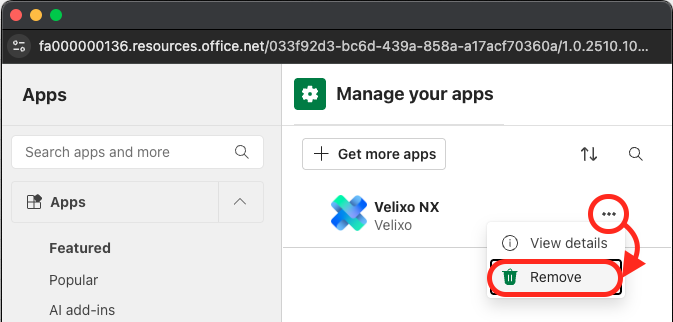
Click on the … (three dots) symbol on the Velixo NX tile and click Remove.
-
Click Remove to remove the Velixo NX Add-in from your device.

Excel for the web
-
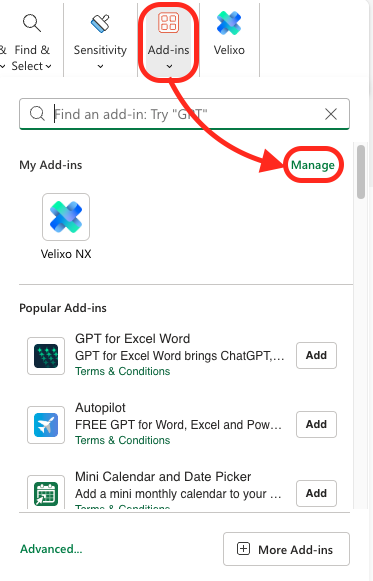
In the Home tab of the Excel ribbon, click Add-ins → Manage.
-
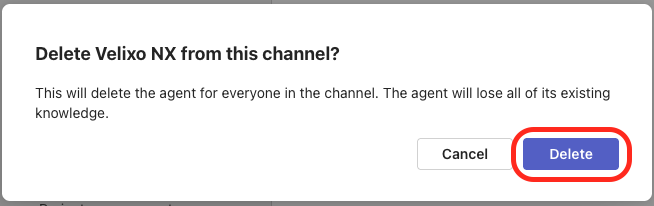
In the pop-up window, click on the … (three dots) symbol on the Velixo NX panel and click Remove.
-
Click Delete to remove the Velixo NX Add-in from your Excel for the web account.
Removing references
It is possible for Excel files to maintain a reference to an add-in even after the add-in has been uninstalled. When Excel opens the file, it will reintroduce the NX add-in. To avoid this, it is necessary to manually remove that reference.
-
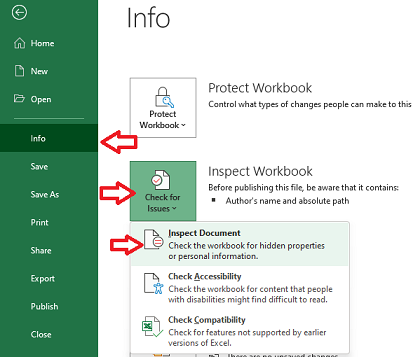
In Excel, click on File → Info → Check for Issues → Inspect Document:
-
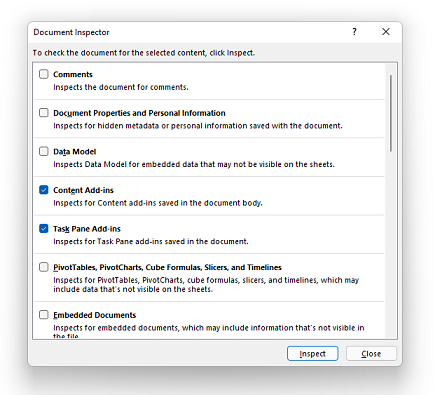
On the Document Inspector window, check the boxes for
-
Content Add-ins
-
Task Pane Add-ins
-
Then click Inspect.
-
If the Document Inspector reports that there are add-ins still found, then Click Remove All, and Close
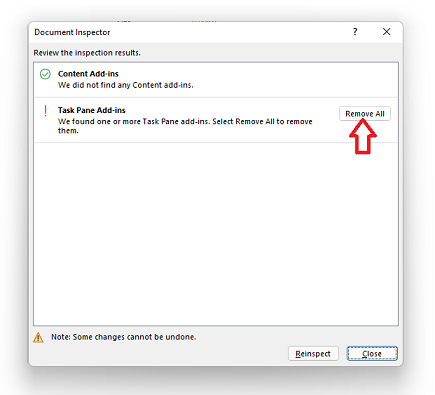
-
Save the workbook, close Excel
Organizations using both Velixo Classic and Velixo NX
Some organizations use both Velixo products, and you can have both Velixo Classic and Velixo NX installed within the same installation of Excel (Velixo NX simply automatically defers all functionality to Velixo Classic).
It can be possible for a Velixo Classic user to open a file that had been created or modified by a Velixo NX user (where Excel has automatically included a reference to the NX add-in in that file) and be prompted to install that add-in:

There are two methods available to address this.
Option 1 - Install Velixo NX
By clicking Allow and Continue, Excel will install Velixo NX. Since both Velixo Classic and Velixo NX can peacefully coexist within a single instance of Excel (NX simply does not initiate when Classic is present - thus giving full control to Classic), Excel will see that NX is present and will stop presenting the message each time such a file is opened.
Option 2 - Clear references to the add-in within Excel for Windows
In Excel for Windows, you can tell Excel to "forget" about any add-in references it has encountered.
From the File ribbon, select Options → Trust Center → Trust Center Settings... → Trusted Add-in Catalogs
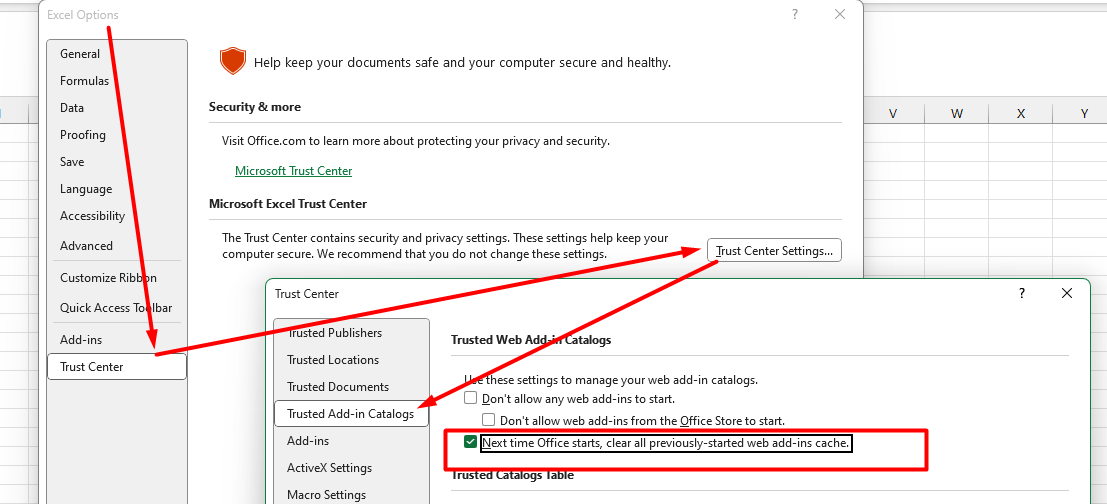
and check the box next to Next time Office starts, clear all previously-started web add-ins cache.
You can then close and restart Excel for the setting to take effect.