Instructions in this article require Sage Intacct admin privileges.
The below steps must be performed by an administrator of Sage Intacct for Velixo to connect to Sage Intacct through webservices.
Steps 5 and 6 are typically performed by every user of Velixo. We have included them in this article for your convenience, but they are also covered in our Installing Velixo NX article.
Step 1. Enable Web Services
-
Navigate to the Top Level on the Entities dropdown list
-
In Sage Intacct, go to
Company→Admin tab→Subscriptions -
Ensure
Web Servicesare enabled as shown below:

Velixo uses its own sender ID to connect to Sage Intacct Web Services; you do not need to pay for web service access in order to use Velixo.
Step 2. Add the Velixo IP addresses to the allow list
-
In Sage Intacct, go to
Company→Setup tab→Company -
Press the
Editbutton -
Open the
Securitytab -
Under
Login settings→Password, go to the prompt forEnforce IP address filters
If the IP filter value is set to None, this current step is complete; your company does not enforce an IP address restriction policy.
If the IP filter value is set to any value other than None, add each of the following IP addresses to the list of allowed IP addresses:
-
13.239.34.44 -
15.157.55.169
This will ensure that Velixo can make requests to your Sage Intacct company from its servers.
Step 3. Enable Velixo as a safe sender
-
In Sage Intacct, go to
Company→Setup tab→Company -
Press the
Editbutton -
Open the
Securitytab -
Go to the section labeled
Web Services authorizations, and add Velixo's sender ID:VelixoMPP

Step 4. Optional: Configure a separate Sage Intacct user through which Velixo will access data
Velixo STRONGLY RECOMMENDS that users access their Sage Intacct data with the same username & password credentials they use to log into Sage Intacct in the browser.
The biggest upside of that approach is that the data each user sees in their reports built with Velixo matches their Sage Intacct user permissions.
It is also possible to set up a dedicated Web Services user for Velixo. We do not recommend this approach because this user will require separate access roles configuration and this user may unintentionally be exposed to more sensitive data in Sage Intacct than they would normally see under their own account. It is also more difficult to troubleshoot access rights issues with a dedicated Web Services user because such users are not able to sign in to Sage Intacct via a web browser.
If, for risk mitigation reasons, it is absolutely necessary to create a separate user (or multiple users with different access rights) specifically for Velixo integration, you can follow the instructions below.
Note that these instructions vary slightly depending on whether the company's security is defined as “Role-Based” or “User-Based”.
4a - Configuring the Role to be used
Both security types require that a role be created.
-
In Sage Intacct, go to Company → Admin → Roles
-
Press the Add button
-
Configure the role's Name and press Save
-
If our organization uses Role-Based security, enable the necessary permissions for each module, and then press Save
For a list of the permissions required, see Permissions for refreshing a Sage Intacct report
4b - Creating the Web Services User
Next, create the Web Services User account which will be used by the Velixo reports.
-
Go to: Company → Admin → Web Services Users
-
Press the Add button
-
Configure the values for:
-
User ID
-
Email address
-
Contact name
-
User Type (set to Business User)
-
Role (select the Role created in step 4a)
If the organization uses Role-Based security, we are done defining the Web Services User.
Otherwise, proceed to step 4c to define the user-based permissions.
4c - Specify the User-Based permissions
Next, configure the permissions for this user:
-
After saving the user, Sage Intacct will return to the list of Web Service Users.
-
Find the newly created Web Service User and press the user's Subscriptions button.
-
Enable the necessary permissions for each applicable module.
-
Press Save to apply changes.
For a list of the permissions required, see Permissions for refreshing a Sage Intacct report
Step 5. Install the Velixo NX add-in
Configure the Velixo add-in in the Microsoft Excel application.
To do so:
-
Ensure that you have access to the Microsoft Office Add-ins store (this is a Microsoft requirement for all users)
-
Follow the steps outlined in the Getting started with Velixo NX guide
Step 6. Define a connection to your Sage Intacct company in Excel
-
After adding the Velixo add-in, click the Velixo button that appears on Home ribbon.
-
A side panel will open. Click the
Get startedbutton.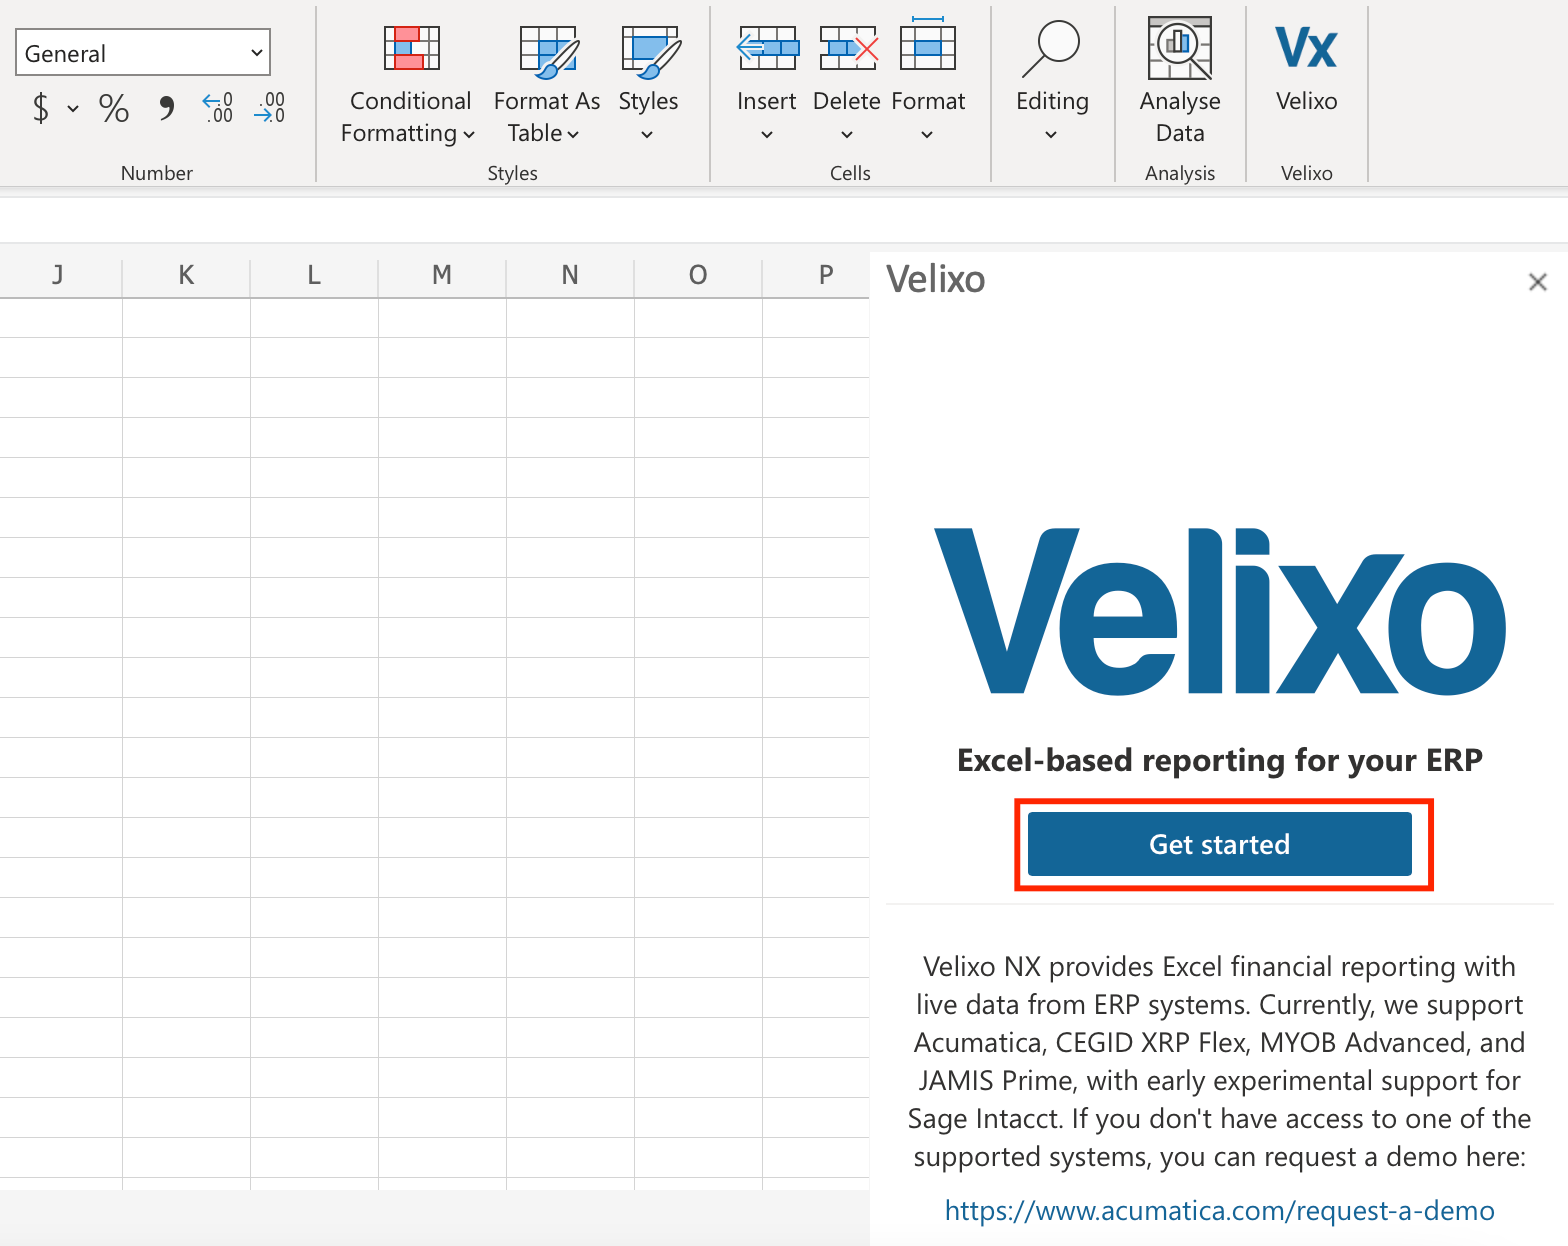
-
A connection manager will display. Click
Add connection: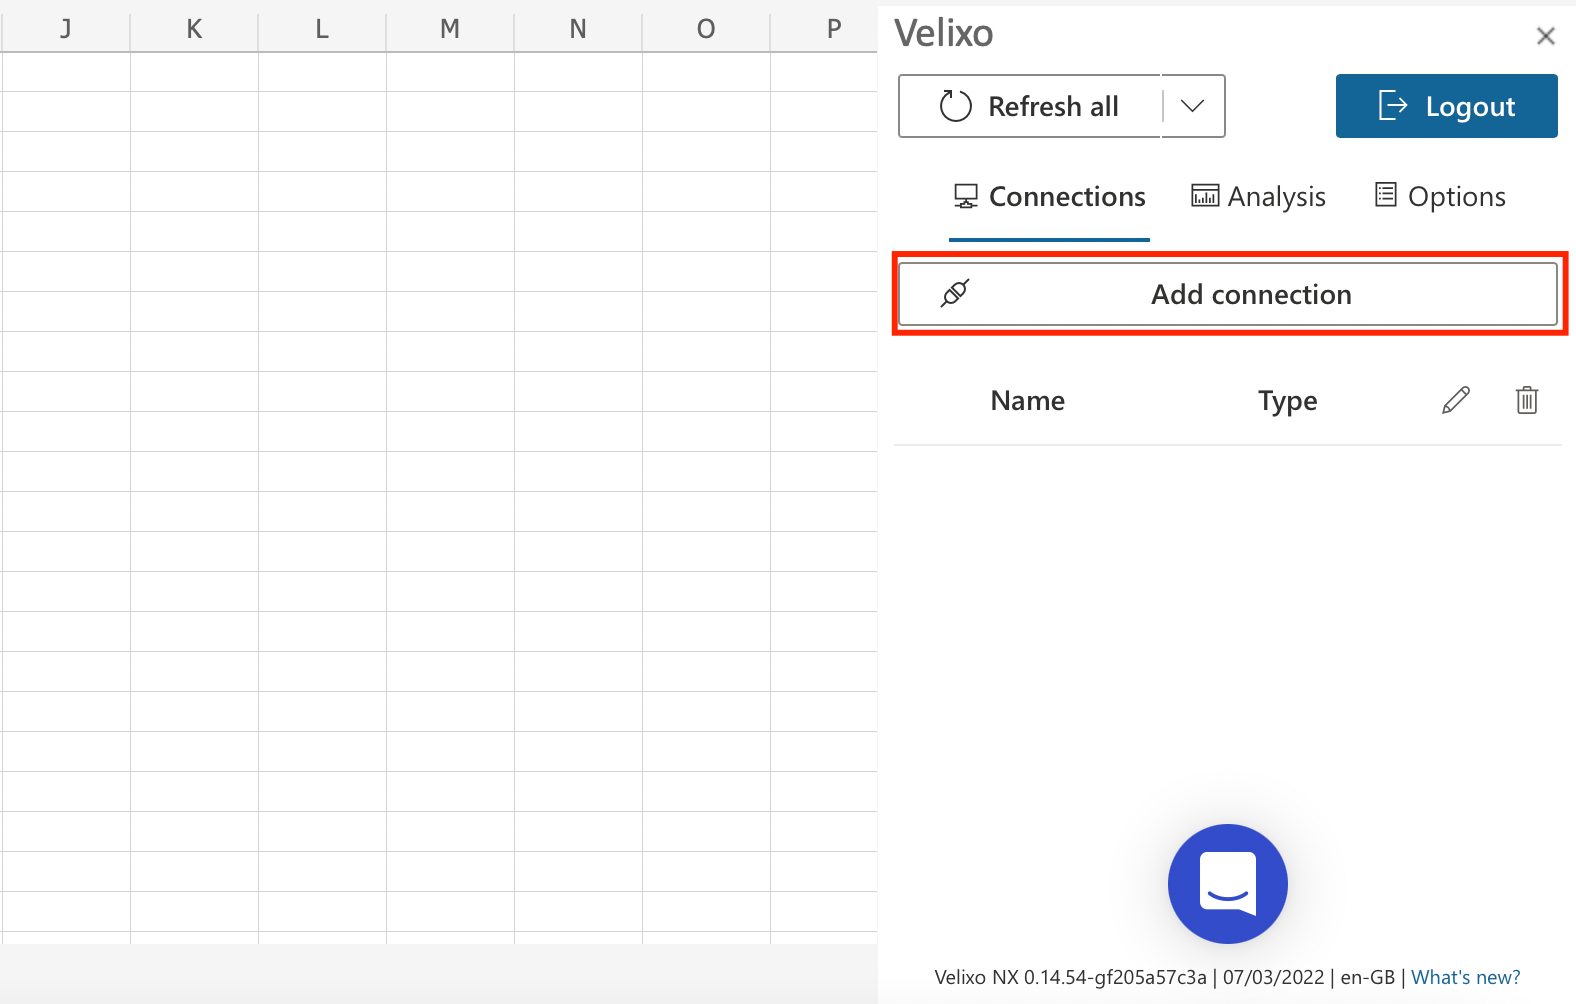
-
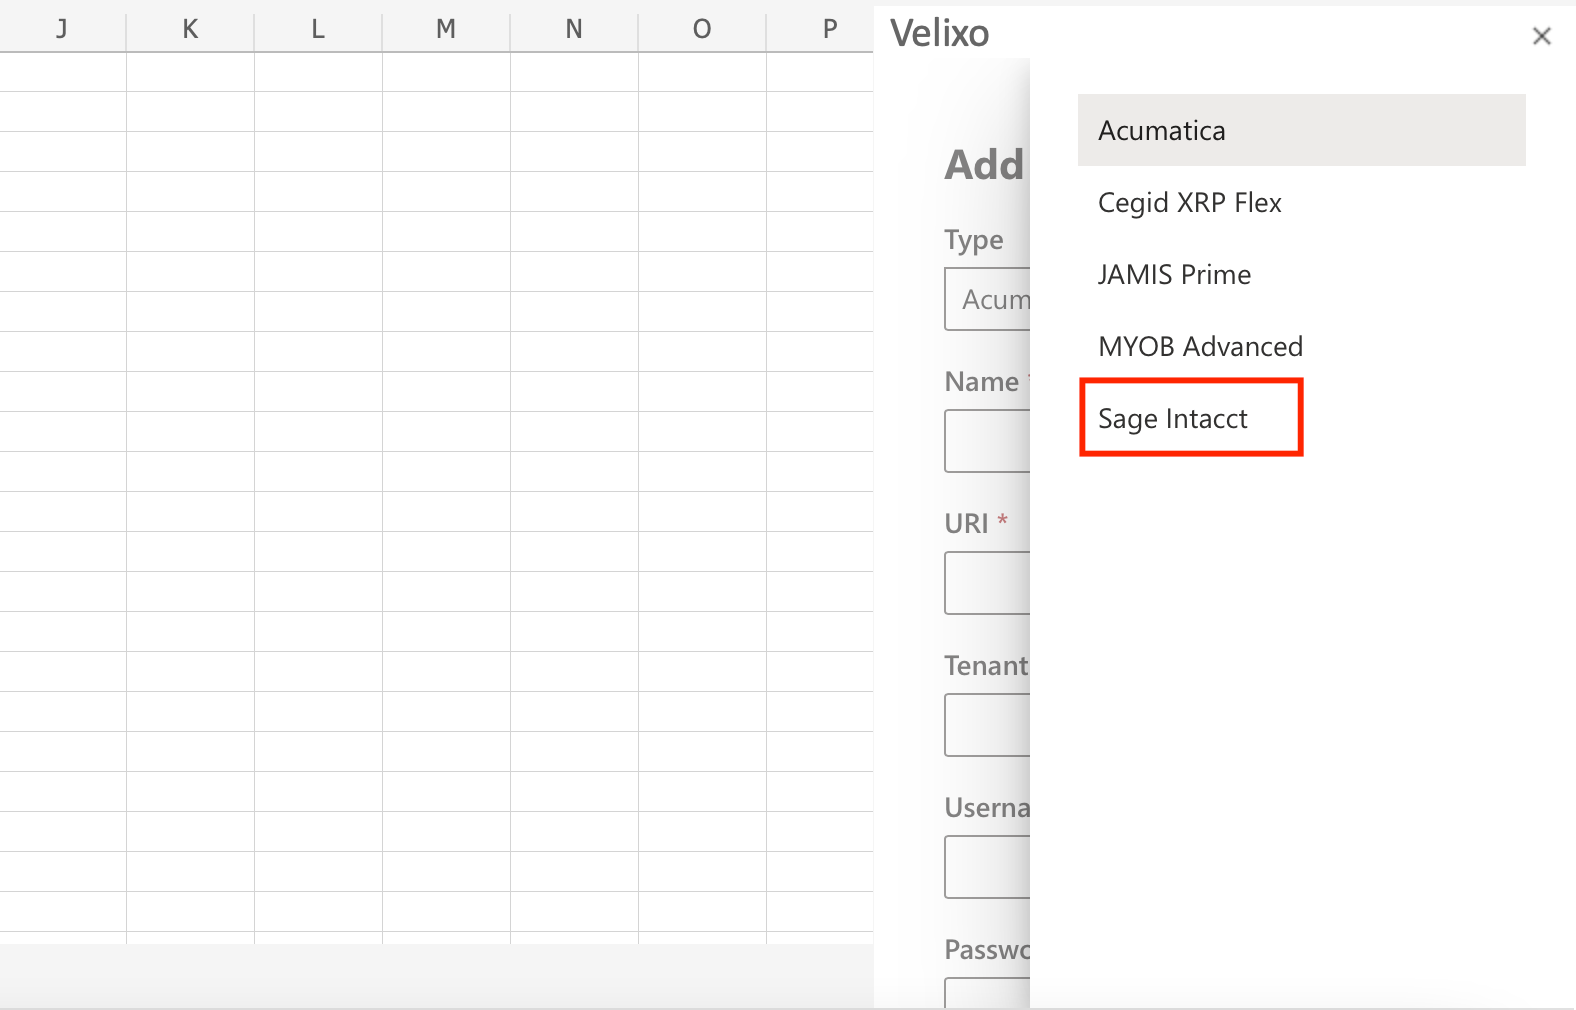
In the
Add connectionwindow, click theTypedrop-down and selectSage Intacctfrom the supported ERP systems' list:
-
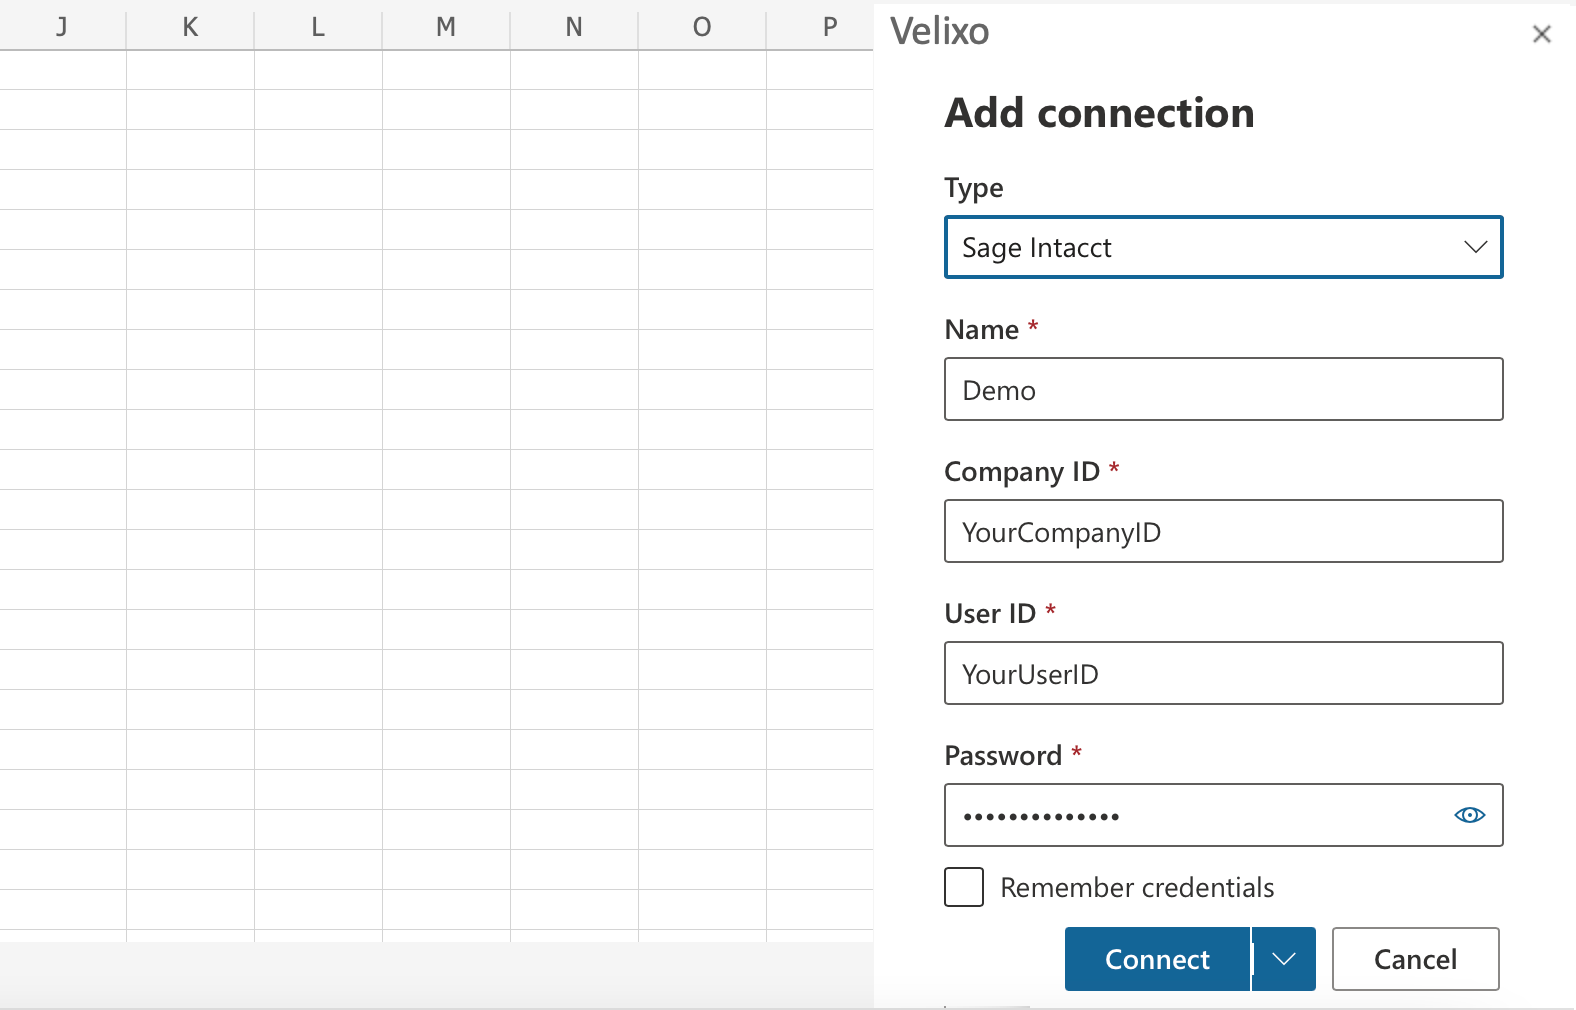
Fill in the connection details:
-
In the
Namefield, enter any convenient name of the connection that you will use in Velixo formulas in the workbook -
In the
Company IDfield, enter the ID of your Sage Intacct company. -
In the
User IDandPasswordfields, enter:-
If you configured a separate Web Services user for Velixo, the credentials of that user.
-
If you prefer to log in under your actual Sage Intacct user, your own User ID and password.
-
-
Check
Remember credentialsif you don't want to log in to Sage Intacct every time you reopen the Excel workbook. No worries: the remembered credentials are not stored on Velixo servers, they will be securely kept on your computer in an encrypted form.
-
-
Click the Connect button to finalise the connection creation.
-
You can now use Velixo to get instantly refreshable data from Sage Intacct into your Excel reports!
Next Steps
See other Getting Started articles for using Velixo NX with Sage Intacct.