Instructions in this article require admin privileges.
Overview
The guide below is applicable in situations where organization members are prompted to send approval requests (similar to the one below) to their admin when trying to access specific Velixo NX functionalities.
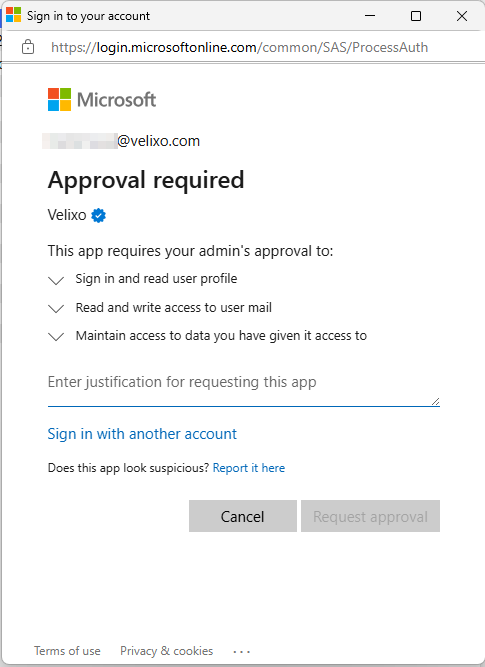
By following the steps below to grant admin consent, you will enable access to all Velixo NX functionalities for a user, eliminating the need for separate requests for each functionality.
If users are unable to request approval, you can enable consent requests in Microsoft Azure as follows:
-
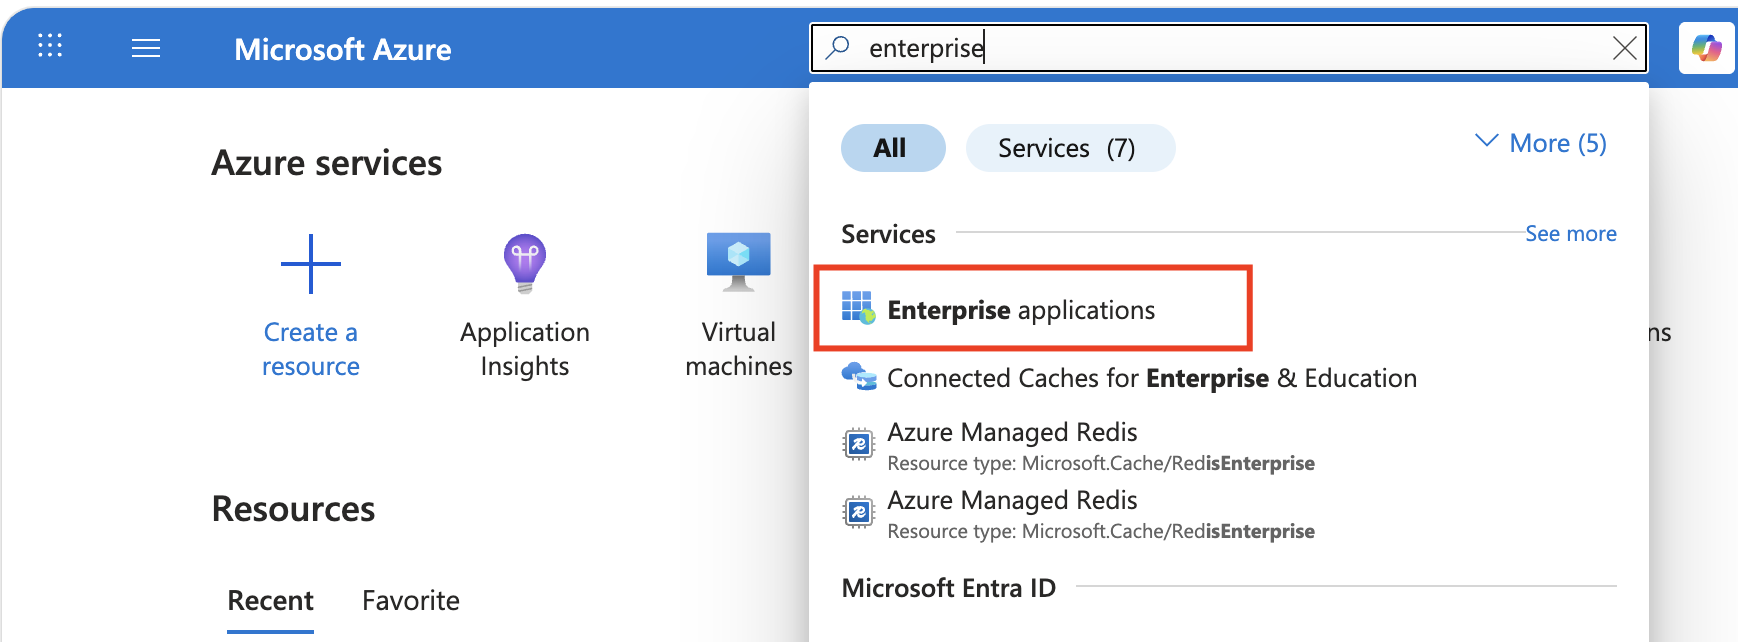
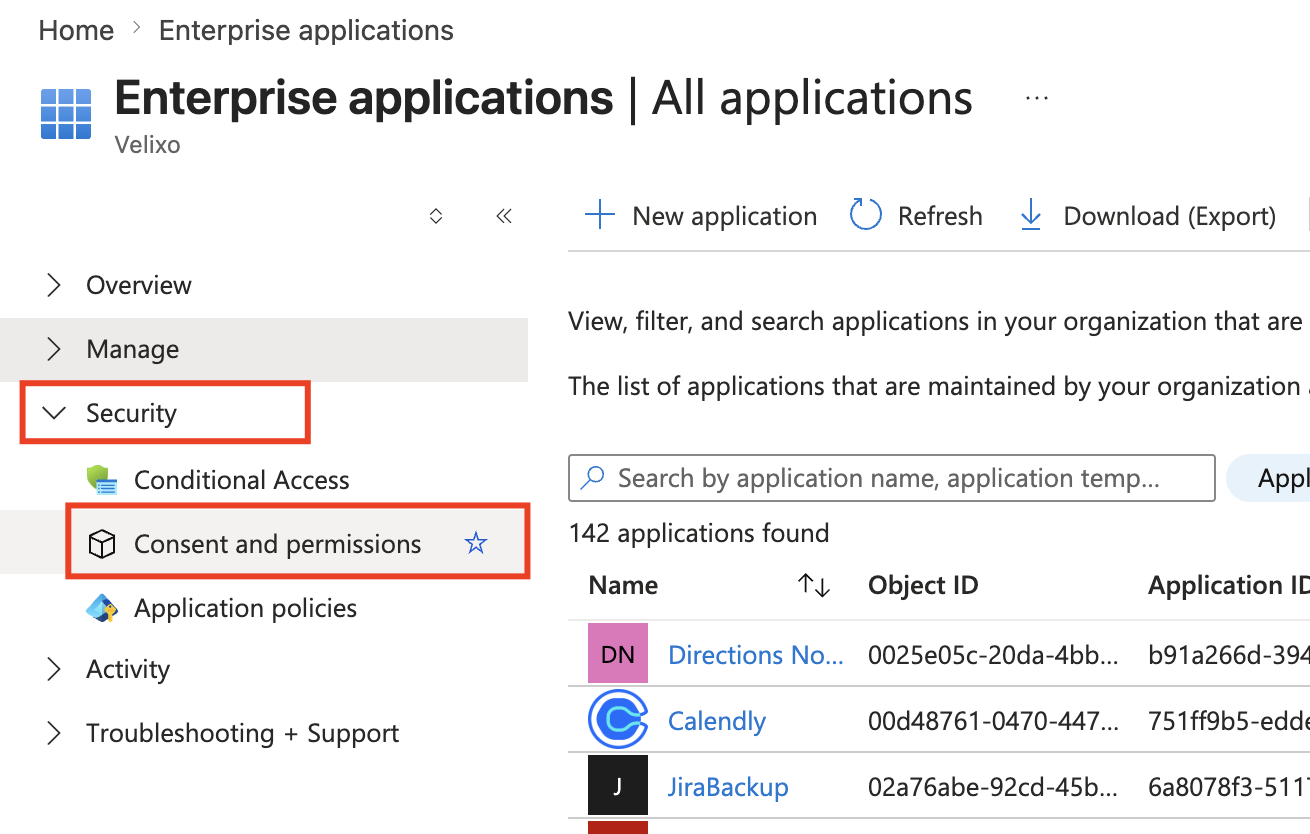
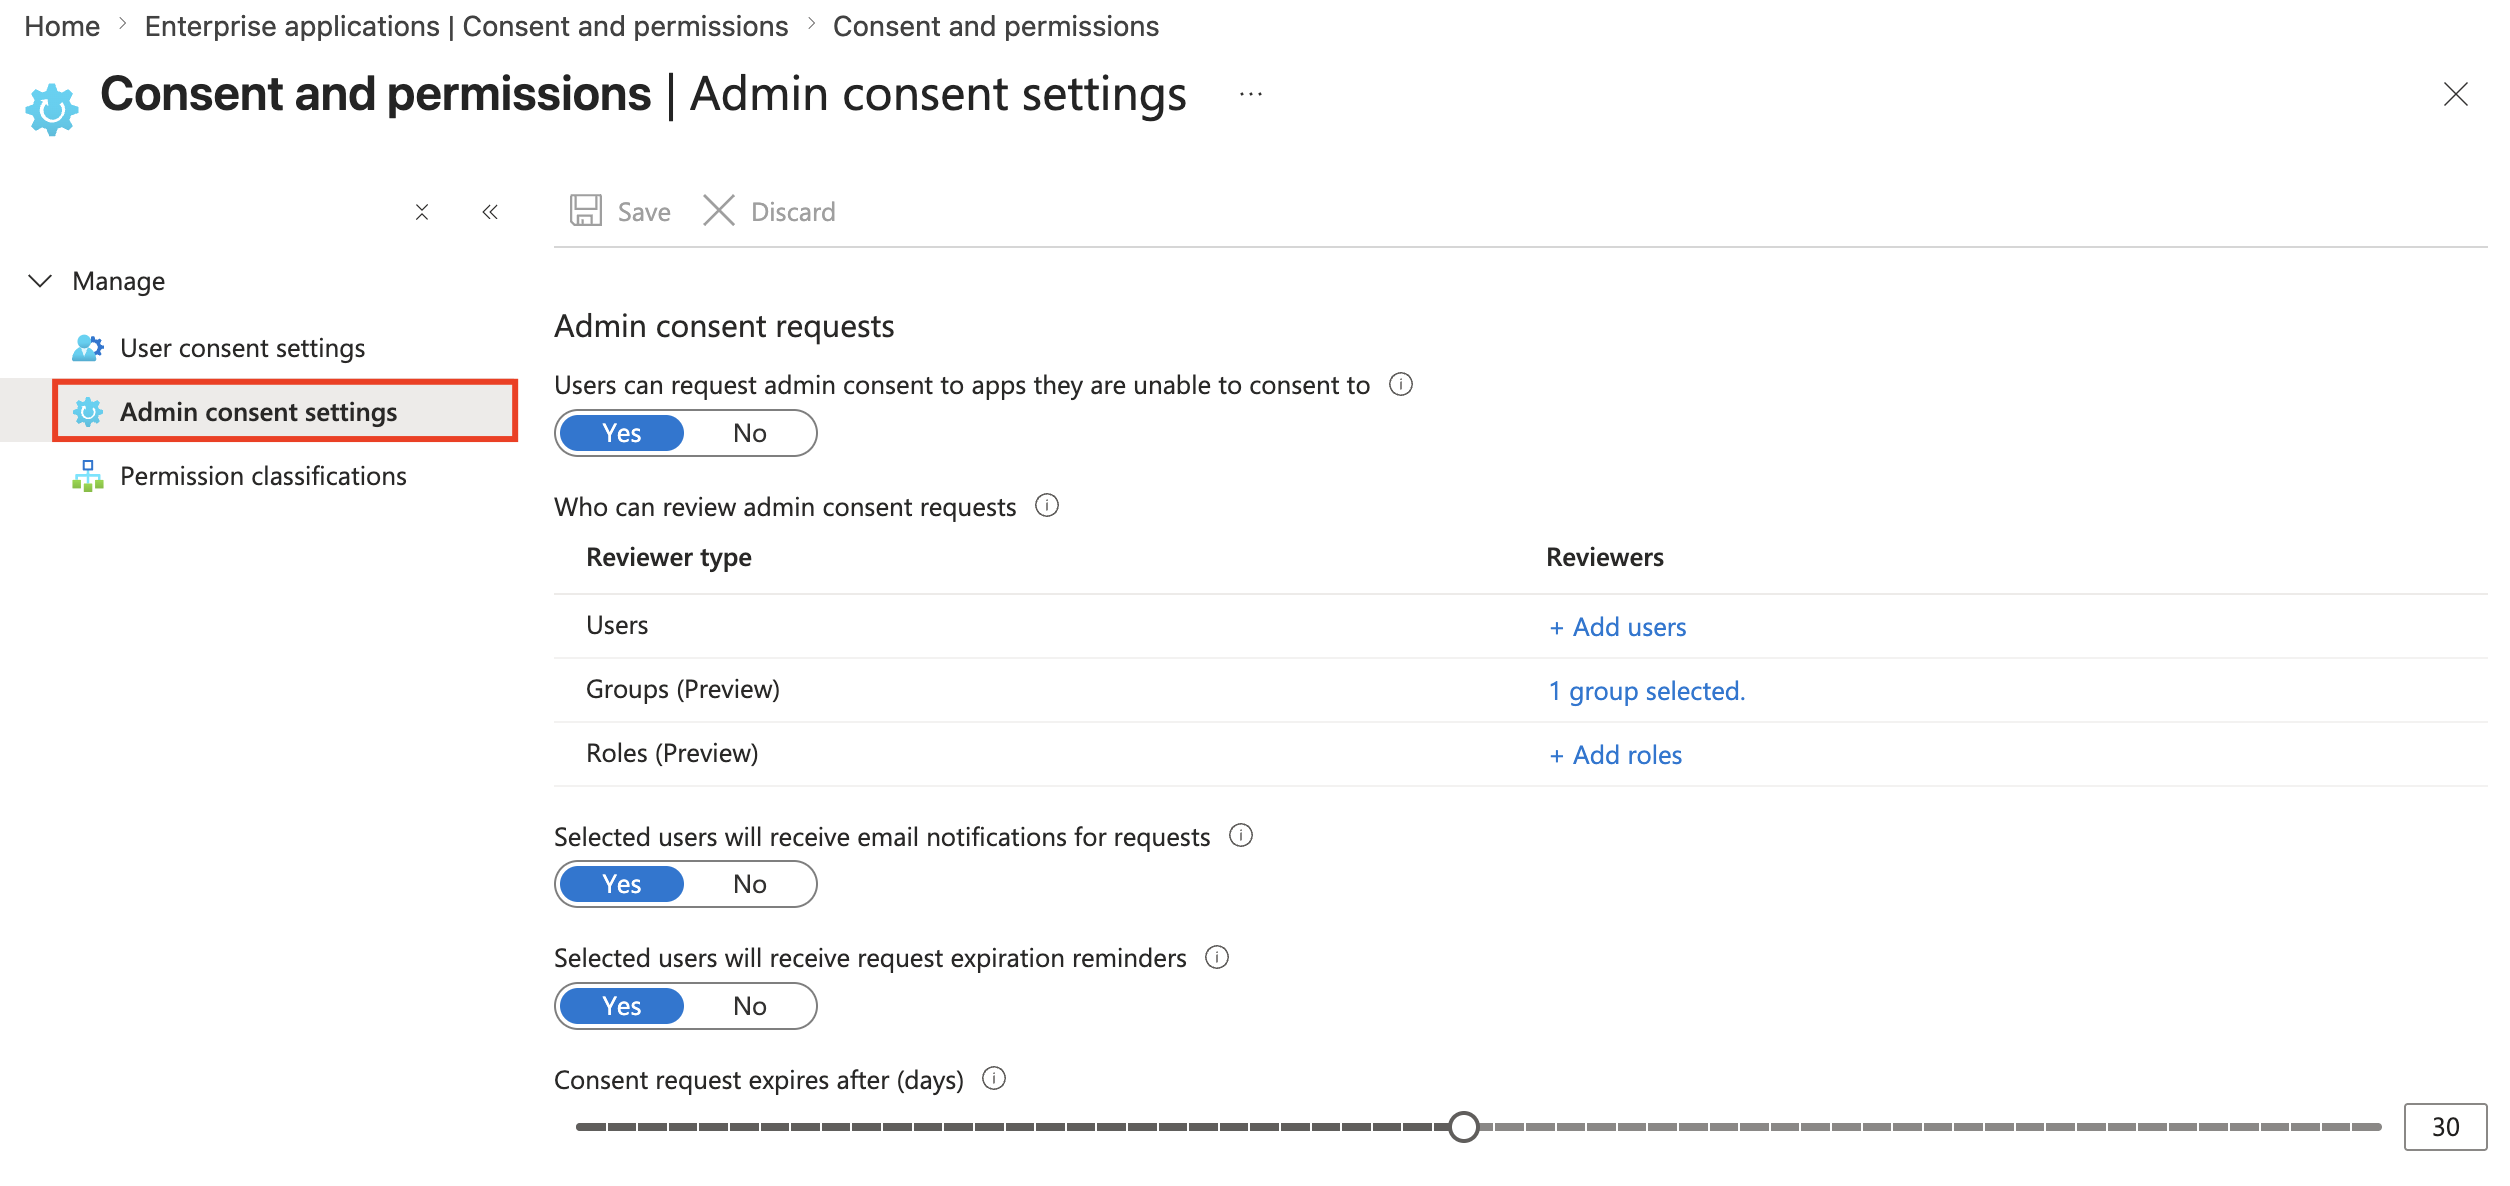
Go to Enterprise applications → Security → Consent and permissions
-
Switch the Users can request admin consent to apps they are unable to consent to to Yes in the Admin consent settings menu.
-
Under Who can review admin consent requests, select the users, groups, or roles that will review requests, and then select Save. Each reviewer must already have a role that can grant admin consent. For details, see Microsoft's article Configure the admin consent workflow.
If no reviewers are configured, user consent requests are rejected. They never appear under Admin consent requests → My pending, so there's nothing for an admin to approve.
Note: This setting applies to all Microsoft 365 Apps, not only Velixo.
Granting consent
In your organization's tenant, Velixo NX is listed under Enterprise applications, not App registrations. App registrations only lists apps your organization develops and registers itself. Make sure the Application ID of the app you're configuring is dd4aabf4-b6ab-4faf-b511-a16f60b89c6f.
Once an organization member sends an approval request, go to the Enterprise applications screen in the Azure portal, select Activity → Admin consent requests → My pending and click Velixo NX. For details, see Microsoft's article Review admin consent requests.
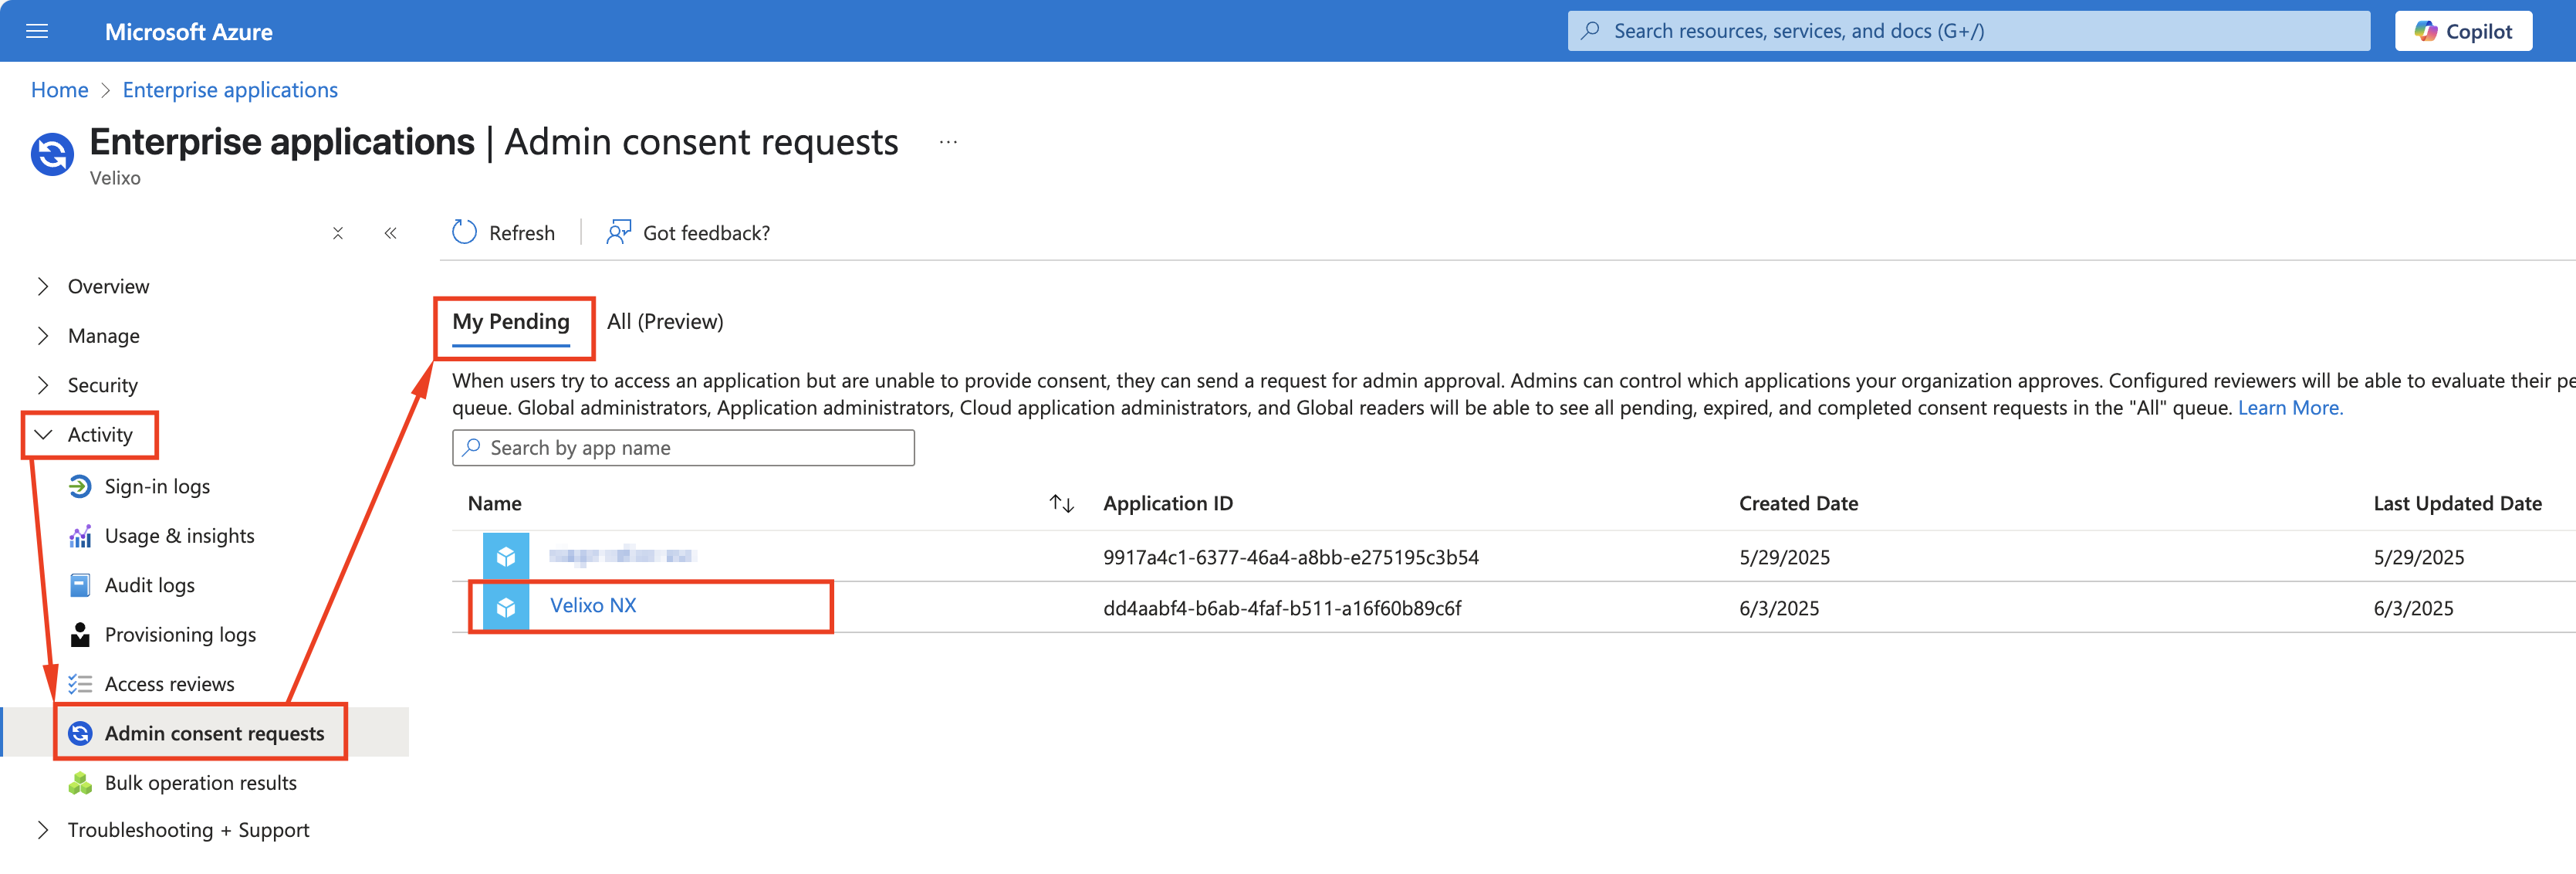
On the next screen, click Review application.
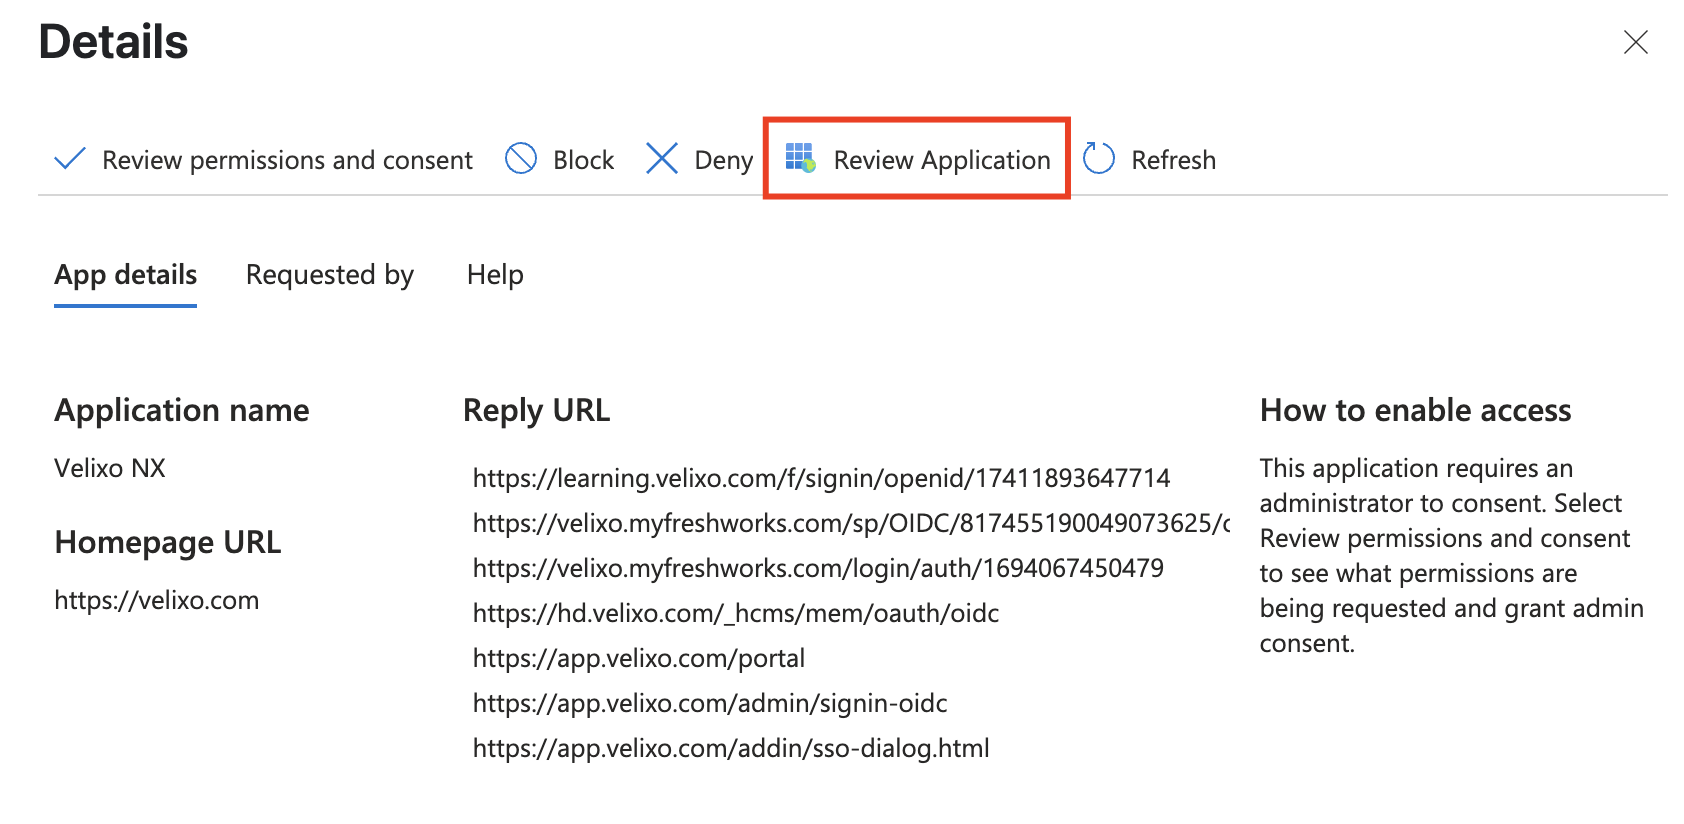
We do not recommend clicking Review permissions and consent on this screen, as it will only grant consent once for the current request.
In that scenario, every time the user, for instance, runs a Distribution list using Outlook's Graph API, their distribution will be blocked unless the admin promptly grants their subsequent consent requests; otherwise their workflow will fail.
To avoid this situation, Velixo recommends granting permanent admin consent for the user. See instructions below.
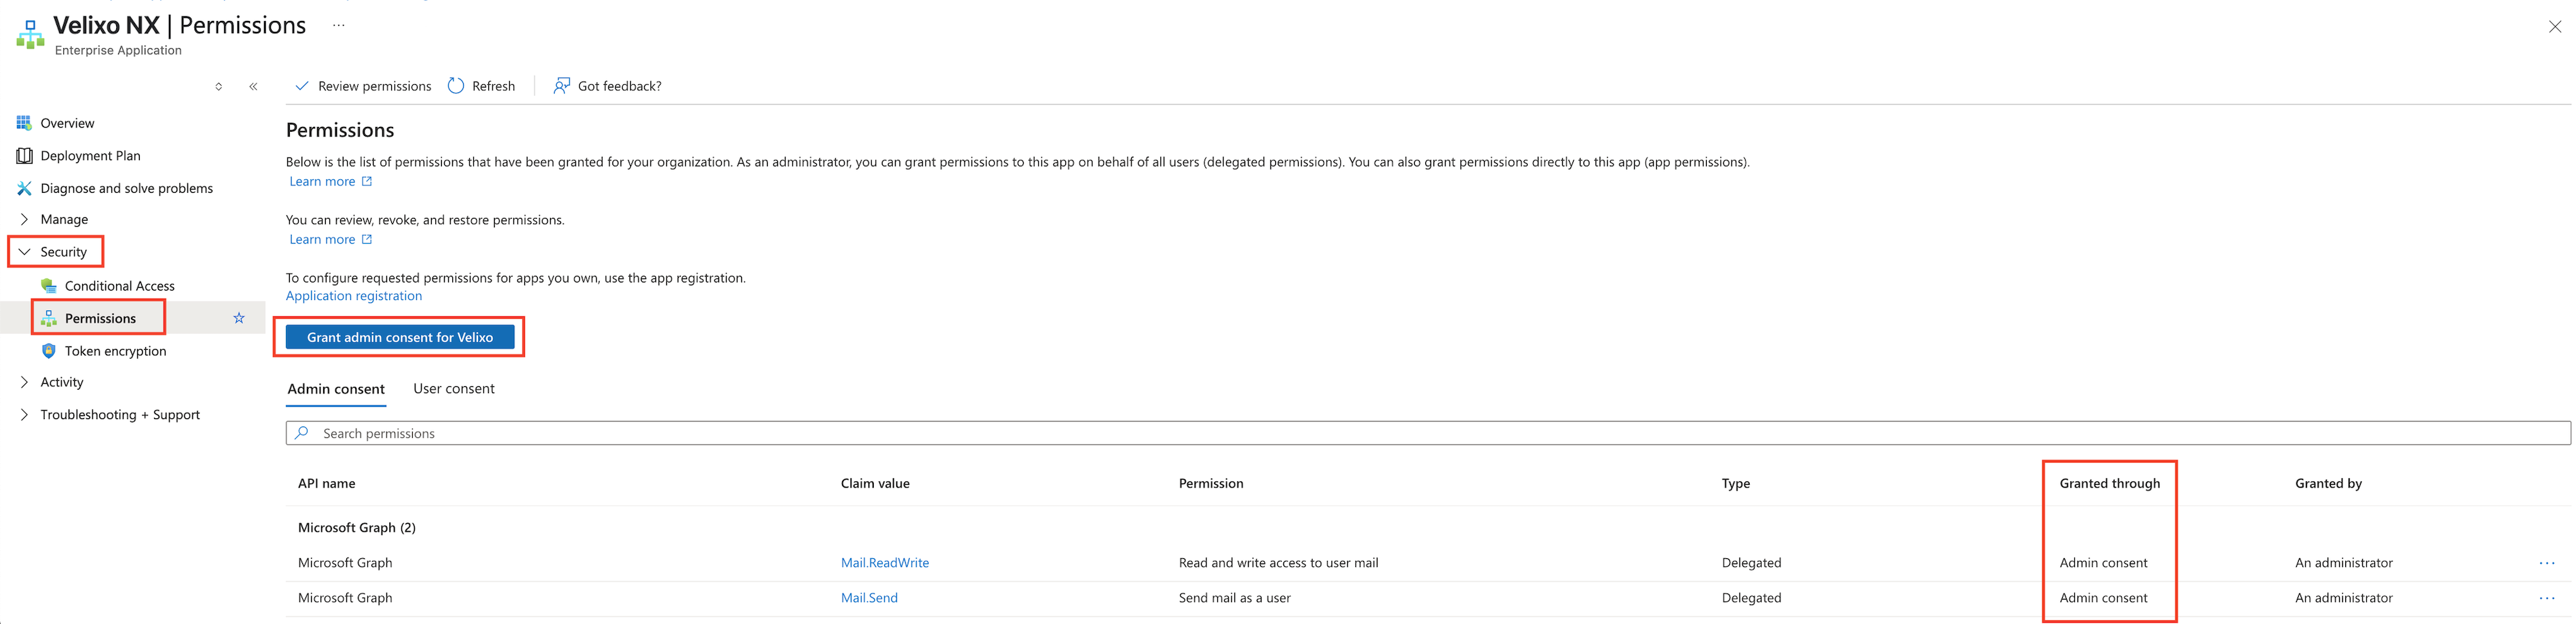
Navigate to Security → Permissions → Grant admin consent for Velixo. The granted permissions should now appear on the Admin consent list with Admin consent status in the Granted through column.
Make sure the list includes the following Microsoft Graph permissions, each with Admin consent in the Granted through column:
-
User.Read -
Mail.ReadWrite -
Mail.Send
For details about this screen, see Microsoft's article Grant tenant-wide admin consent to an application.
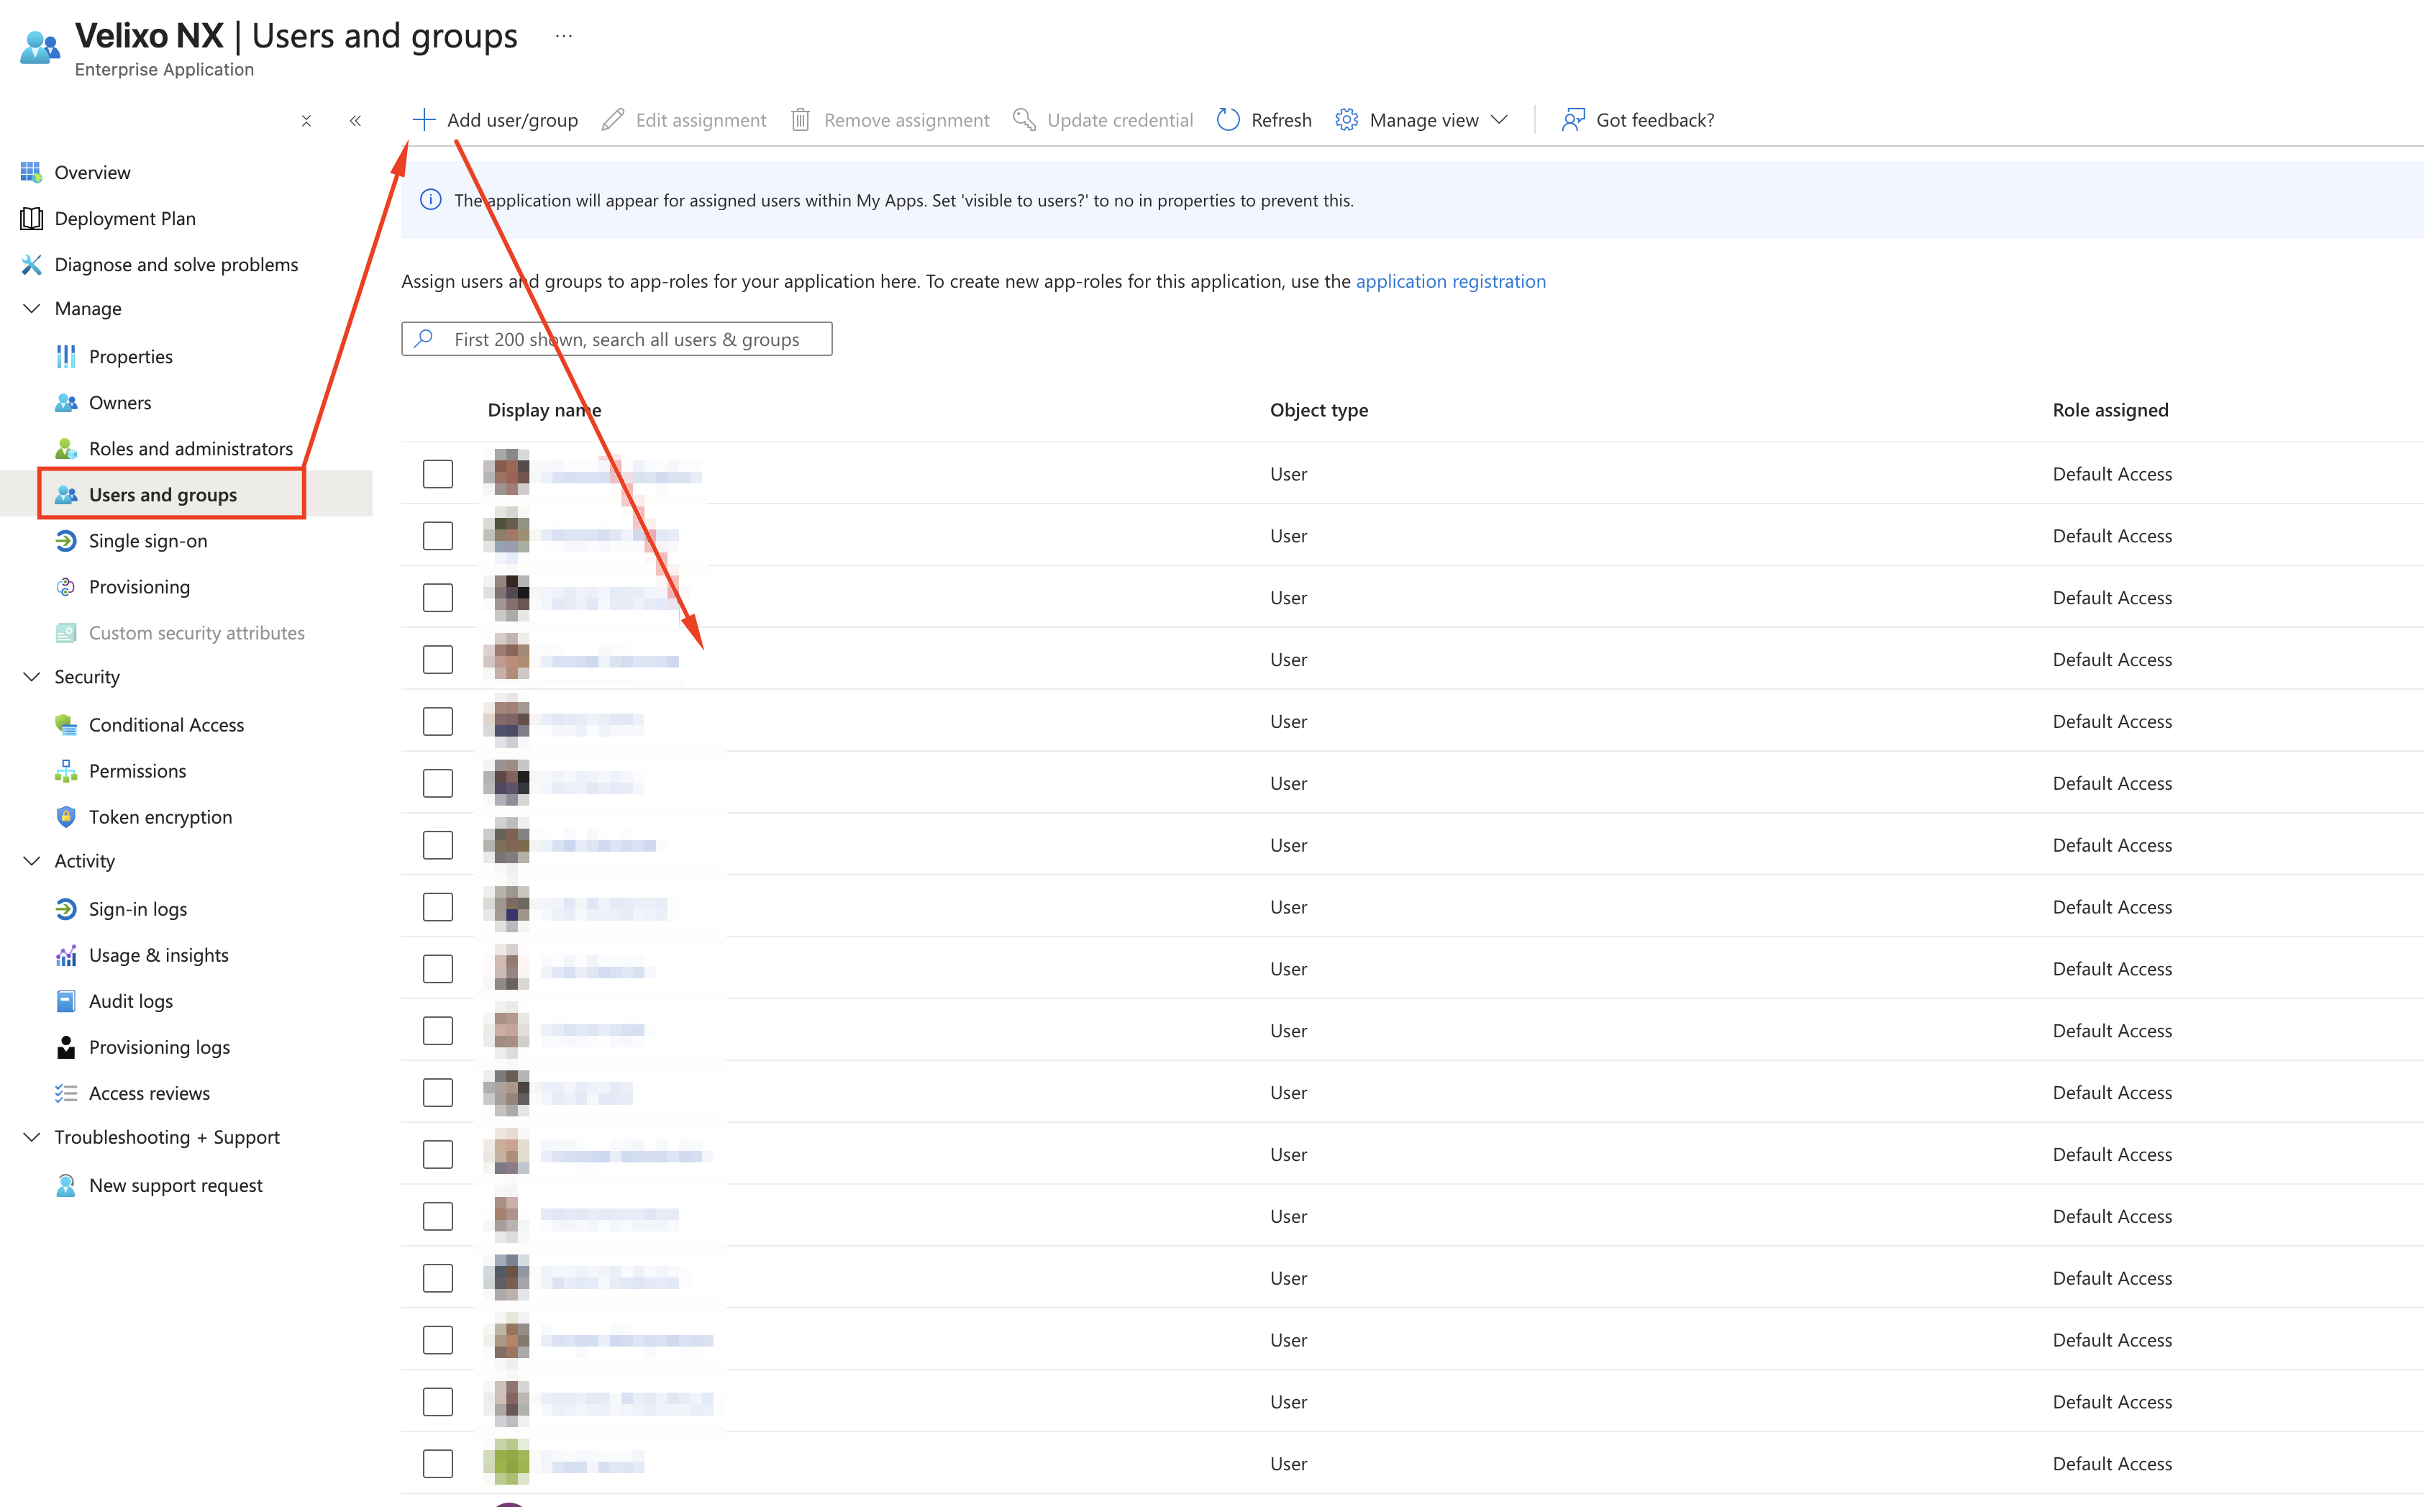
Next, in the Velixo NX Enterprise Application screen, go to Users and groups and use the Add user/group button to add the user for whom you wish to grant consent.