Using Distribution Lists with Velixo NX
Purpose
We can use the Distribution List feature with a desktop installation of the traditional edition of MS Outlook to quickly distribute reports to a large number of users with a single click. Reports can be sent by e-mail or simply saved to a folder in a variety of formats. You have the freedom to include specific content (i.e., selected worksheets) and/or use different arguments (location, branch, dates, financial period, dimensions, etc.) based on the recipient. If desired, highly sensitive data can be password protected.
Example use cases:
E-mail a monthly performance dashboard in PDF format to the manager of every location of your 200-location business.
Send detailed financials to your area/group managers in Excel format.
Prepare a complete financial reporting package for your shareholders, removing Velixo formulas for those recipients without access to your ERP system.
Archive the final version of your monthly reports to a network share with clear and consistent naming.
E-mail a PDF version of your project progress report to project managers every week.
These are just some examples of what can be achieved — Report Distribution lists are extremely versatile, powerful, yet very simple to use.
Installation
The Distibution List feature is included in the optional Velixo Tools package. Please see Installing the Velixo Tools for instructions and the download link.
How to use the Distribution feature
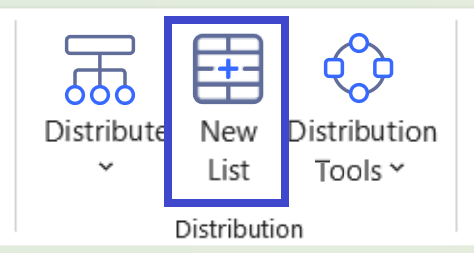
For any workbook, start by creating a blank Distribution list. To do so, click on New List in the Distribution section:
What you will then see is a new spreadsheet that contains all the fields needed to set up report distribution:

Simply fill in the blanks. Here’s a description of all the different settings:
By default, the distribution list shows 10 (blank) rows, but you are free to add as many as you want. An Excel workbook can contain multiple distribution lists, so if you have different monthly/quarterly/yearly runs or simply occasional distribution requirements, feel free to add as many lists as you need and give your lists unique and memorable names.
Be sure not to change the order of the columns or introduce any additional columns anywhere except at the end of the Excel table.
Format: | Select the type of file that you want to create:
|
File Name | The name of the file you want to create |
Tab Selection | The names of the unprotected worksheet(s) you want to include in the file you create - if specifying more than one worksheet, the list must be separated by semicolons ; The names are case sensitive. List the names exactly as they appear in the tabs of the workbook. |
Folder Path | The location where the file is to be created. You can use the Insert Folder Path option under the Distribution Tools button in the Velixo ribbon to help you specify the location |
Email To | Optional. The email address to which the file is to be sent. |
Email Subject | Optional. The subject line for the email |
Email Body | Optional. The body of the email. This can be hand-entered text or a cell/range reference. |
File Password | Optional. The created file can be password protected. To do so, place the password in this column. |
Attachments | Optional. The path and name of any additional attachments for the email |
Report arguments
Reports can be run with different arguments for each recipient. You can configure the arguments in the Distribution List by adding new columns to the end of the list.

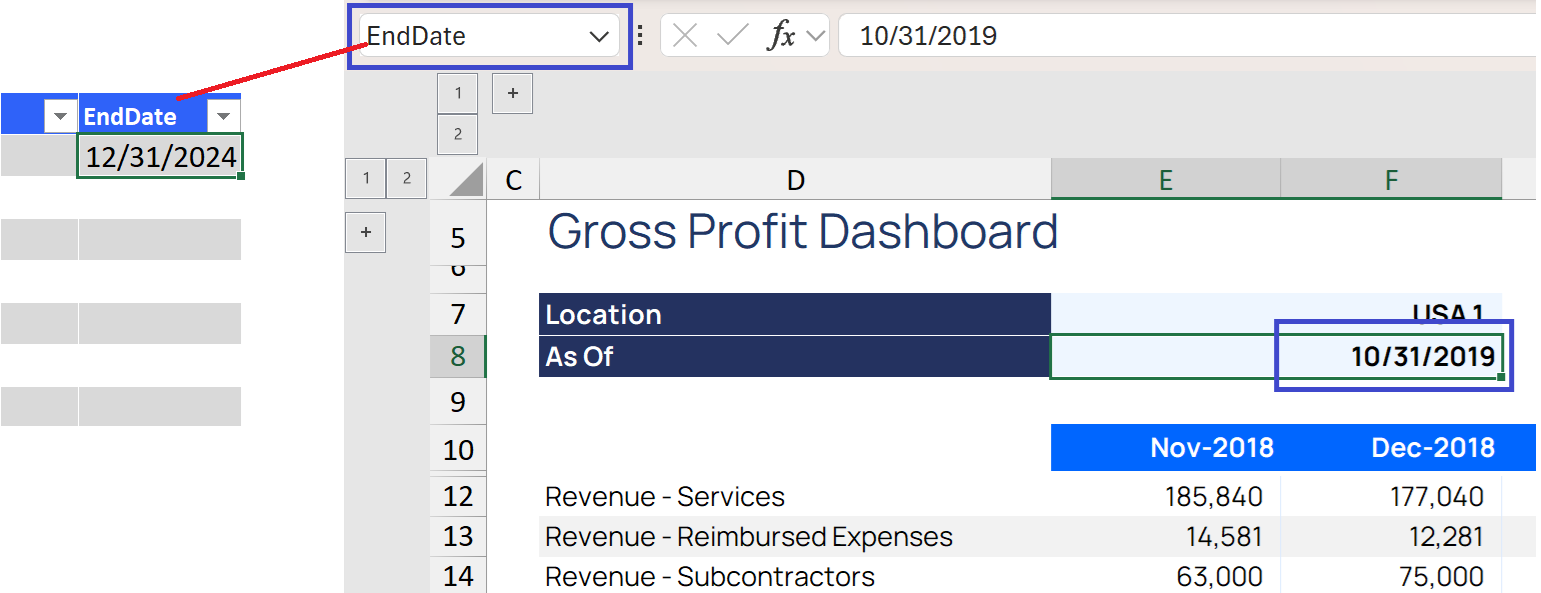
The name of the column must match a named range in your spreadsheet:
The named cells must be scoped to the ENTIRE workbook:
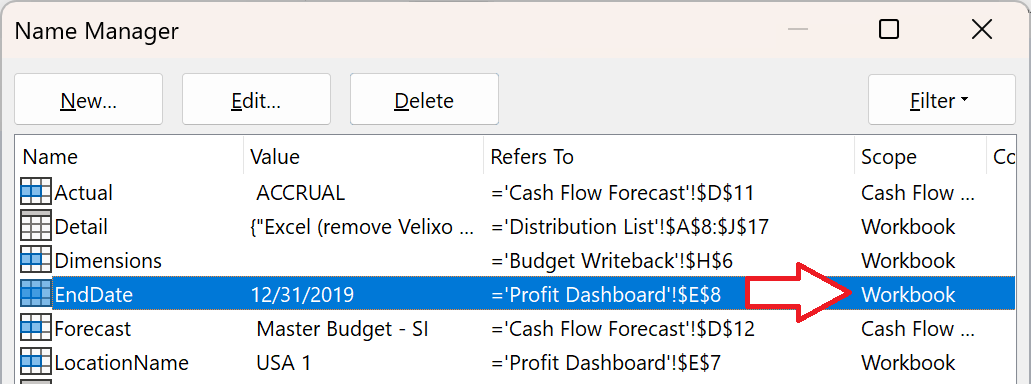
(worksheet-specific regions can only be used with the Velixo Blueprint feature)
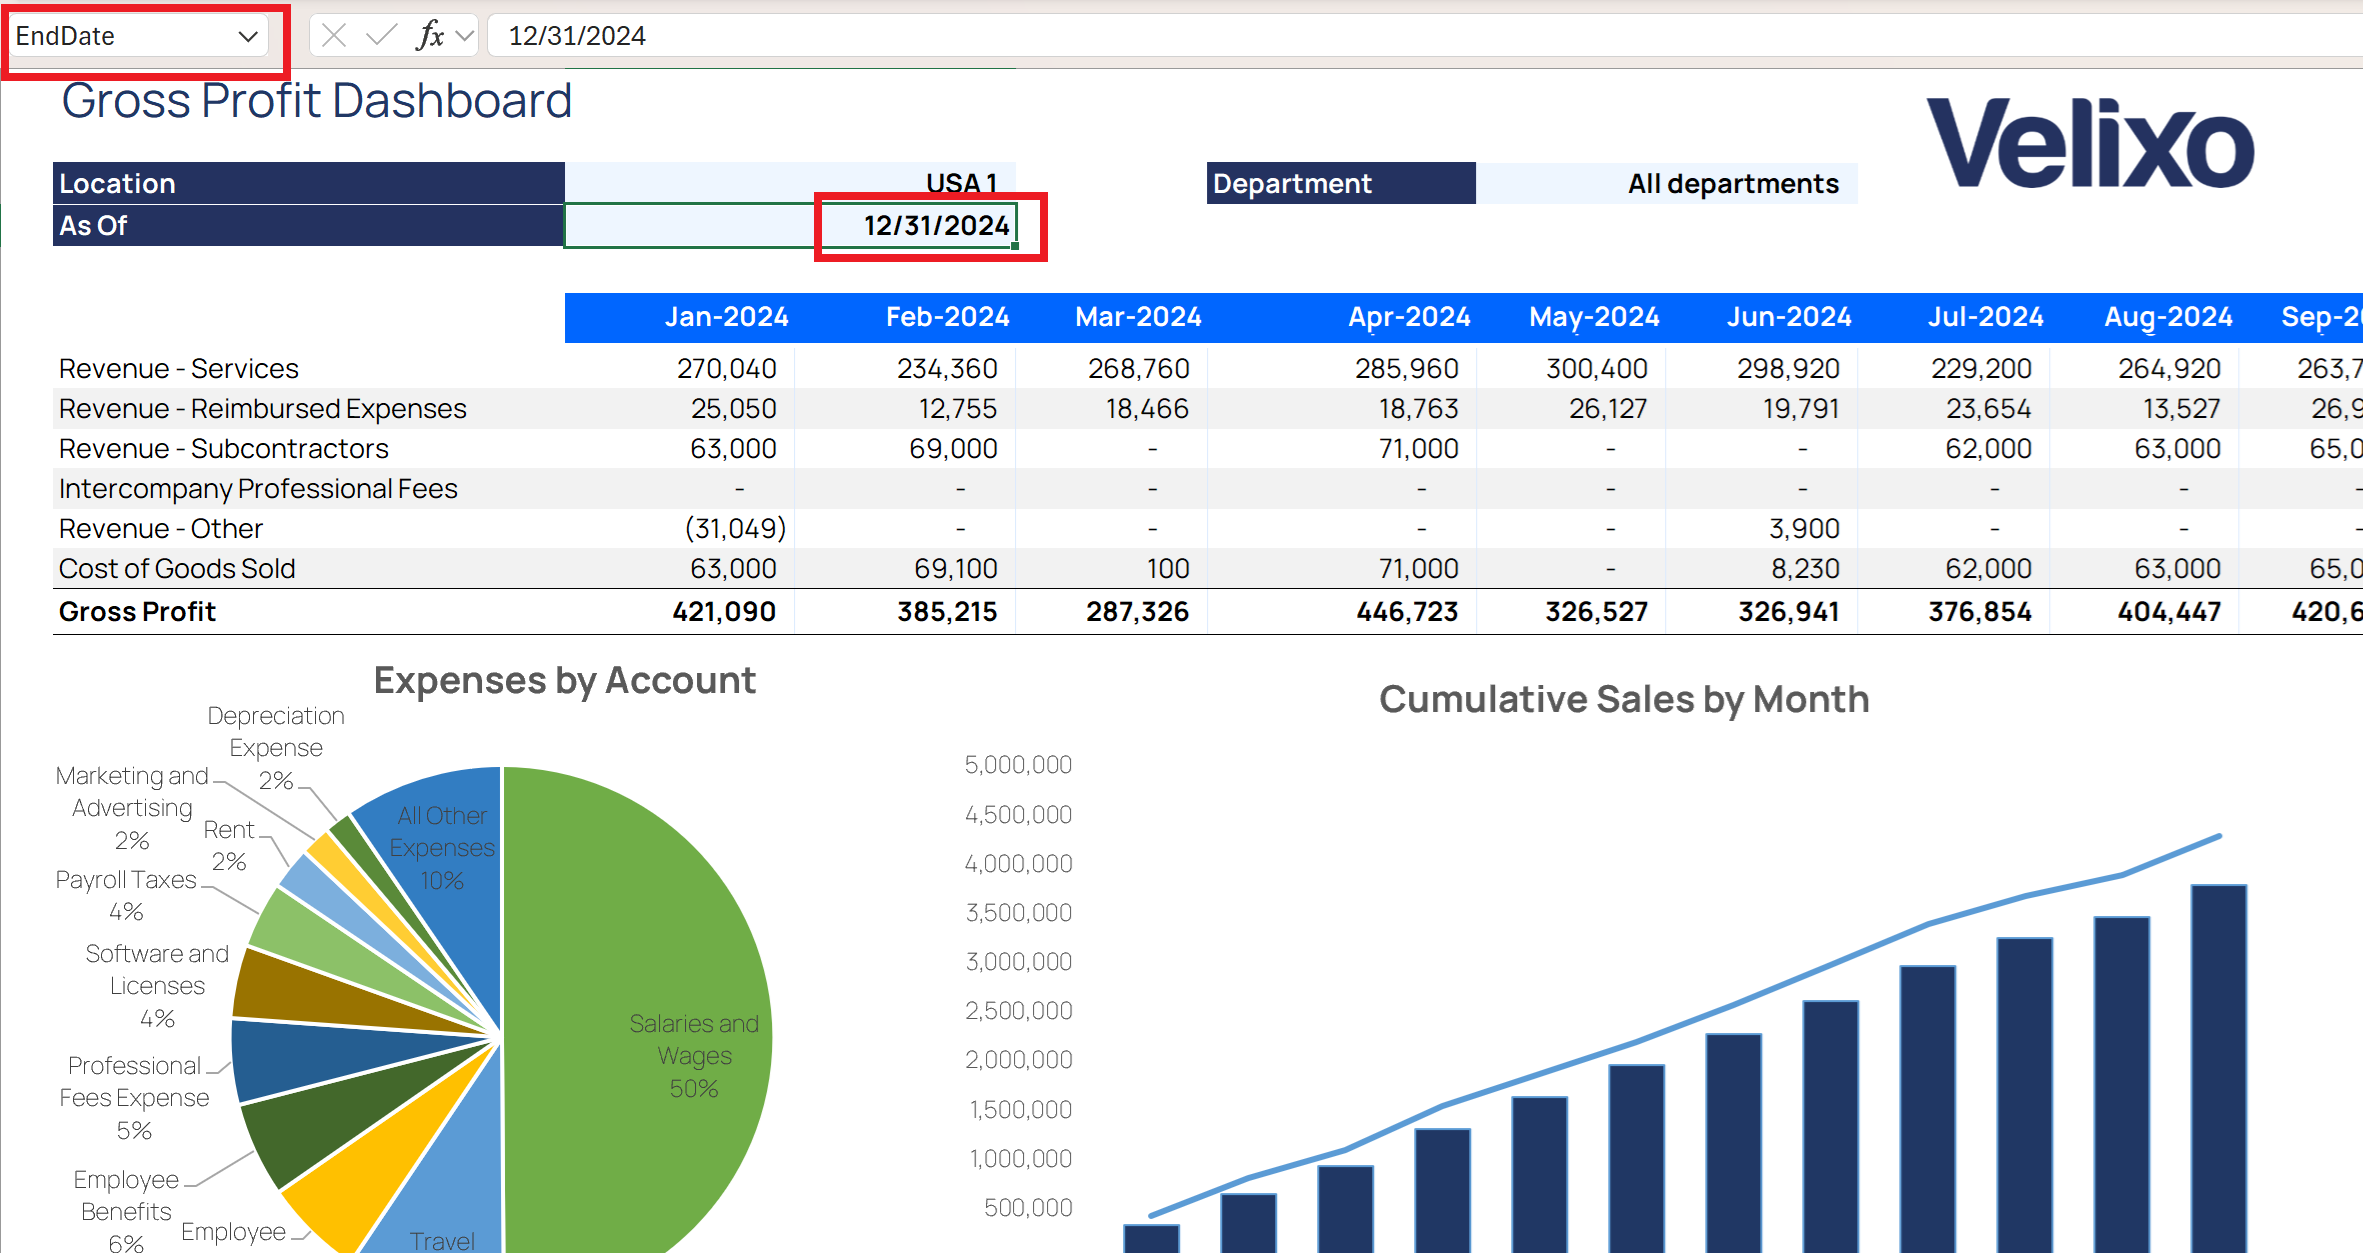
Velixo NX will apply the arguments automatically during distribution.
Including temporary information
Occasionally it can be convenient to include a cell containing some temporary data or interim calculation but that you do not want to pass to your report as a argument. This can be accomplished by prefixing the name of the column with an exclamation point.
In this example...

... the data in the !CompanyStores column could be used in determining the contents of the Stores column but would not be passed to the report. Like all user-defined columns, these must be located at the end of the Excel table (leaving the standard columns undisturbed).
To start the distribution process, click Distribute All from under the Distribute button on the Velixo NX ribbon.
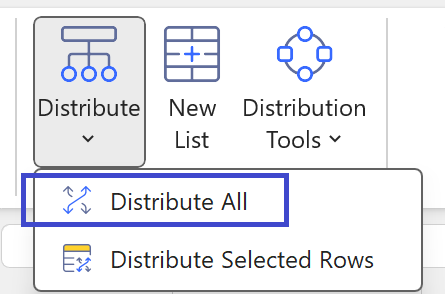
You may also select one or only a few rows within the Distibution List and use the Distribute Selected Rows option.
Refreshing the entire report
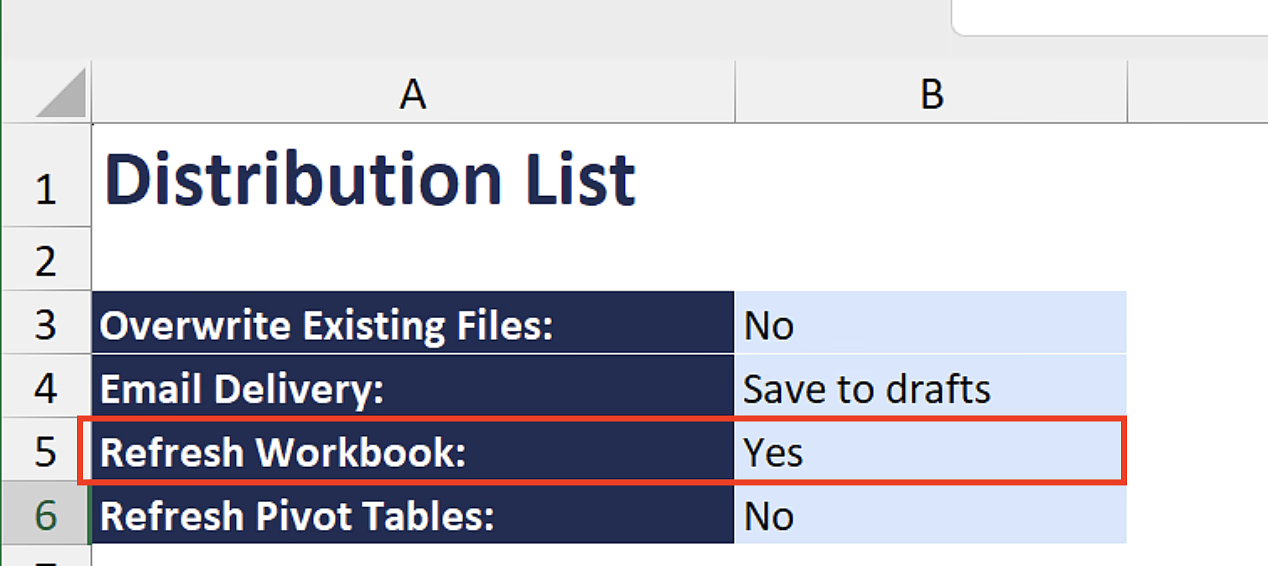
When passing report arguments, any cells that are dependent upon those arguments are automatically updated. If it is desired the ALL cells in the report be updated, select Yes for the Refresh Workbook setting:
Using Pivot Tables with a Distribution List
When passing report arguments that can impact a pivot table, a Velixo Distribution List can be configured to automatically refresh the pivot tables as part of the Distribution process:
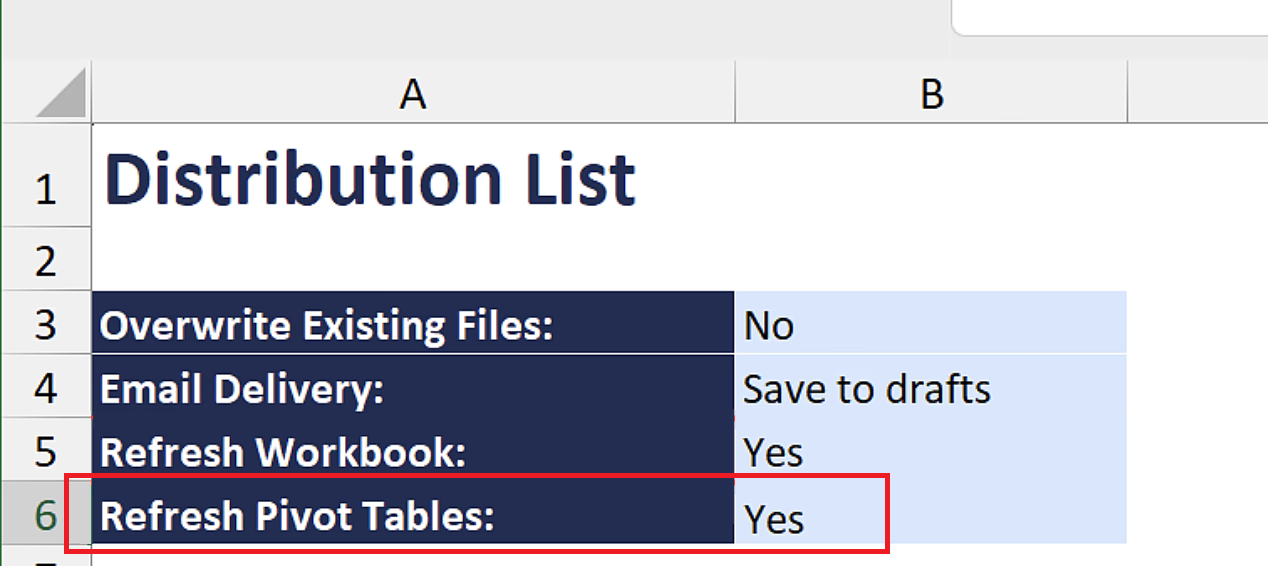
When distributed reports contain pivot tables where the data source depends on a Blueprint argument, such pivot tables will always be refreshed
Saving Reports to SharePoint or WebDAV
Additional Info - Distribution Tools
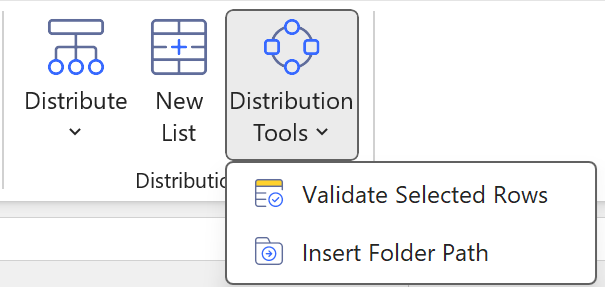
The Distribution Tools button provides two additional features.
Validate
This feature:
Verifies that the worksheet conforms to the distribution template (contains the valid header fields and detail columns)
Verifies that the detail table contains rows for distribution
Ensures that all custom columns specified actually exist as named fields in the workbook
Checks the format of each value in each row (emails, paths, URLs)
Checks that any Blueprint tabs exist
Insert Folder Path
This feature opens Excel's standard file explorer dialog to allow the user to navigate to the desired output folder (rather than having to type the entire path name by hand). This helps to avoid typographical errors in the folder path name.
