Overview
Here we showcase and give you a step-by-step guide on how to use Excel 365 and Velixo Classic for Windows to build a dynamic General Ledger detailed transactions report, using Generic Inquiry functions.
Video summary
Walkthrough
Step 1 - Set up the GL Entries Inquiry in Acumatica
First, download this generic inquiry configuration and import the XML on the Generic Inquiry screen in Acumatica:
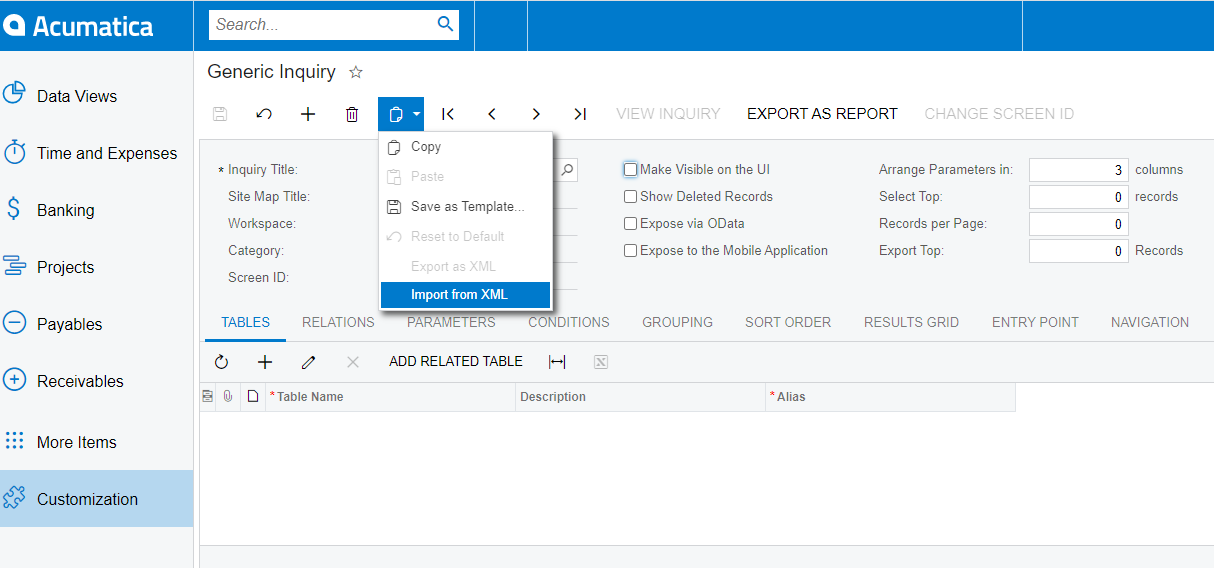
Importing a Generic Inquiry from XML
Review the Tables, Relations, and the Results Grid tabs in the imported inquiry. As you can see, it queries individual transaction lines from the system and returns the columns that are likely to be of reporting interest, such as:
-
account
-
posting period
-
debit and credit amounts
-
the user who recorded the transaction
-
module (e.g. AP, AR, or GL) from which the transaction originates
-
batch number etc.

Reviewing the imported inquiry results grid
Then, click View Inquiry to review the inquiry results in Acumatica:
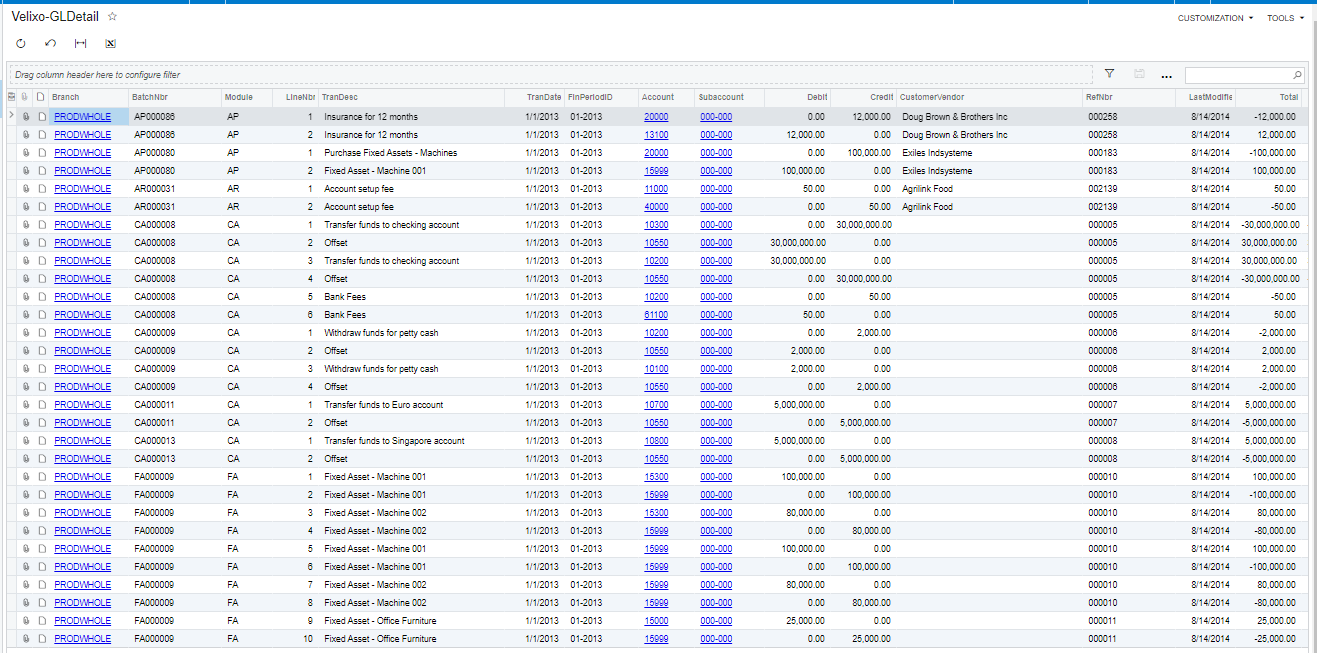
Viewing the inquiry results
Make sure that Make Visible on the UI and Expose via OData flags are both checked for the inquiry (otherwise, Velixo GI functions will not be able to access it):
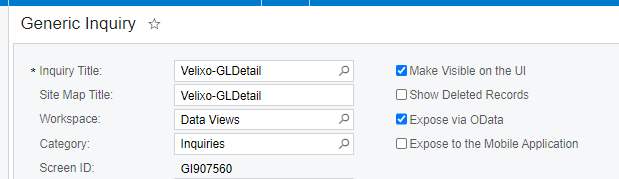
If necessary, make changes and save the inquiry.
Step 2 - Building the report
We want a report that, for each account within our specified range, shows three pieces of information:
A - the beginning balance
B - all transactions during the specified financial period(s)
C - the ending balance
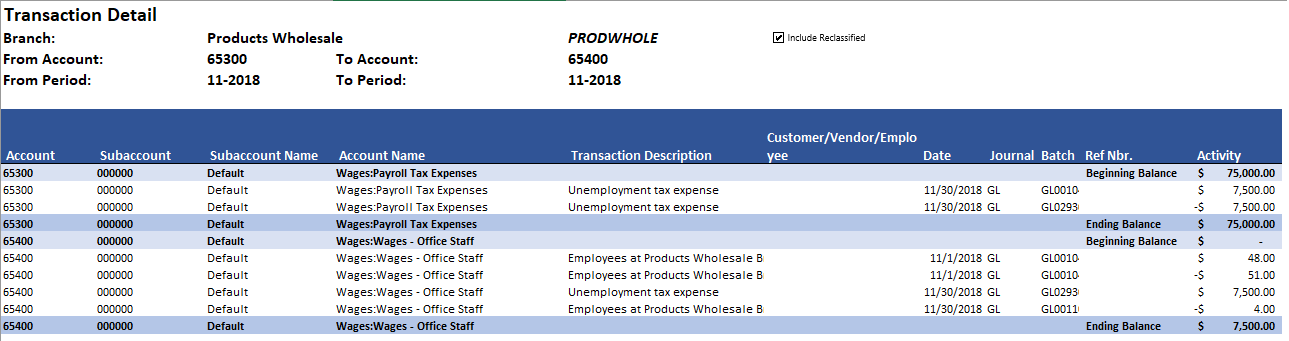
(click the image to see a larger view)
Set Up Report arguments Using Excel & Velixo
Now let's start building our transaction report in Excel using Velixo.
Create a new Excel 365 workbook and set up a Velixo connection (Connection Manager). This example uses "Demo" as the connection name.
The upper-left of the worksheet (range B3:G5) will host our variable report arguments:
-
the branch
-
the financial period range (within a single fiscal year)
-
the account range
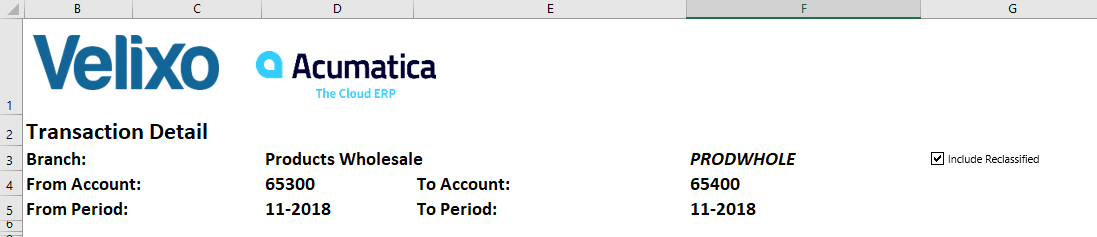
Setting up report arguments
In cell C7, use the GIFILTER function to prepare the filter clause for our generic inquiry:
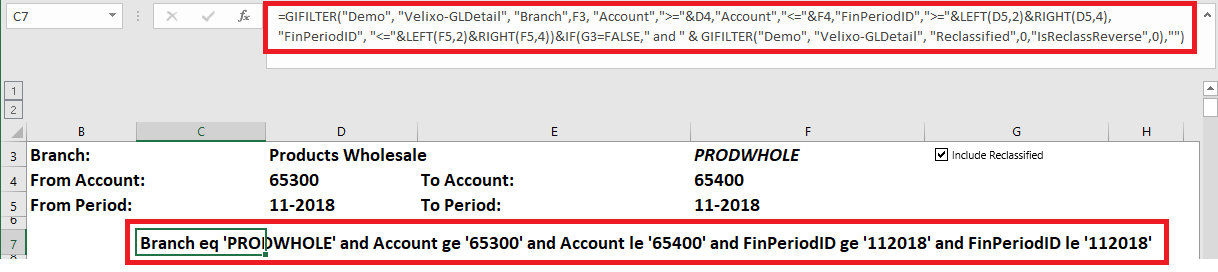
Using GIFILTER function to prepare a filter clause for the generic inquiry
As you can see, the GIFILTER function has prepared a valid OData filter clause.
You can also see that, to properly filter by financial period, we need to reformat the financial periods to match the Acumatica internal format. This format can vary, depending on whether we performing the filtering in Excel, Acumatica 2020 R2 or newer, or Acumatica 2020 R1 and older.
For example, for Acumatica 2020 R2 and higher, the human-readable period representation of "11-2018" will need to be formatted as "112018".
We have used the Excel RIGHT and LEFT functions for that purpose, directly inside the GIFILTER function:

To show the three pieces of information we need, we'll create three separate areas that we will then combine in the main part of our report. We'll build the first of these sections to retrieve the transactions. This section will use the Velixo GI function with the filter we defined in cell C7 to with the Velixo-GLDetail generic inquiry that we imported into Acumatica to return all the transactions for the specified accounts during the specified financial period for the selected branch:
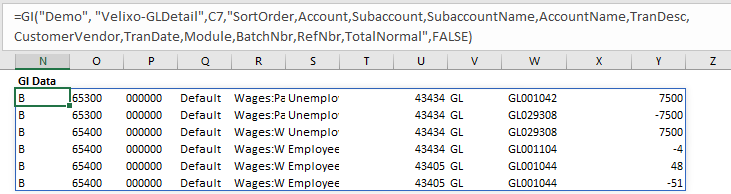
We have specified to only return certain fields (starting with SortOrder) from the inquiry, and we are not displaying the headers for columns.
In the next section, we will use the ACCOUNTSANDSUBACCOUNTSWITHHISTORY function to return all the accounts (and respective subaccounts) within the specified account range, for which there was transactional history during the specified financial period:

Next, we'll fill in the rest of the same columns that we retrieved for the transactions.
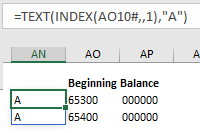
First, the Sort Order. The Velixo-GLDetail inquiry returns a sort order of "B" for the transactions. Since we want the ending balance to appear after the transactions, we'll use C for this section:
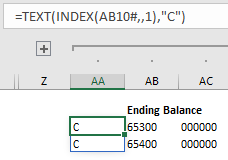
We'll then retrieve the rest of the data we need:

|
Column |
Function |
|
AD (subaccount name) |
=IF(AND(AC10<>""),SUBACCOUNTNAME("Demo",AC10),"") |
|
AE (account name) |
=IF(AB10<>"",ACCOUNTNAME("Demo",AB10),"") |
|
AK |
=IF(AB10<>"","Ending Balance","") |
|
AL (ending balance) |
=IF(AB10<>"",ACCOUNTENDINGBALANCE("Demo","ACTUAL",,AB10,AC10,$F$3,$F$5),"") |
In the last of the three hidden sections, we will retrieve the beginning balance for each of the accounts.
Everything in this section is almost identical to the previous section where we retrieve the ending balance. The only differences are that we will use "A" as our sort order (since we want this section to appear before the transactions):
and, in the last function, we will be using ACCOUNTBEGINNINGBALANCE:

Now that we have our three sections - each showing part of what we want in our final report - we can combine them using a combination of Velixo and Excel functionality.
The Velixo COLLATE function allows us to combine Excel 365 arrays and ranges. This gives us the ability to show our three sections in one place:
What we want now is to sort this.
First, we want to sort by Account Number (column 2), then by subaccount (column 3), then by our special Sort Order (the A, B, and C in column 1), and finally Date (column 8).
The Excel 365 SORT function allows us to define multiple sort orders. Here is what that function looks like:
=SORT(COLLATE(N10#,AA10#:AL10#,AN10#:AY10#),{2,3,1,8})
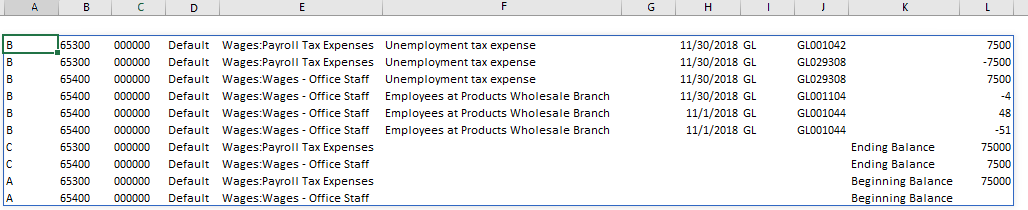
And this is what the results look like:

Tweak GI Caching Options to Avoid Loading All GL Entries
Velixo directs Acumatica to perform as much of the filtering as possible. This is important because many inquiries, including the one we are using here, are very heavy: loading all GL transactions over the network can take quite a bit of time.
We can further improve performance by modifying the Generic Inquiry Options.
On the Velixo ribbon, click the Options button.
In the Options pop-up window, observe that there is already a set of default options for the Velixo-GLDetail generic inquiry, which was automatically created once we used the GIFILTER function:
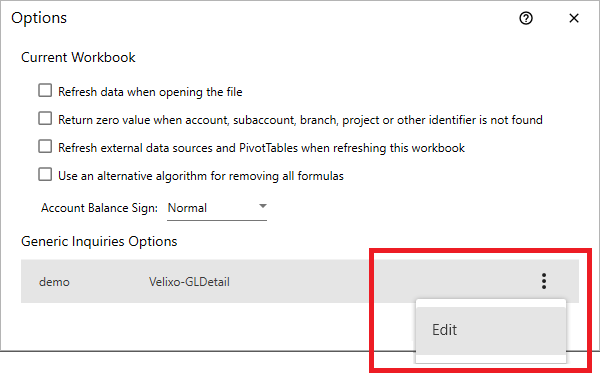
Editing the inquiry options
Click the three-dot "kabob" button and then click Edit.
In the inquiry's options window:
-
Set Refresh Mode to Smart Refresh
-
Specify the Key Fields to be: Module, BatchNbr, and LineNbr (in that order)
-
Set the Smart Refresh Field to LastModifiedDateTime
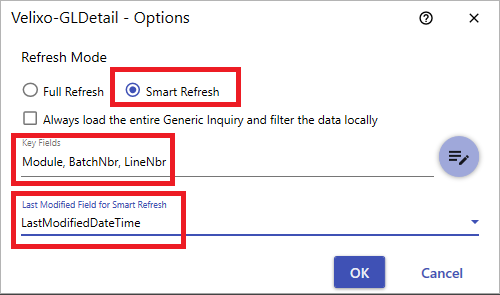
Tweaking the refreshing and key options
The above measures will help ensure faster update times: when you refresh the report, Smart Refresh will ensure that instead of re-loading the whole inquiry result set over the network, Velixo will only incrementally load new transactions based on their LastModifiedDateTime field value.
Let us reiterate that manually tweaking GI options is not something you will be likely to do on a regular basis. For most smaller inquiries, the default caching / refreshing options provided by Velixo will work just fine.
Step 3 - Finalizing the report
Now that we have GI options set up, let us load the inquiry data and finalize the report.
We can add a heading, hide those columns and rows we do not need to see, and use Excel's Conditional Formatting feature to format the three parts of our report.
We'll apply any other necessary formatting (e.g., ensure that the TransactionDate column is properly displayed as a date) and our report is ready:
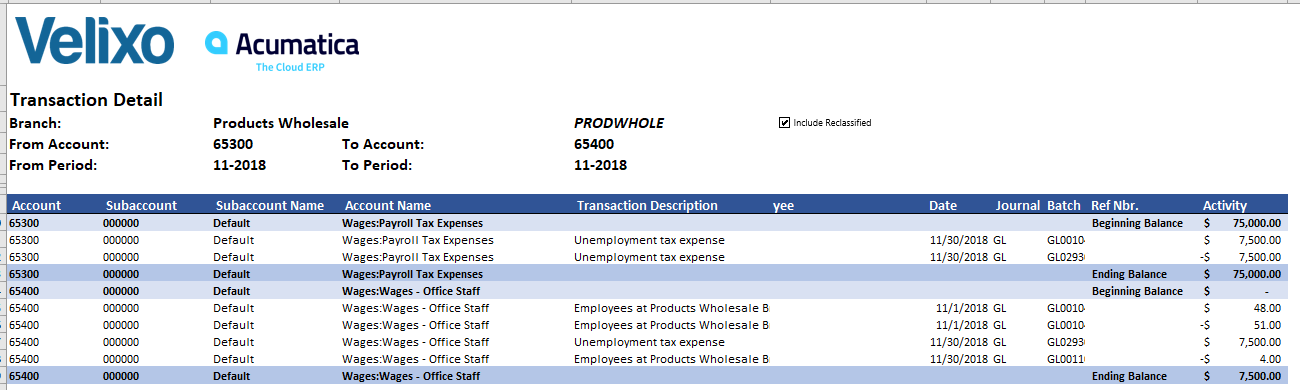
Formatted report
Now, try changing the account or period range to see how the report refreshes dynamically.