Updating the Customization Package
Acumatica versions newer than 2024 R1 require the use of the customization package.
The customization package has been updated to accommodate changes introduced in Acumatica 2023 R1 and higher (while continuing to support older versions of the ERP). If you currently use one of these newer versions or are planning to upgrade, you will want to make sure you upgrade your version of customization package.
Overview
Velixo provides an Acumatica customization package to facilitate the configuration process for system administrators. This package is required for certain Velixo features and is updated when new functionality requires changes within Acumatica.
Updating the Project
Updating the project is a fairly simple process for an Administrator.
Publishing the Customization Package may momentarily disconnect all active users - especially when using versions prior to 2021 R2.
Step 1
Download the latest customization package.
(once you have done that, return here and continue with Step 2)
Step 2
In Acumatica, go to the Customization Projects Screen
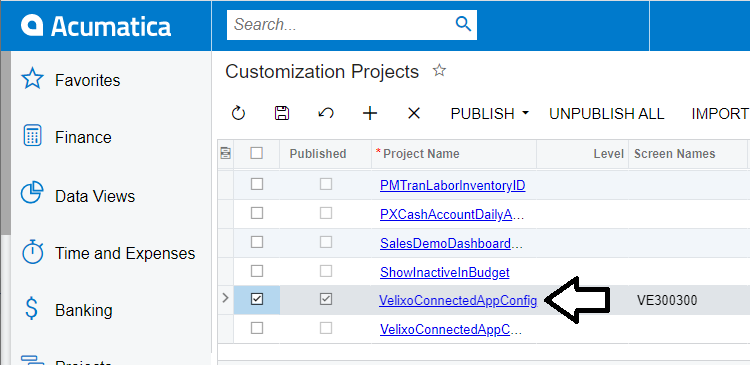
and click on the VelixoConnectedAppConfig project
Step 3
Once in the Customization Project Editor, select Replace from Package from the File menu:
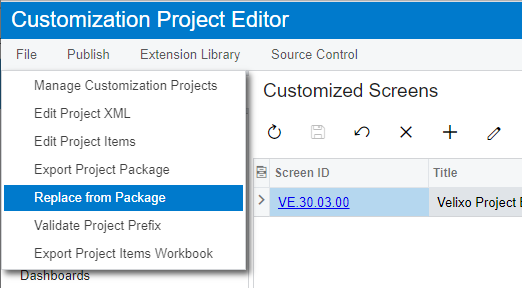
Step 4
On the Open Package dialog, first click the Choose File button and then navigate to where you downloaded the latest customization package...

…then click the UPLOAD button.
Step 5
5a - Publish the Customization.
Back on the Project Customization screen, ensure that the VelixoConnectedAppConfig project is selected.
If you have other published customizations that you want to ensure remain published, select them as well.
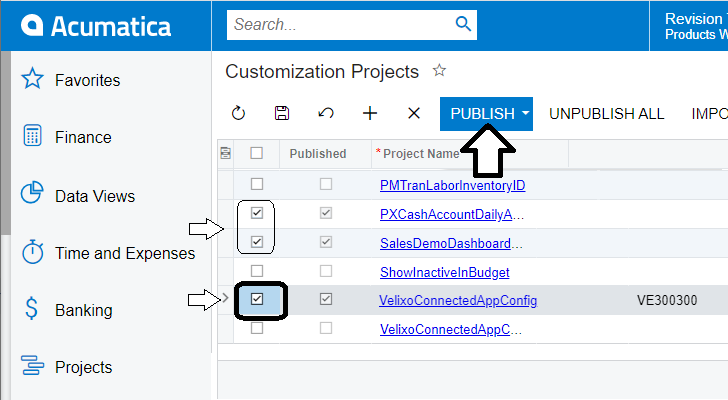
If your Acumatica installation contains just one tenant, click the PUBLISH button
Step 5b
If your Acumatica installation contains more than one tenant, click the three dots (...) menu and select Publish to Multiple Tenants:
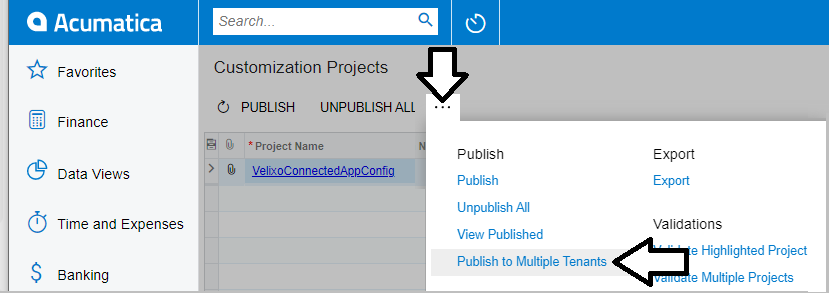
If you are using a version prior to 2021 R2, Publish to Multiple Tenants is available by clicking the down arrow on the PUBLISH button ...
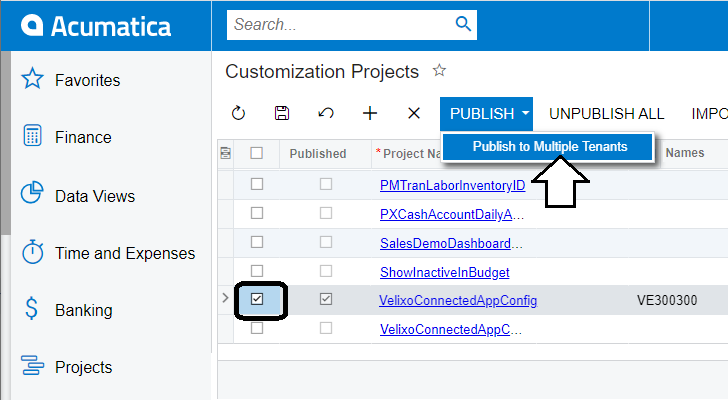
…and then select every tenant that will be connected to from Velixo:
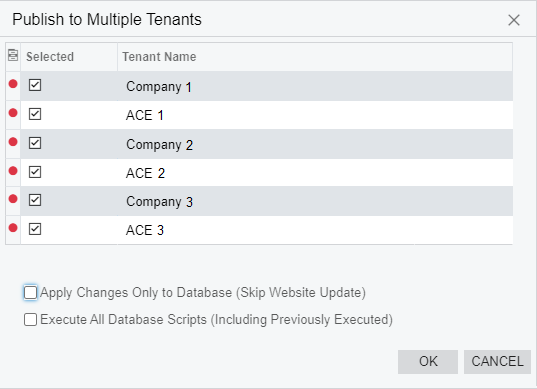
and click OK.
For newer versions of Acumatica (2021 R2 and newer), take extra care not to restart your application (and therefore not to log out the active users from the site) when publishing a customization. There is still a chance of that happening, though, especially when the customization contains changes to business logic code or you publish it "with cleanup".
You can however ensure that the website is not restarted - this is especially handy in case you need to update existing Velixo Inquiries right away on a live site.
All you need to do is check Apply changes only to database in the dialogue window above - doing so will update all Velixo inquiries to their latest versions.
In such a case, don't forget to do a full republish (without the checkbox checked) later on when you can afford the downtime.
Step 6
Acumatica will compile the upgraded project and display the final Publish button.
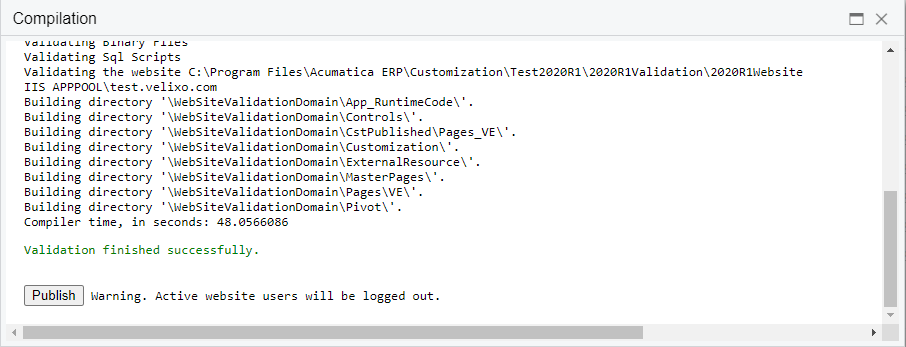
When you are ready to log out all active Acumatica users, click Publish.
Step 7
Once you are informed that the website has been updated...
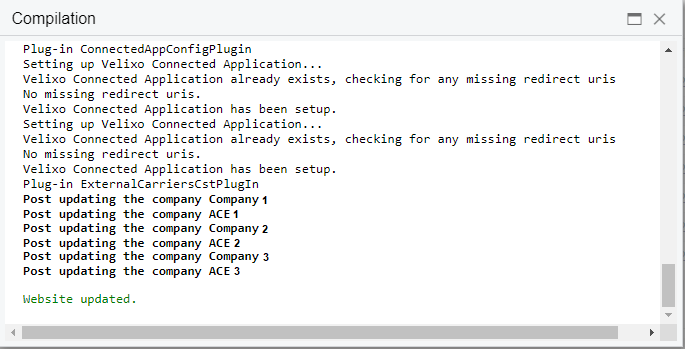
…You can close the Compilation window and return to Acumatica.
Done
The customization project has been updated and has now been published to all specified tenants.
